Summertime…

Grilled Spatchcock Chicken

Who doesn’t long for summer, and those lazy days sprawled on the hot sand or immersed in the ocean’s salty brine? I hated the summer  I had to spend at my  landlocked Michigan college but rejoiced when I landed in Sierra Leone for my  mandatory foreign study–mainly because it’s summer year round in West Africa and the university was minutes from one of the most beautiful beaches I’ve ever seen.

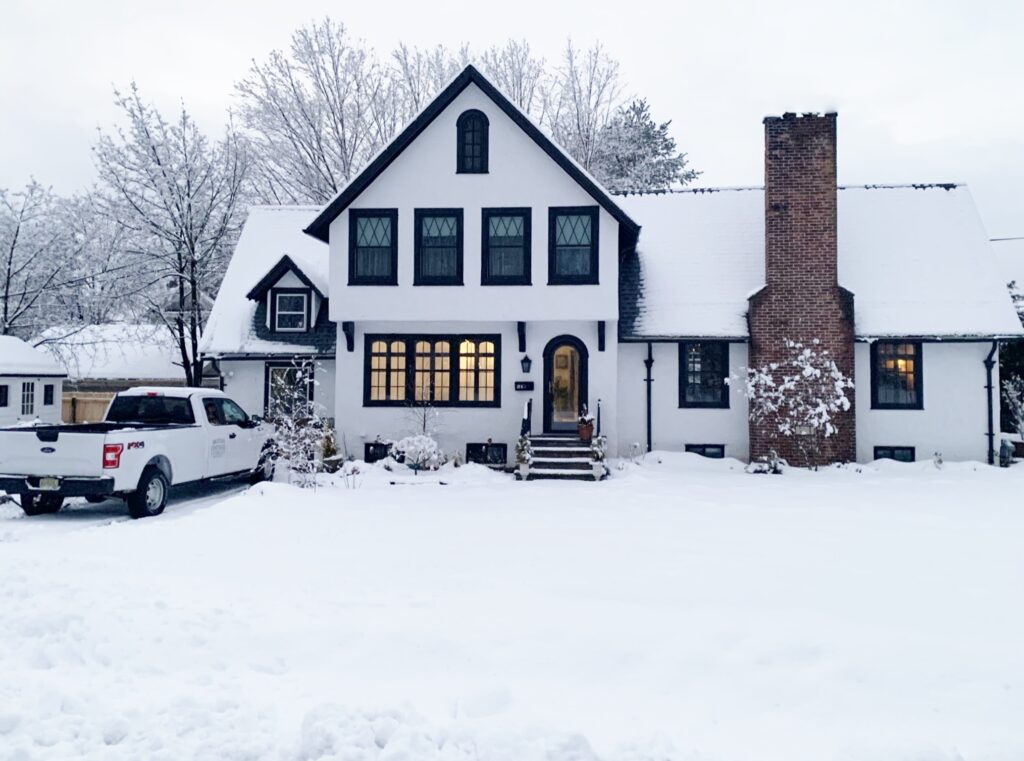
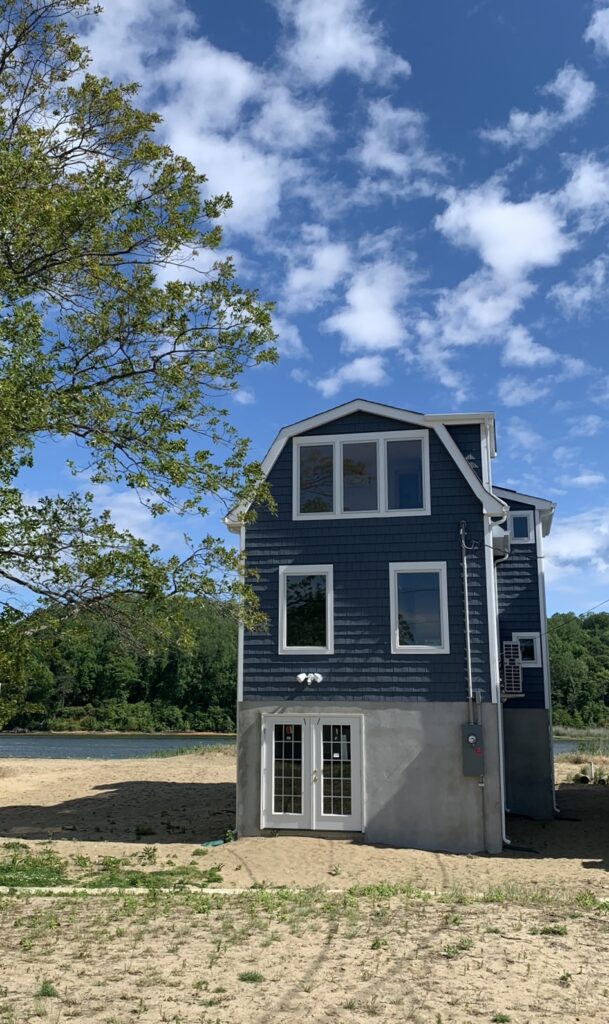
Even though I continue to reside at the Jersey Shore, as I age I have limited my actual  beach days. Wrinkles, heat waves, wrinkles, traffic, wrinkles…I still revel in the sea air, the brilliant blue of the sky, a southeast wind but also take pleasure in the lush green leaves, stunning flowers and velvety lawns found on this verdant peninsula in coastal New Jersey.

And now it’s my garden that brings me the most joy in the summer. The neighbors look amazed (or possibly askance) when they see me toil: mowing, trimming, dragging and spreading loads of top soil and mulch, digging in new plants and ripping out old ones. It is hot; I am always sweaty and dirty and I am perfectly content.

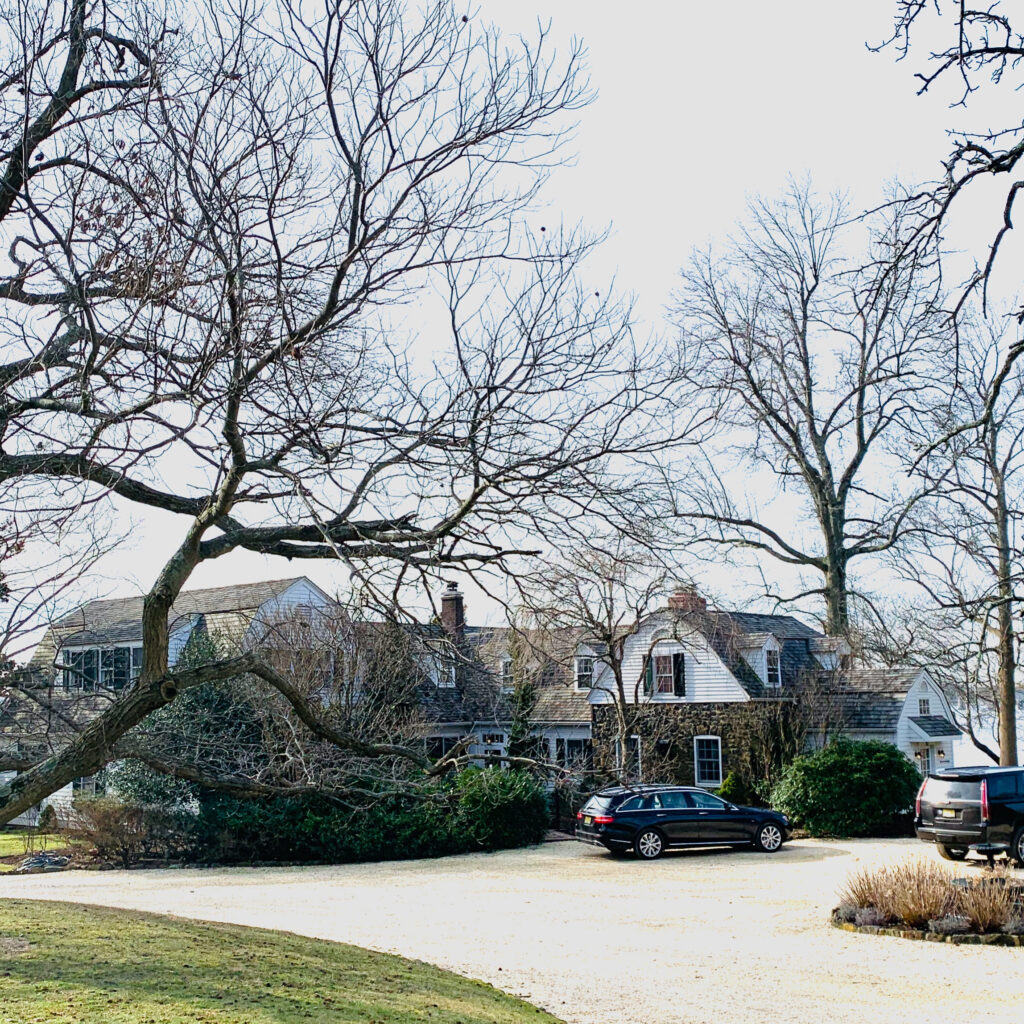
Our property was horribly overgrown when we bought it. In fact, our house was actually being consumed by the surrounding vegetation. There was an enormous maple tree close to the house whose roots were growing into the basement while its branches had pierced through the roof and into the attic.

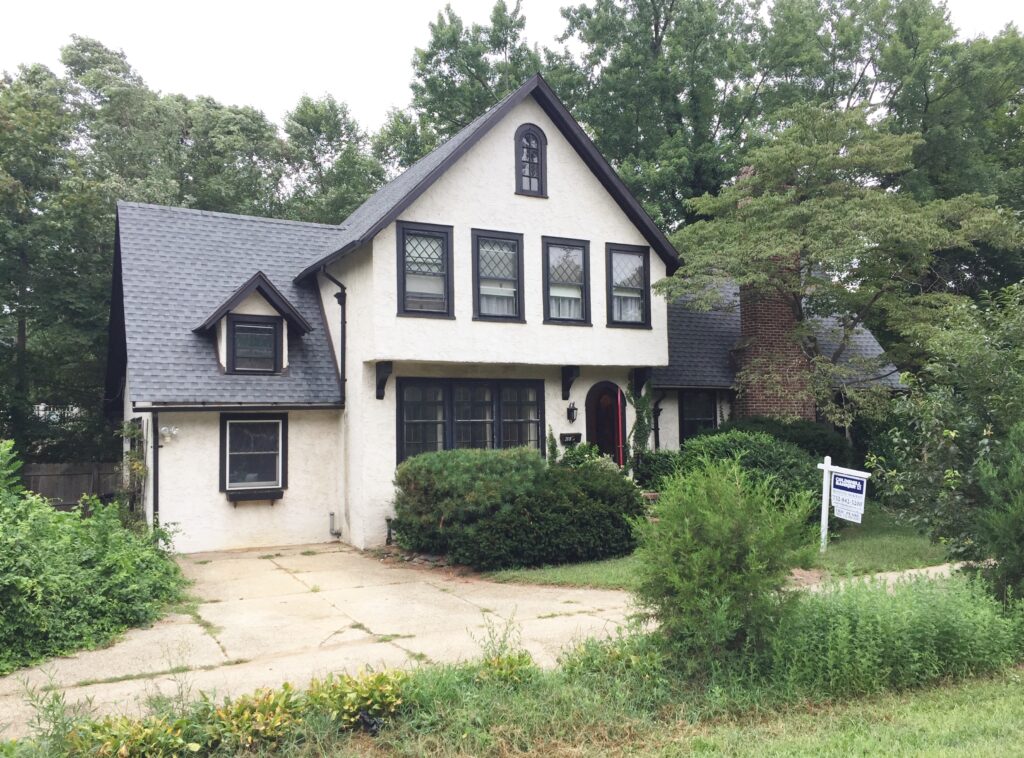
It all had to go–all of it. There was mold and damp and bugs and cracks so the tree guys came, the bulldozers came and in the end we weren’t left with anything green.

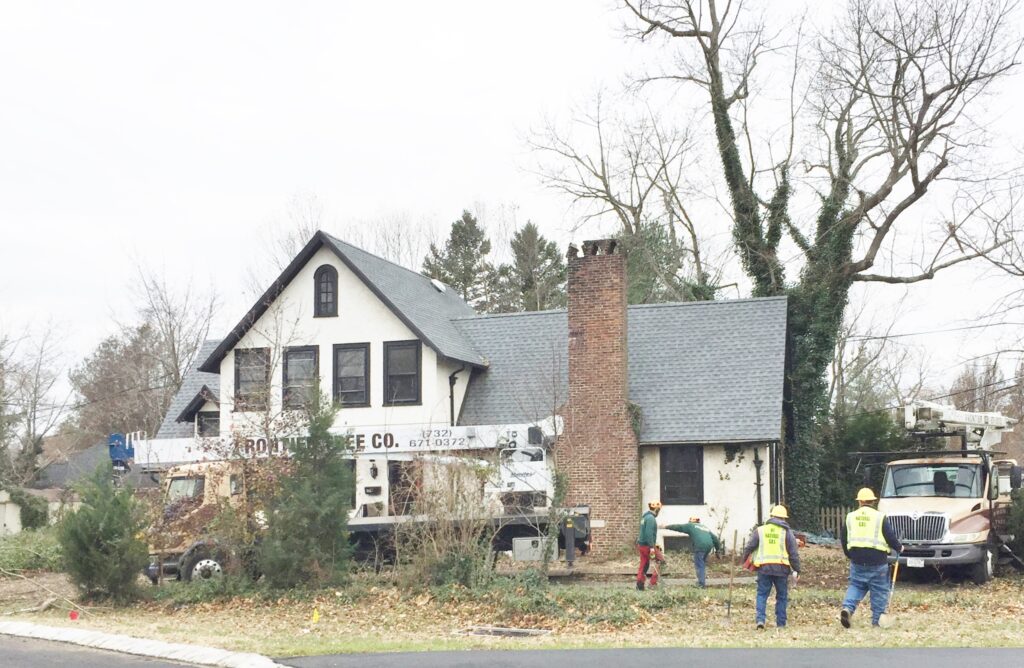
It was hell: you can see it looks like we went through a war. Several truckloads of top soil, hundreds of pounds of grass seed, and a couple of thousand spent on plants, and  three years later we have a garden.  Proving that old adage true–all it takes is time (and more time) and, of course,  money.

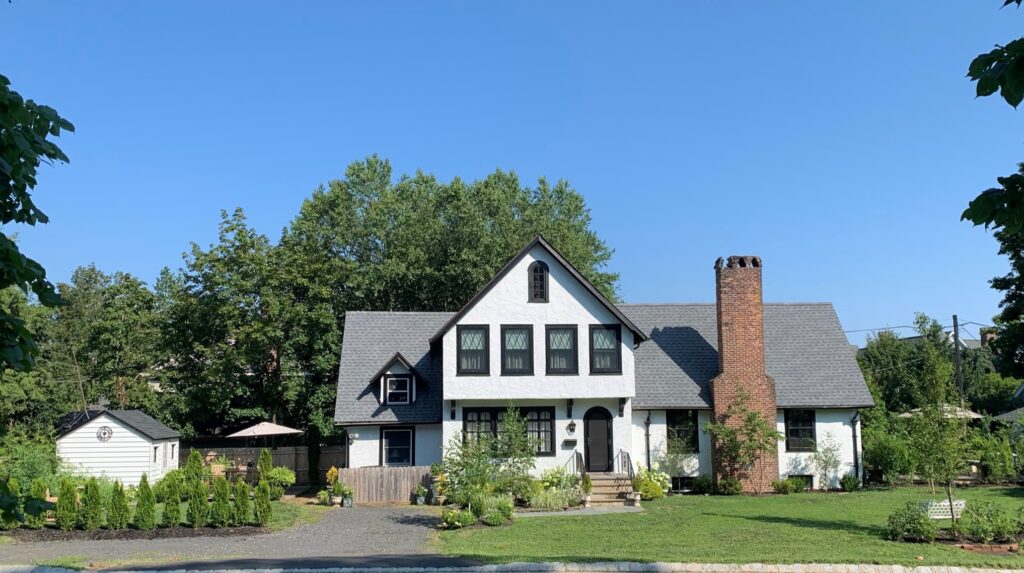
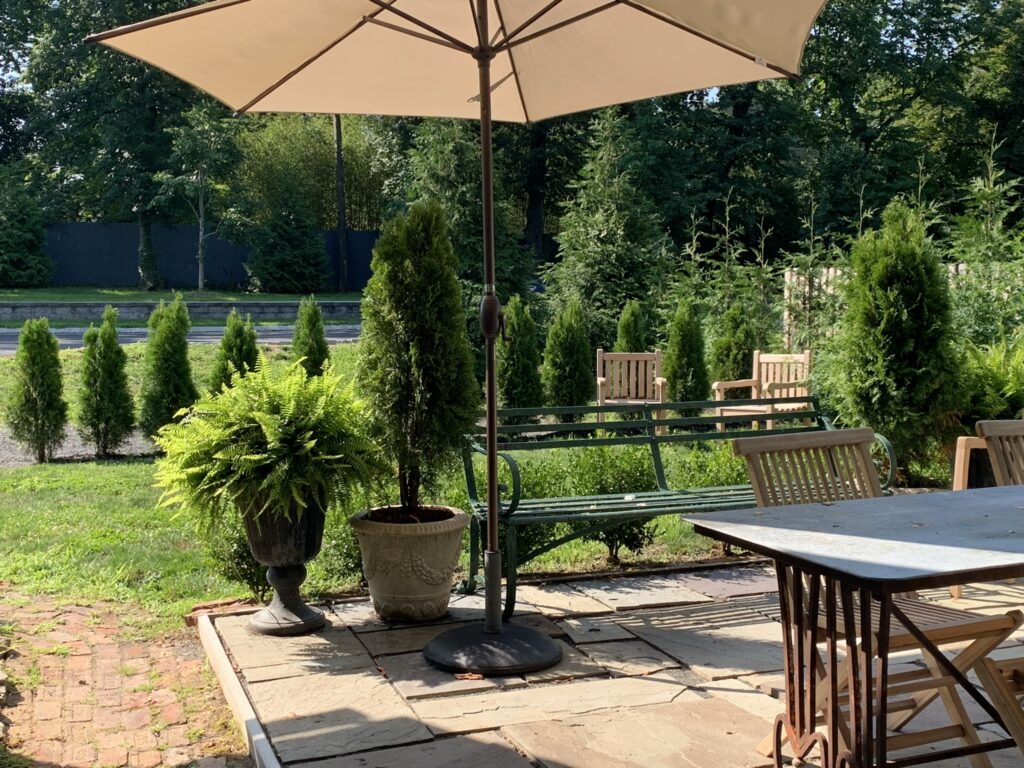
I heeded the advice of our friend, a landscape designer, who, noting the uniqueness of the lot, very long and narrow, with no backyard to speak of, suggested that we make a series of room-like spaces throughout the garden. Areas that would look nice but also function like interior spaces and be amenable to lounging and dining–just outside–not in.

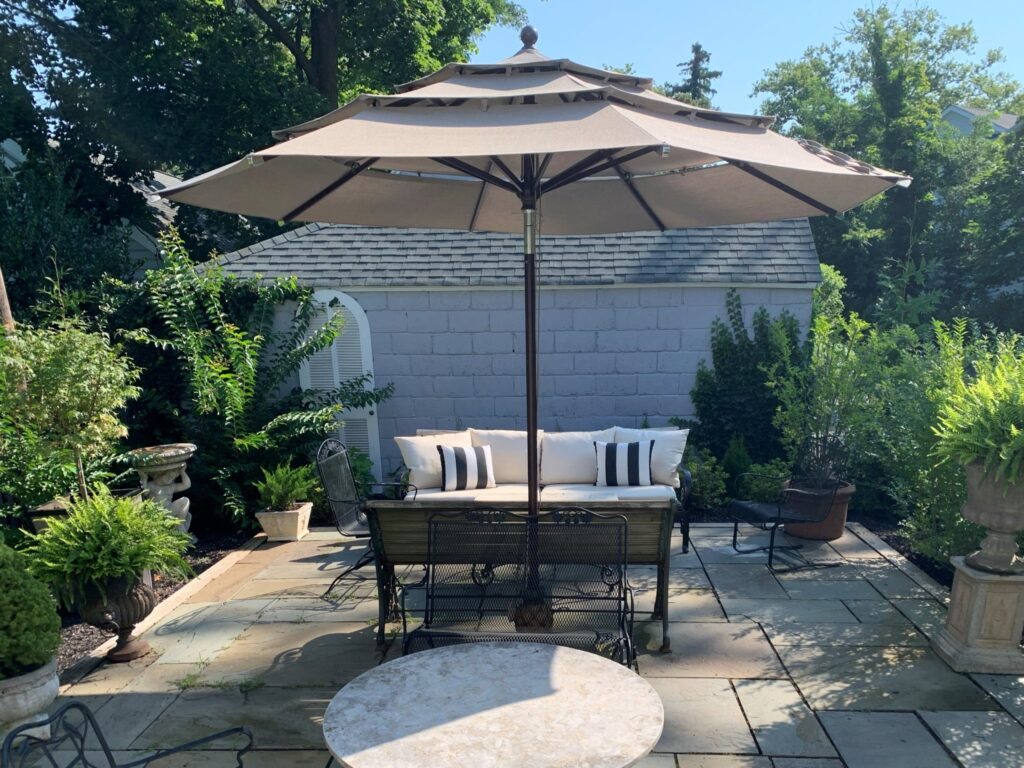
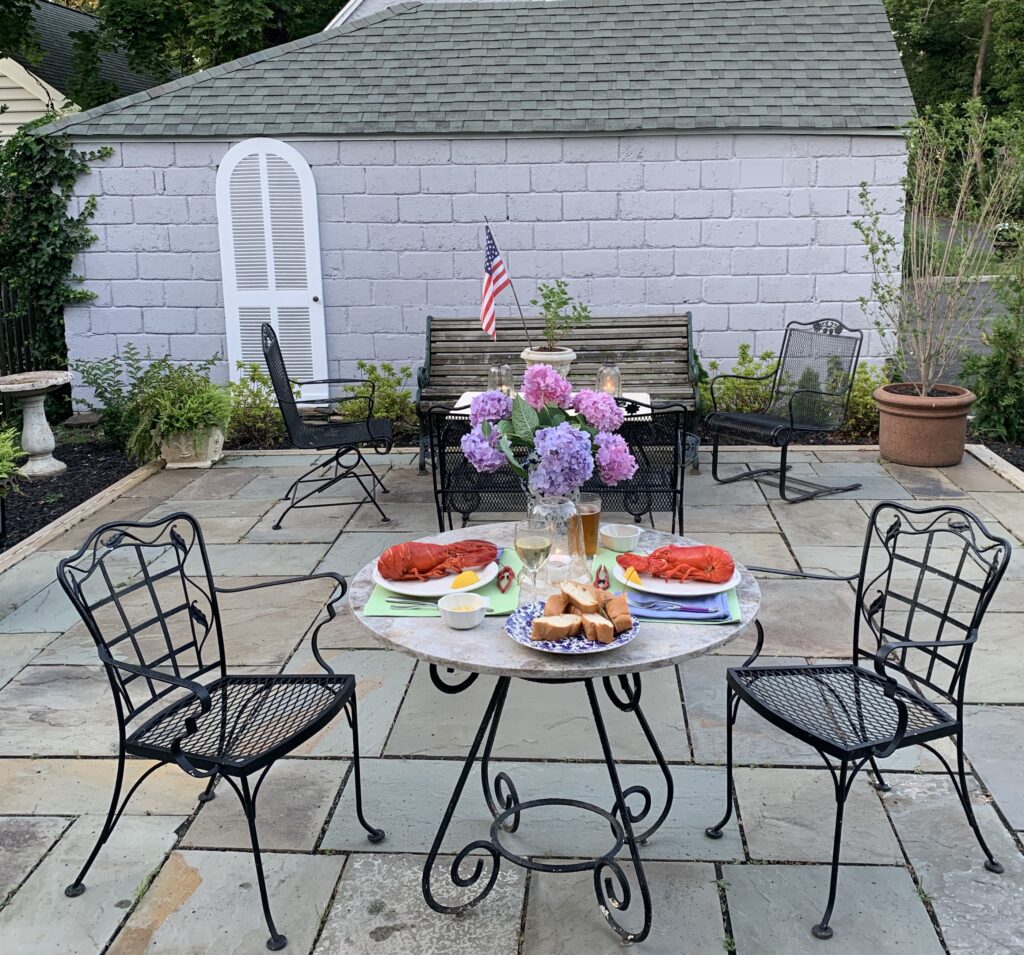
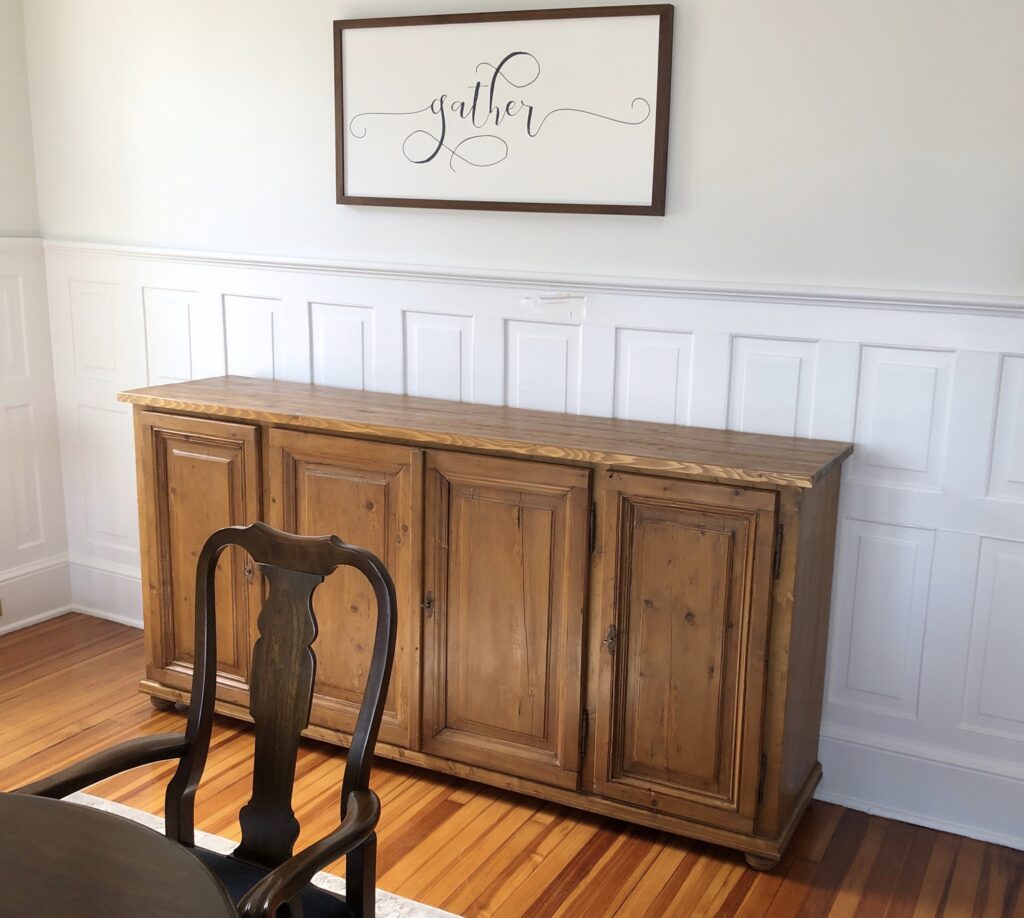
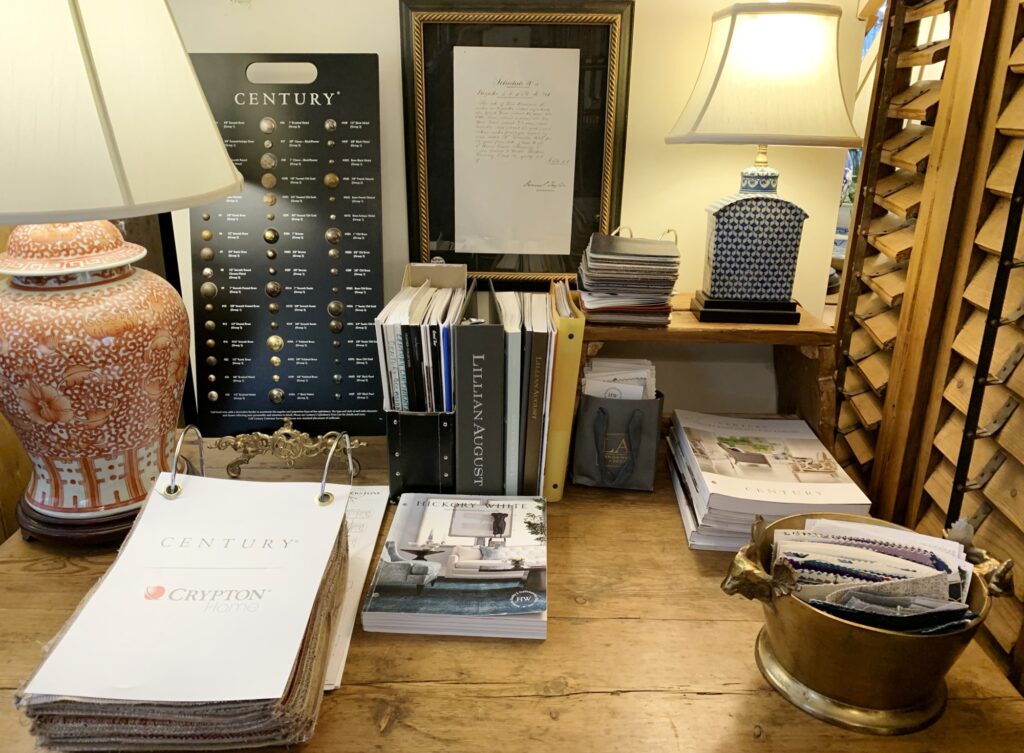
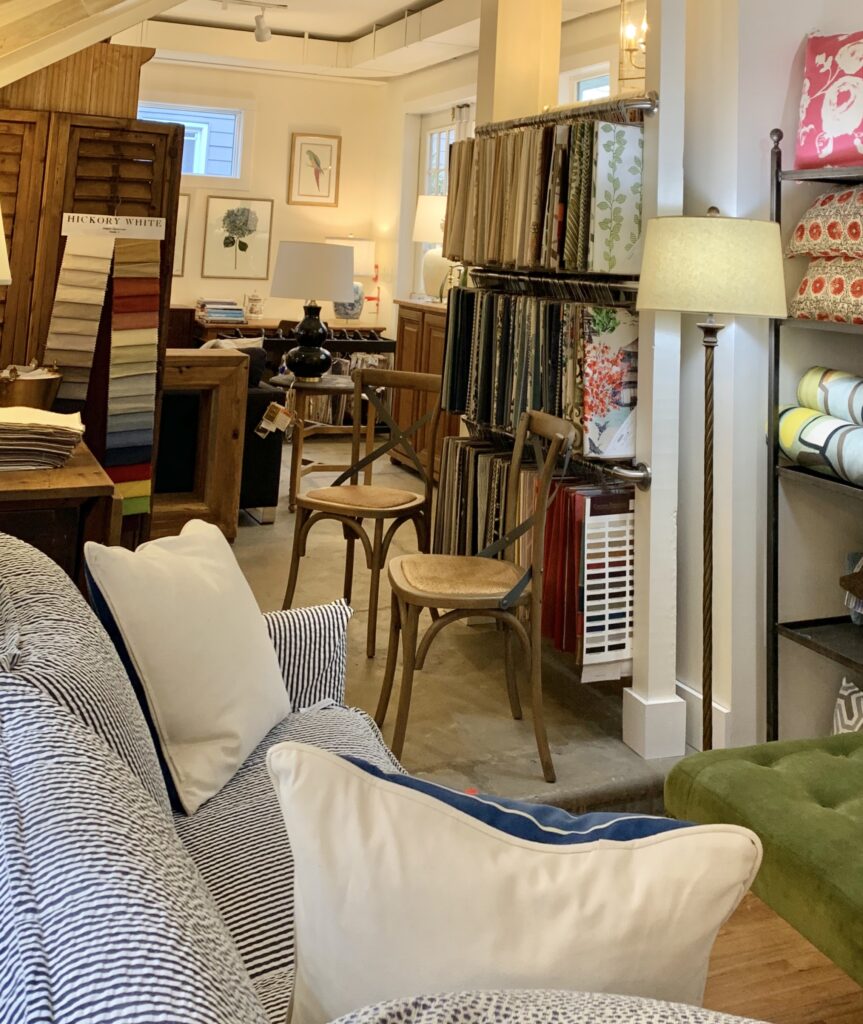
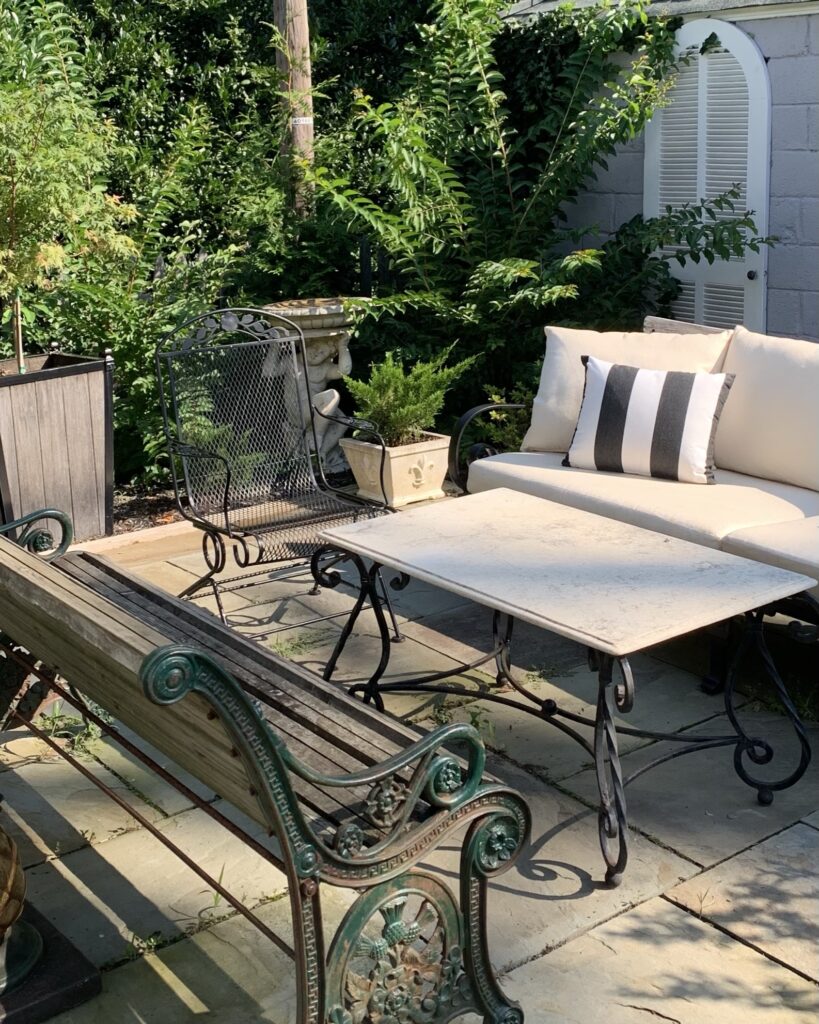
We started by creating a paved area (okay patio) off the great room, with antique bluestone set in a random rectangular pattern that looks like it might have built when the house was, 100 years ago. See how I’ve anchored the assortment of vintage and antique benches, tables and urns I’ve acquired over the years with a Century Furniture outdoor sofa. 

Who would have thought ten years ago that we could have upholstered furniture outside in the northeast? The secret is in the wide range of weather resistant fabrics (Perennials, Sunbrella, Inside/Out) that are made from solution-dyed acrylic.  These fabrics, when combined with quick drying foam inserts, means you can leave your cushions outside all summer long. 

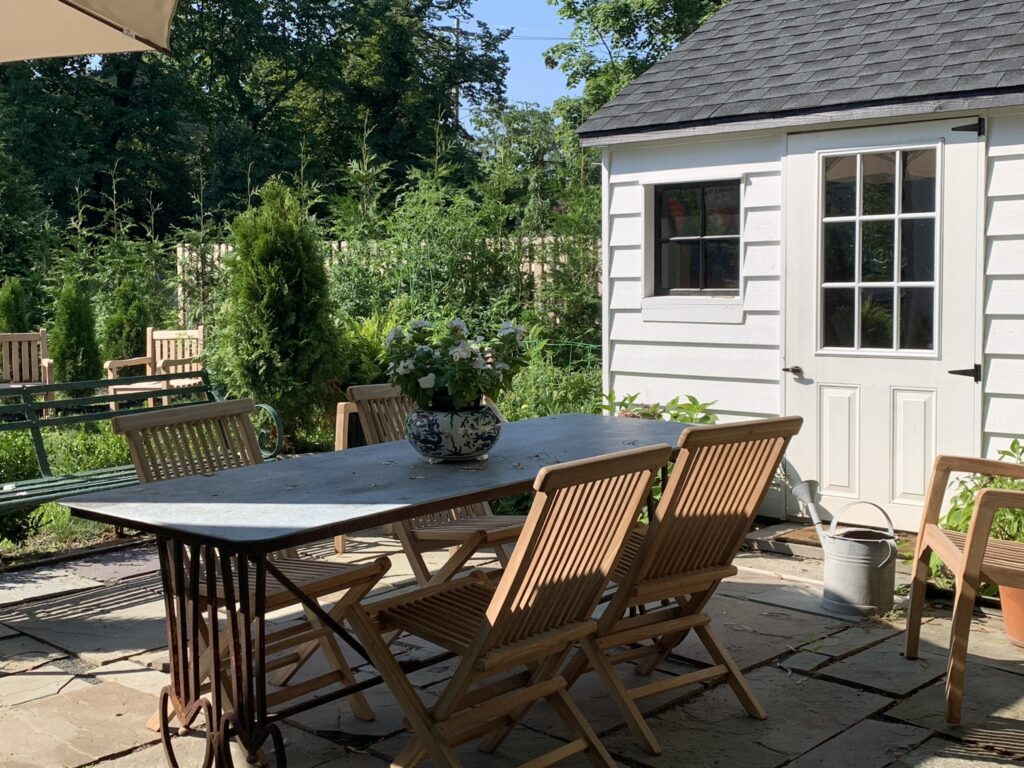
There’s a second bluestone patio off the kitchen that leads to our potting shed and the driveway. We partnered a zinc-topped table we bought years ago at an antique warehouse in Holland with new teak chairs, that will weather to a soft, silvery grey. I think the secret to outdoor furniture is to choose natural materials that are not harmed by the elements and, even better, enhanced by a bit of weathering. For the record, outside furniture does not need to be plastic.

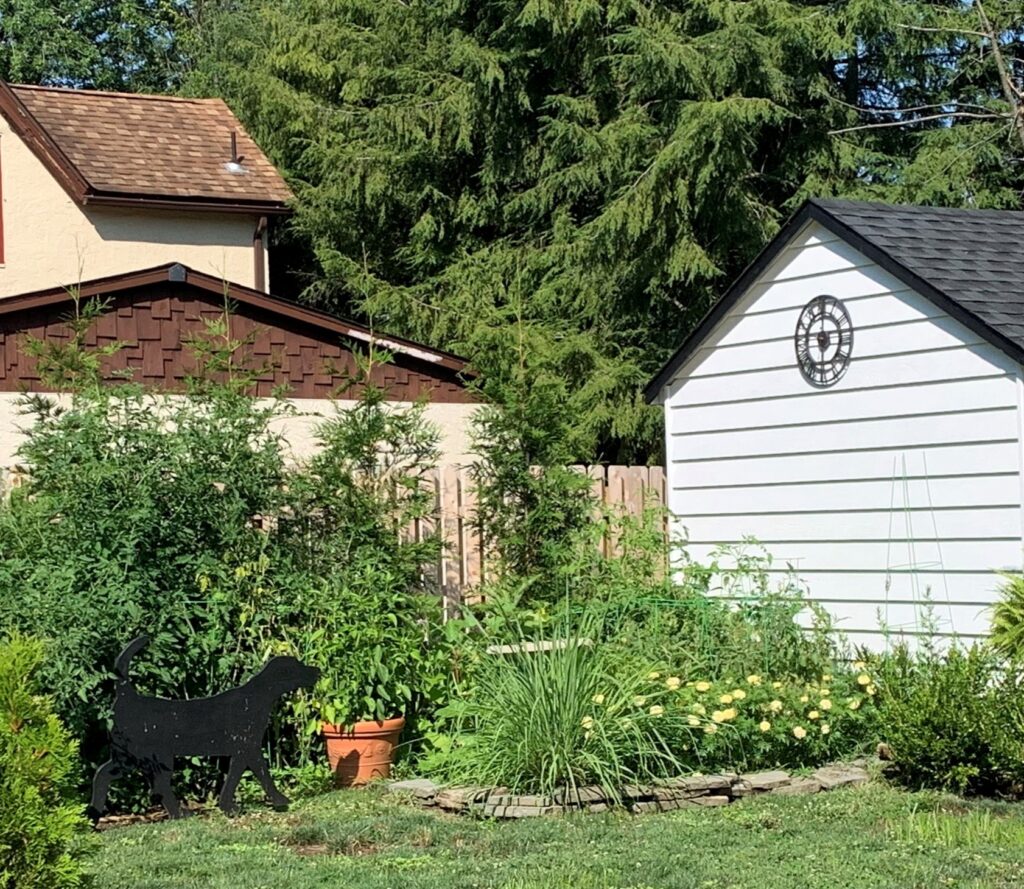
In the side yard there was just enough room for a a pocket size vegetable garden and a small lawn. We planted a hedge of arborvitae (never my favorite evergreen) but in a year or two it should give us less exposure to the street.

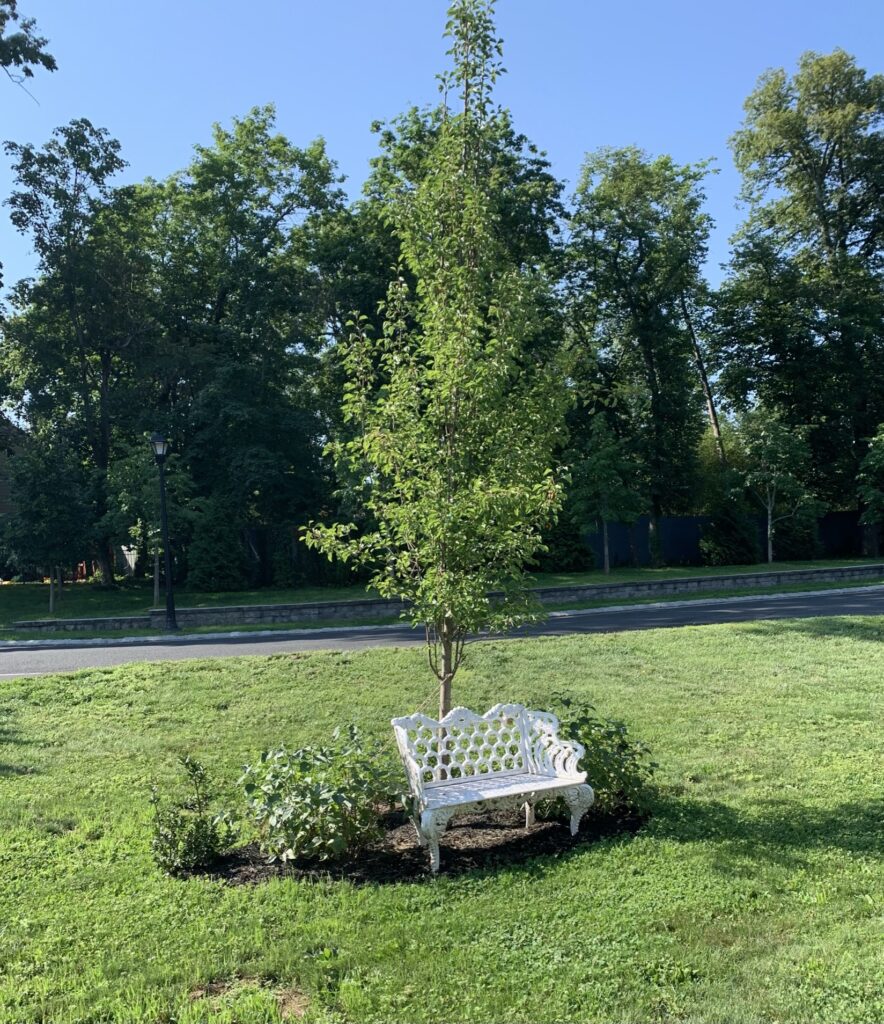
And finally, we made sure to include an area in the front of the house to perch and enjoy the moment.

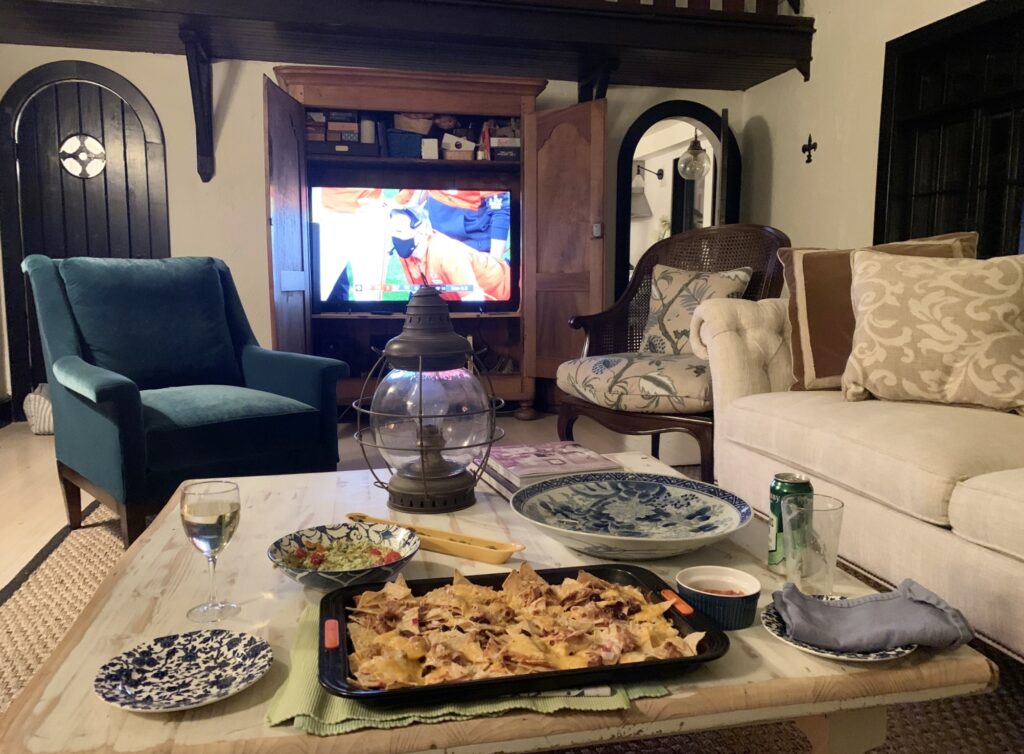
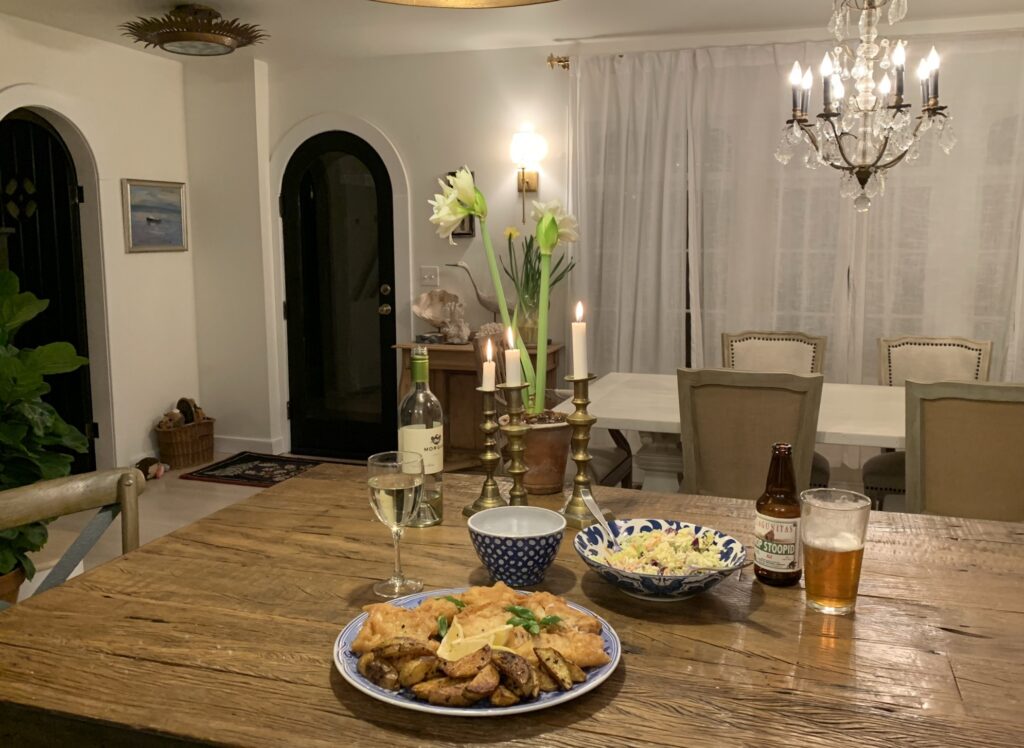
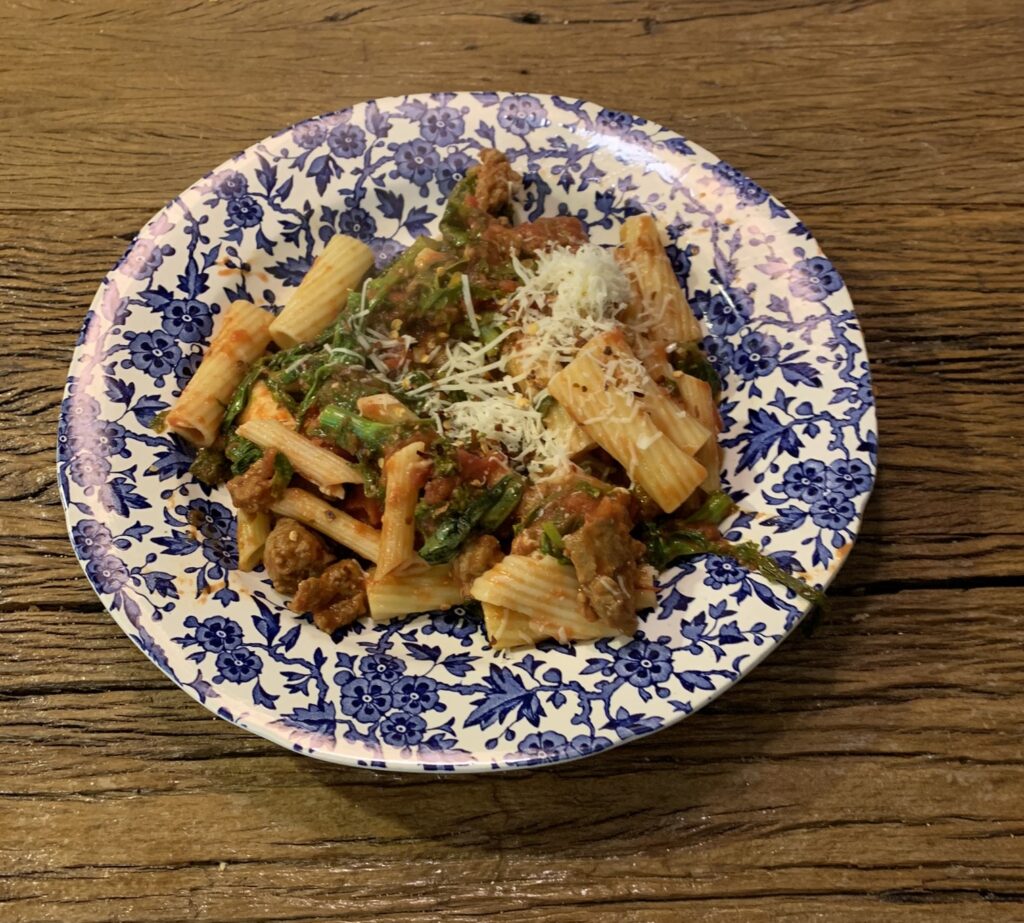
As we all know there is nothing is better after a long, summer day than an ice cold glass of wine and a fabulous meal dining al fresco. This summer I’ve become very fond of spatchcock chicken. All white meat gets too dry and all thighs is getting boring so spatchcock gives you a bit of both. Actually spatchcocking a chicken is beyond my skillset so I buy my chicken already split from Sickles Market.  I’ve had great luck with this recipe from that accomplished tastemaker–and master gardener herself– Martha Stewart.

Full disclosure, we jazz up the marinade with a splash of maple syrup and a teaspoon or two of Coleman’s Mustard (it’s a British thing) but you can’t go wrong following Martha’s version exactly.

Grilled Spatchcock Chicken with Dijon and Rosemary

This image has an empty alt attribute; its file name is IMG_5858-2-768x1024.jpeg


Ingredients


Directions

  • Place chicken on a large cutting board, breast-side down. Using kitchen shears, cut along each side of backbone and remove (reserve for stock, see cook’s note). Flip over; press firmly with your palm in center of breasts to flatten.

  • Whisk together mustard, mayonnaise, rosemary, and lemon juice. Season chicken generously all over with salt and pepper; slather both sides with mustard mixture. Cover loosely and let stand while you prepare the grill, or refrigerate in a resealable bag up to 1 day (return to room temperature 1 hour before grilling).

 
  • Heat grill to 350°F for direct and indirect cooking. Oil grates over indirect zone, then place chicken, skin-side up, on it, with legs facing direct zone (this helps keep the breast from overcooking before the legs are done).

  • Cover and cook, maintaining a temperature of about 350°, until skin begins to brown and a thermometer inserted in thickest part of breast reads 150°, 45 to 50 minutes.

  • Oil grates over direct-heat zone. Using tongs, carefully flip chicken skin-side down over direct heat. Cook, moving occasionally to avoid flare-ups, until skin is charred in places and chicken is cooked through (thermometer should read 160°), 5 to 10 minutes more. Transfer to a tray; tent with foil. Let stand at least 15 minutes before carving.

Happy Mother’s Day

So last year at this time things, admittedly, were looking a little bleak. Locked up, locked down, whatever, so I made myself a Chocolate Mousse Pie for Mother’s Day and pledged to moved on. But not much happened…I didn’t write the great American novel, clean out my closets, or even my dresser drawers so in the fall I decided I would go back to college. 

My BA is in English Lit but I’ve been importing antiques and selling furniture for the last 36 years or so and actively engaged in interior design all along the way: renovating 6 or 7 properties from studs to thickly settled, designing custom furniture for the store, and participating in a number of showhouses. (Below is a photo of the AndersonCampanella Potting Shed (be still my heart) we furnished for one of the VNA’s Stately Home-by-the-Sea Designer Showhouses at  Sheep’s Run in Rumson. But I digress…)

It was in August when I realized that because there was  literally  nowhere to go, it was the opportune time to actually focus on the field that seemed to have chosen me.  Fortunately there is a nationally renowned community college, Brookdale Community College , ten minutes from the store offering classes in Interior Design so I bit the bullet, took the plunge and signed up for:

I really wanted to take CAD, computer assisted drawing but this was a prerequisite. The good news was my class was held in the classroom. I’m fairly certain remote learning would have not have worked for me; zoom is not my friend.

At first it did not go very well.

Printing has been my nemesis since first grade, but I persevered and learned more about creating a cohesive set of drawings that would convey an interior design plan than I thought was possible. There are multiple multiple factors and details to consider when designing a home, and I think we covered them all. No joke. Never cast aspersions on community college learning; this course was incredibly challenging. 

Below are the drawings for my final project which included an electrical plan, custom millwork and furnishings for a two bedroom house.

Phew, and did I mention presenting it all in Power Point? What was I thinking? Thank heavens my daughter, Laird, came home for a Christmas break and at the last minute walked me through the program; otherwise I would have walked into my final with a Mood Board and a bunch of samples and flubbed the whole thing.

But I got through it and even, thinking back, rather perversely enjoyed obsessively worrying about something other than Covid, the elections, the economy and my nearest and dearest scattered across the globe. So much so that I may have been the first in my class to sign up for the next semester.

Of course, after the first actual class, I was in total despair. At least I knew how to print, and read architectural drawings, and place furniture so figuring out the first semester was largely achieved by getting an eye test and new glasses (so I could see what I was doing) and concentrating on the task at hand, but this, this attempting to make my computer make a legible plan was insane. I stunk.

I won’t bore you with my trials and tribulations, but somehow, finally, I managed to figure it out. It wasn’t easy but here are the results. This time my final project was to design a 3200 square foot interior design office. Along with the electrical and furniture plans and millwork…

Then, the plans were uploaded into a laser printer and cardboard was cut into bits so the drawings created a scaled model, building, walls, floors, furniture, and all… Pretty cool huh?

It was totally cool when it all came together exactly like I planned–amazing what a little technology and lots of Elmers Glue can do. I located my firm in a repurposed industrial building with 12′ ceilings, exposed brick walls and polished concrete floors. Not super huge at 3200 square feet, but spacious enough for three offices, conference room, complete kitchen and furniture showroom. Stay tuned…maybe I’ll build it someday!

And now, here we are back to Mother’s Day and that eternal question, what should we have for dinner? This year I am voting for lobster from Doug Douty’s Lusty Lobster, and  Chocolate Mousse Pie, of course.

Let it Snow, Let it Snow, Let it Snow…

Parker’s Fish and Chips –

It’s been nice to have a real winter this year with lots of snow. Activities in a pandemic are on the limited side so shoveling snow has had its merits and you have to admit there is nothing prettier than a fresh fall of snow.

In January we looked forward to the Super Bowl. And we even had a party–for two.

And of course now that the weather is mostly inclement we have had quite a few deliveries of furniture and accessories that were ordered what seems like eons ago but thanks to Covid disruption their arrival was delayed. However the good news is everything looks great. Like this fabulous sofa by Hickory White, the higher end, design driven division of the mighty Sherrill Furniture.

Hickory White Grand Sofa with a new, wider arm option.

And we were thrilled to finally get our artwork order that was meant to arrive in December…and, once again, the good news is it was worth the wait. Everything is magnificent, starting with this JJ Audubon print of an Ibis…which somehow  manages to be vintage, yet modern, clearly meeting that transitional genre we were hoping for.

And we have been dining well. One memorable dish was Fish and Chips. Keith is a huge fan and I don’t fry anything but we gave it a whirl one evening and enjoyed great success.

The recipe I used is by Ina Garten:

Parker’s Fish and Chips

Ingredients

Baked Chips

Directions

  1. Lay the cod fillets on a cutting board. Sprinkle both sides with salt and pepper. Cut the fillets in 1 1/2 by 3-inch pieces.
  2. In a bowl, combine the flour, baking powder, lemon zest, cayenne pepper, 1 teaspoon salt, and 1/2 teaspoon pepper. Whisk in 1/2 cup of water and then the egg.
  3. Pour 1/2-inch of oil into a large (12-inch) frying pan and heat it to about 360 degrees F.
  4. Dip each fillet into the batter, allowing the excess to drip back into the bowl. Place it very carefully into the hot oil. Don’t crowd the pieces. Adjust the heat as needed to keep the oil between 360 and 400 degrees F. Cook the fish on each side for 2 to 3 minutes, until lightly browned and cooked through. Remove to a plate lined with a paper towel. Sprinkle with salt and serve hot with the “chips.”

The Bobbin Chair

Recipe for Turkey Chili – 

The Bobbin or Spool Chair

While 2020 will not doubt be remembered as the year time stood still, happily we made some progress here at British Cottage. One thing we did was go long on the Bobbin Chair. You’ve seen it at the store from time to time and you see it in books and magazines all the time.

Like in this gorgeous room by Barbara Westbrook. The Bobbin Chair is derived from  the heavy, lathe-turned furniture common in the 1700’s that over the ensuing centuries evolved into  something significantly lighter and far less medieval looking. Some of you might have seen a spool bed in your grandma’s house, but other than that this style did not get much play until this particular style chair worked its way into the twenty first century mix.

I love them. We get most of ours from Hickory White Furniture, the higher end, designer-driven division of Sherrill Furniture in Hickory, North Carolina. They sit like a full-blown upholstered armchair but look much lighter, and the wood frames provide architecture without looking unfinished, like those silly  deconstructed armchairs Restoration Hardware was flogging several years ago. 

In contrast the Bobbin chair is pretty and graceful. Don’t you just love how they look in this gorgeous room by Erin Gates?

In the fall we did them in a bold, blue animal print in a dark, practically ebony finish:

And from our December shipment this bold, geometric print with a white frame:

And just last week this snazzy version in a dark walnut finish and a geometric ogee pattern fabric arrived.

Along with this one in a Lillian August striped fabric:

Make sure you come in soon to test one out–before they get sold. While we are happy to order one–or two–for you in the fabric and finish of your choice–we are equally as happy to sell off the floor. 

Meanwhile I have to hurry home. Can you believe it someone is coming to dinner? (Don’t worry, she had the vaccine.)

TURKEY CHILI:

I plan to make Turkey Chili–and before you all start whining and saying really, you are starting off the new year with Turkey Chili–just hang on a minute. Our daughter popped in for two weeks at Christmas and established herself as family chef. Who was I to argue? After nearly 10 months of home cooking I was ready to hand over the mantle. Although when Laird said it was Turkey Chili for dinner I was first seriously underwhelmed, then concerned when I arrived home at 5:30 and saw she had not even started to cook.

I needn’t have been. This goes together lickety split and tastes scrumptious. Here are her notes:

As the instructions say, “a combination of dark and white meat really adds depth and richness of flavor, so try to find a mix, but all white meat (or a mixture of ground beef and turkey) will yield a stellar batch too.” We went with ground white meat – with a bit of ground beef thrown in for good measure!
 
I didn’t use chicken broth (because we didn’t have any). Instead, per the comments, I didn’t drain the beans and also added a little turkey broth. Also I dislike kidney beans, so we had pinto and black beans instead. And no bay leaves, because they were not in the cupboard. No jalapeno because I forgot to tell Dad to buy it. Green bell pepper instead of red. 
 
But otherwise, mostly followed the recipe, at least in spirit! And it’s so fast! 
 

INGREDIENTS

  • 1 tablespoon olive oil
  • 2 pounds ground turkey, white and dark combined
  • 2 cups coarsely chopped onions
  • 2 tablespoons chopped garlic
  • 1 large sweet red pepper, cored, deveined and coarsely chopped
  • 1 cup chopped celery
  • 1 jalapeno pepper, cored, deveined and finely chopped
  • 1 tablespoon fresh oregano, chopped, or 1 tablespoon, dried
  • 2 bay leaves
  • 3 tablespoons chili powder
  • 2 teaspoons ground cumin
  • 3 cups canned diced tomatoes
  • 2 cups chicken broth, fresh or canned
  •  Salt and freshly ground pepper to taste
  • 2 15-ounce cans of red kidney beans, drained
  • 2 cups shredded cheddar cheese
  • 1 cup sour cream (optional)
  •  Sliced lime for garnish (optional)

PREPARATION

  1. Heat the oil over high heat in a large heavy pot and add the turkey meat. Cook until lightly browned, about 5 minutes, chopping down and stirring with the side of a heavy kitchen spoon to break up any lumps.
  2. Add the onions, garlic, sweet pepper, celery, jalapeno pepper, oregano, bay leaves, chili powder and cumin. Stir to blend well. Cook for 5 minutes.
  3. Add the tomatoes, chicken broth, salt and pepper. Bring to a boil, reduce heat and simmer, stirring occasionally, for 15 minutes.
  4. Add the drained beans and cook, stirring occasionally, for 10 minutes longer. Serve in bowls with cheddar cheese, and sour cream and lime wedges, if desired.


Time to Freshen up for Fall

Beef Stroganoff –

In August Keith and I sadly realized we would not be going to the High Point International Furniture Show that was held last week. We knew we would miss not only seeing what the big companies had to offer, but also buying the latest market offerings. So we made a plan right then and there to step up and create our own line for fall. Some of those items arrived yesterday and I am relieved, thrilled, and excited to say they look pretty darn good!

As usual, I went long on blue, and white, but added a dash of spice to the mix with this blue leopard print. The bobbin or spool chair is a decorator’s secret weapon. It sits like a classic upholstered arm chair but the external wood frame makes it appear lighter–and possibly a bit more modern.

Meanwhile all the sofas are from the Hickory White Features program, which allows you to design your own custom sofas, sectionals and armchairs at a fraction of what you would normally expect to pay for high end, custom upholstery. In this case I chose an off-white performance fabric that looks like linen but is stain, odor and pet resistant.

One sofa has a fairly traditional sock arm (rounded), while the other has a wide track arm. Neither is skirted. You can buy these off the floor (in fact the sock arm is sold already) or design your own. There are literally hundreds of fabrics to choose from and we are happy to assist in any way.

For example, let’s say you are over beige, and grey and taupe and want to add some pizazz to your space. You could always do what we did; look for a color that would sparkle and pop and add some drama and life but still work with everything else. In our case the answer, we decided, was green. Not any green but that green that is the lime in your vodka and tonic, a true Kermit the frog green.

Then we added a couple of over-stuffed armchairs in bold floral fabrics for the fun of it. The chair in the photo below is from the Features program so fabric, arm, leg and back style are all custom.

While this chair is one of the Hickory White classics, overstuffed and robust, and super comfortable, and even better, we added a swivel to the base. The fabric is from the Lillian August for Hickory White Upholstery collection and a bit of an upgrade but worth every penny.

Beef  Stroganoff

And speaking of upgrades the original recipe for this two-pot meal called for hamburger but what I do (and advise you to do the same) is use fillet mignon which takes this recipe to a whole other level. You can make it in just a half hour and it serves 2 hungry people–or four with salad and garlic bread on the side.

Ingredients
  • 2 tablespoons butter
  • 2 shallots
  • 1 pound  beef tenderloin, trimmed sliced 1/4 inch thick and cut into 1 inch pieces
  • 8 sliced ounces fresh button mushrooms 
  • Freshly cracked pepper
  • 2 tablespoons all-purpose flour
  • 2 cups beef broth
  • 8 ounces wide egg noodles
  • 1/3 cup sour cream
  • handful fresh parsley for garnish (optional)

DIRECTIONS

  1. Mince the shallots and add them along with butter to a skillet and sauté over medium heat for about one minute, or until the shallots are soft and fragrant.
  2. Add the sliced mushrooms and some freshly cracked pepper to the pot. Continue to sauté until the mushrooms are soft (about five minutes). Add the flour and sauté for about two minutes more. The flour will coat the bottom of the pot and this is okay.
  3. Pat beef dry and season well with salt and pepper. heat 1 tablespoon oil in a 12 inch heavy skillet over moderately high heat until foam subsides. Add beef in 2 batches and cook, turning once, until browned on both sides but still pink inside, about 1 minute per batch. With a slotted spoon, transfer to a plate.
  4. Meanwhile add the beef broth to the skillet with the mushrooms and stir to dissolve the flour off of the bottom. Add the uncooked egg noodles. Place a lid on the pot and allow the liquid to come up to a boil. As soon as it reaches a boil, give the pot a stir, replace the lid, and reduce the heat to low. Allow the pot to simmer for about 7-10 minutes, stirring the noodles and replacing the lid every couple of minutes. After 7-10 minutes the pasta should be tender and most of the liquid absorbed. Make sure the liquid is simmering the entire time. If not, increase the heat slightly.
  5. Once the noodles are tender, stir in the beef and then a minute or so later the sour cream. Roughly chop a handful of parsley leaves and sprinkle over top. The idea is to make sure the dish is hot without overcooking the beef.

Is Shabby Chic finally over?

Gazpacho Recipe

Afraid so. 

Slipcovers, faded chintz, peeling paint seem so yesterday. I want surfaces to be uncluttered. Couches sleek and taut, not blousy and overstuffed. No lace, no whitewash and, above all, no clutter.

I’m not saying you need to go all mid-century modern but now is the time, with fall approaching and the whole school/work thing still happening at home, to get your act together. We just delivered the cabinet in the above photo today to a gorgeous Century home overlooking the bay in Atlantic Highlands. Normally you would expect to see an enormous walnut breakfront looming over the rather formal dining table and chairs but in this case, the homeowner opted for simplicity. Sometimes less is more AND not everything has to match!

Is this cupboard going to hold dishes or files? We’ll never know. But if someone has to work at the dining room table all day a cabinet like this is the perfect answer. Come five o’clock all signs of work can be put away–laptop, printer, paperwork–out of sight–out of mind. But come Thanksgiving you have a perfect spot to set out your turkey or line up all those desserts.

But meanwhile, it is still way too hot to even thinking about cooking and my garden is literally exploding with cucumbers and tomatoes which means it is time to make:

Gazpacho

  • 2 Cucumbers, peeled, halved, and seeded
  • 2 red bell peppers, plus 1 green cored and seeded
  • 4 overripe heirloom tomatoes
  • 1 red onion
  • 3 cloves garlic
  • 3 cups vegetable juice
  • 1/4 cup sherry vinegar
  • 1/2 cup good quality extra virgin olive oil
  • 1/2 tablespoon Kosher salt
  • 1 teaspoon cayenne
  • 1 cup croutons toasted golden brown

Directions

  1. In a food processor, combine the tomatoes, garlic, onion, cucumbers, peppers, vegetable juice,  cayenne, salt, and vinegar. Start blending, and then add the olive oil in slowly to emulsify.
  2. When the vegetables are well-blended, ladle the soup into bowls and top with croutons. That’s it!


130 Shrewsbury

How cute is this?

Grilled Zucchini Roll-Ups With White Beans and Arugula

Back in 2005 Keith and I bought the building right next door to British Cottage, 130 Shrewsbury Avenue. The front area was a storefront and in the back was a small, two story, three bedroom house. Renovating the store section was easy; we just put in a new hardwood floor and replaced the existing windows. The house part was a bit trickier with three teeny bedrooms and bath upstairs complete with the original plaster and lath crumbling hither and yon. In the end, we decided to gut the whole thing right up to the roof and create one large lofty bedroom area.

When we moved from our house in Rumson to the apartment above the British Cottage store after Sandy in 2012 (we did not flood but our neighbors did and the people who bought their property built a Tuscan mansion literally on top of us which meant it was time to bid adieu), the space at 130 became a perfect spot to park visiting children and friends. We never really decorated–just filled it up with stuff. Some stuff we liked but could not use in our current situation, other items were just too valuable to leave in the warehouse, and the rest was just clutter.

Fast forward to this benighted Summer of 2020 when we invited one of our long time customers, stuck between rentals in the red hot Jersey Shore real estate market, to crash there for a couple of months. Yikes! What were we thinking? And they needed to be in by August 1!

Some people have junk rooms–this had turned into a junk house. We needed to get it cleaned out and cleaned up–stat. One good thing is we pretty much know what furniture our lodger is bringing, seeing as we sold it all to her in the first place. Her antique pine table with extensions would be perfect for this spot in the kitchen area; then we added one of the pine cupboards we have made at our factory in Hungary to serve as a pantry/storage cabinet.

Sadly her navy blue Hickory White sofa won’t fit through the narrow doorway into the living room so for now we left the Biedermeier sofa we bought at the fabulous antique store, Green Square, in Copenhagen. (The map above the couch is an original 1900’s map of the area our Maine cottage was located.)

Directly opposite the sofa is a long wall  for her 84″ pine sideboard also from our factory in Hungary and above that she can hang the tv. (I am hoping there will be a Part Two to this blog when we see how the lodgers put their own stamp on our little abode).

In the corner is an armchair from The Best Slipcover Company, a leftover from our first foray into upholstery sales. For years and years I never wanted anything that was not slipcovered but now, with the new performance fabrics, upholstered furniture is a breeze to care for and certainly easier on the eye.

Up the stairs is the loft bedroom which will be shared. Here is the little girl side featuring an original British Cottage pine bed from the very first factory we worked with in England way back when, and an antique pine chest of drawers, also from the UK, that Keith fished out of the depths of the warehouse. Hopefully he will find the knobs soon.

With everyone working–and studying–from home we thought this corner would make a perfect work/study area. We grabbed the table from the store, mostly it is used as a console table behind a sofa or in an entryway, but in this case it should be just the right size for a lap top–or desk top for that matter.

Then we made a little sitting area in front of the great kas–also purchased from Green Square many years ago–that we cannot bear to part with. A kas, (pronounced kaz) is a massive cupboard of Dutch origin similar to an armoire that was popular in the 17th & 18th centuries. Used to store linen, clothing, and other valuables, they were status symbols and family heirlooms in the Low Countries. (Thank you Wikkepedia). We knew we would never find another one we could afford so stashed it up here until the right room comes along. 

Tucked snugly in an adjacent alcove is a queen bed in a matte, black metal finish from the Californian company, Wesley Allen.  We find a metal bed fits into most decorating schemes and like to have one on hand to show customers when our British Cottage beds are not a go. The photos over the bed are from a series of black and white images of our daughter and her friends and their ponies taken years ago. (This is a great thing to do if you are looking for artwork; everyday images, when enlarged and printed in black and white become much more visually interesting).

The bathroom area is not huge so it was lucky we had this shelf, originally purchased at Schwung Home for the Maine cottage. Then it didn’t fit into the Fair Haven house either; happily it works perfectly here.

Over the years we have sold dozens of  benches but there was something about this homely antique, Hungarian bench in the original paint that was charming so we held on to it. Above it, on the gallery wall is a set of botanical prints we bought at our neighbor and renowned local artist, Barbara Cocker’s yard sale 35 years ago that Keith discovered in the painted armoire where they’d probably been languishing for at least a decade. Surprise!

So what happens if all you have is mismatched curtains, furniture and artwork? Try taking a deep breath and tossing it all together. As long as your walls are bright and your floors clean, anything can happen.

So it is boiling hot and who wants to cook? Not me. Fortunately Laird surprised us with a mid-summer visit from Seattle and she is more than happy to take charge of the kitchen. On the menu tonight courtesy of The Washington Post:

Grilled Zucchini Roll-Ups With White Beans and Arugula


Here, grilled zucchini is served up in an exciting new way: Rolled into bite-size bundles filled with lemon and garlic-seasoned mashed white beans, peppery arugula and floral basil. Light and fresh, the roll-ups taste of summer and are filled with garden flavors. With the substance of creamy beans, you can savor them as a snack, starter or as a spread of small plates.


SERVINGS:  
 

Tested size: 4 servings; makes 12 roll-ups

INGREDIENTS
  • 3 medium zucchini (about 8 ounces each)
  • 2 tablespoons olive oil, divided
  • 1/4 teaspoon plus 1/8 teaspoon kosher salt, divided
  • 1/4 teaspoon freshly ground black pepper, divided
  • 1/2 teaspoon finely minced garlic (1 clove)
  • 1/2 cup low-sodium canned white beans, such as cannellini, drained and rinsed
  • 2 teaspoons fresh lemon juice
  • 2 cups (2 ounces), lightly packed, baby arugula
  • 1/3 cup fresh basil leaves

DIRECTIONS

Trim the tops and bottoms off the zucchini, then slice them lengthwise into 1/4-inch thick slices using a sharp knife or mandolin. Set aside the outermost slices of zucchini for another use. Brush the center slices on both sides using 1 tablespoon oil and sprinkle with 1/8 teaspoon each of the salt and pepper.

Preheat a grill or grill pan over medium-high heat. Grill the zucchini until tender and grill marks have formed, about 3 minutes per side.

Place the garlic onto a cutting board and sprinkle with the remaining 1/4 teaspoon salt. Using the flat side of the knife and dull edge of the blade, mash the garlic and salt together to form a paste; transfer to a small bowl. Add the beans, lemon juice and the remaining 1 tablespoon oil and 1/8 teaspoon pepper. Using a fork, smash the ingredients together to form a chunky mash.

Spoon about 1 teaspoon of the bean mixture 1/2-inch from the end of a zucchini slice. Top with a few arugula leaves and 1 small or 1/2 large basil leaf. Roll the zucchini slice up and place seam side down on a platter. Repeat with the remaining zucchini, beans, arugula and basil.

Barley Point

Sausage Ragu

Not many people know about Barley Point, a private island that resides alongside the tony town of Rumson and the Barley Pointers are committed to keeping it that way.  The island is gated and if by some means you manage to gain access it will be only a matter of minutes before someone, anyone asks “What the heck are you doing here?”

Recently, however, we were granted a private tour by a friend whose dream house on the island was nearing completion (and a good thing too because construction on Barley Point is prohibited between Memorial Day and Labor Day).  Her new home is quite literally a stone’s throw from the Navesink River and the view is breathtaking. The lots may be tiny and the houses too, but architects, like our friend, Matt Cronin, who has designed many of the newer homes on the island have made it their mission to access and utilize every square inch of allowable living space.

Matt and Keith and that incredible view

The original houses on Barley Point were by and large fairly modest bungalows that served as summer refuges for working-class escapees from Jersey City and Hoboken.

Then along came Hurricane Sandy and a lot of those original structures were clobbered and most ended up being demolished. The new houses are designed to withstand tidal surges and gale-force winds and come in all shapes and sizes.

What they share are multiple views of the sky and river, salt air and sandy beaches that seem far removed from the manicured lawns and asphalt jungles that reside just a channel away.

After so much fresh air and sunshine touring the ins and outs of this adorable island we were starving and needed to eat dinner right away. If you don’t dawdle you can bang this dinner out in 25 minutes flat. I thought I had figured out every which way to combine hot sausage, tomatoes and pasta but this recipe from our friend, Chef John, is terrific.

Sausage Ragu

12 oz. penne, 1 lb. Italian sausage, casings removed, 1/2 c. dry white wine, 2 tbsp. olive oil, 4 cloves garlic, finely chopped, 1/4 tsp. crushed red pepper flakes, 1 28-ounce can diced tomatoes, drained, 3 sprigs fresh basil, 1/4 c.  grated Parmesan, plus more for serving, 4 c. baby kale (I used swiss chard and spinach works too)

  1. In a medium bowl, combine sausage and wine, making sure all the wine is incorporated; let sit at least 5 minutes. (Don’t skip this step!)
  2. Meanwhile, heat oil in a large skillet over medium heat. Add garlic and chili flakes and cook until garlic is sizzling, about 2 minutes.
  3. Add sausage mixture and cook, breaking it up with a spoon into very small pieces until it’s no longer pink and half the liquid has evaporated, 5 to 7 minutes.
  4. Roughly chop up tomatoes. Add them to the skillet along with basil; simmer, stirring occasionally, 10 minutes.
  5. Meanwhile cook pasta according to package directions; drain it and return it to the pot.
  6. Discard basil and stir in Parmesan. Toss pasta with sauce, then fold in kale. Serve with additional Parmesan, if desired.

Suddenly it’s Summer

Chocolate Mousse Pie

Welcome back!

Spring 2020 was a blur. Locked down, shut out, not home bound because I still worked my regular hours (sort of) you’d think by now I’d be all organized and ready and raring to get going but mostly I feel like I need a nap. Fortunately Keith and Bentley are much more energetic!

And the good news is that British Cottage is officially open to the public again and we can get back to doing what we love most, schmoozing, and, hopefully selling some stuff. We have tons of new products which should get your creative juices flowing and inspire you to new decorative heights.  We can’t wait to hear about all the interesting projects and plans you’ve been making to refresh and renew your homes.

Lillian August for Hickory White Bobbin Chair and Grand Sofa

Fortunately too, I have lots of new recipes. But the one I want to share first is an oldie but goodie, Chocolate Mousse Pie. Keith’s cousin Mark, who is now pushing fifty, was the first to make this when he was about ten and since then it has been a family favorite. I hadn’t made it in years until this Mother’s Day when feeling a bit underwhelmed I thought I deserved a special treat–and it was well worth the effort.

The original recipe came from Bon Appetit and it is is by far the best Chocolate Mousse Pie I’ve ever made, or eaten. The secret ingredient is the much revered (or reviled) Oreo Cookie and the best thing is there are no eggs involved here, so one less thing to worry about in these oddly fraught times…the notes in italics are mine.

YIELD
Serves 8 (More like 12)

INGREDIENTS

  1. Crust
    • 21 Oreo cookies 
    • 1/4 cup (1/2 stick) unsalted butter, cut into pieces, room temperature
  2. Mousse
    • 12 ounces semisweet chocolate, finely chopped (buy the best chocolate and add a handful or two extra and you won’t be sorry)
    • 1 teaspoon vanilla extract
    • Pinch of salt
    • 3 3/4 cups chilled whipping cream
    • 1/4 cup sugar
    • Chocolate shavings (optional)
    • YIELD
      Serves 8 (Really more like 12)
        • PREPARATION

          1. For Crust:
            1. Preheat oven to 350°F. Butter 9-inch-diameter springform pan with 2 3/4-inch-high sides. Finely grind cookies in processor. Add butter and process until mixture is evenly moistened. Press crumb mixture onto bottom and up sides of prepared pan to form thin crust. Bake crust 5 minutes. Transfer crust to rack and cool completely.
          2. For Mousse:
            1. Combine chocolate, vanilla and salt in processor. Bring 1 cup cream to boil in heavy small saucepan. With processor running, gradually pour hot cream through feed tube and process until chocolate is melted and smooth. (It is easier to just add the chocolate mixture to the hot cream in the pan and not have to wash out your food processor twice). Transfer mixture to large bowl. Cool to room temperature, stirring occasionally.
            2. Beat 2 cups cream and sugar in large bowl to stiff peaks. Fold into chocolate mixture. Pour mousse into prepared crust. Chill until set, about 6 hours. (Can be prepared 1 day ahead.)
            3. Beat remaining 3/4 cup cream in medium bowl to firm peaks. Transfer to pastry bag fitted with medium star tip. Pipe rosettes of cream around edge of cake. Garnish with chocolate shavings.
          1.  

The Cat in the Hat

Dijon and Cognac Beef Stew Recipe)

The sun did not shine. it was too wet to play. so we sat in the house all that cold, cold, wet day.

What do you do on these damp, dark days in the depths of winter? 

I go on house calls. There is nothing better to dispel seasonal angst than roaming around our  Monmouth County and getting to see firsthand how people upsize, downsize, organize and then re-organize their hearths and homes.  This is like Pinterest–only live!

I started in January in Fair Haven to see how a few key accessories took some really nicely decorated rooms from better to best.  In this case we added the pair of stunning porcelain blue and white  ginger jar lamps flanking the sofa, and a simple, but  shapely white gourd lamp to anchor the console table in the back righthand  corner. I like everything about this room–from the shiplap on the ceiling, to the curtains in a playful print (shutters would have been awful here) and of course the bobbin, or spool chairs in the foreground.Fair Haven NJ family room, blue and white family room, British Cottage

Used to most formal living rooms and multiple great room and sunroom options, this homeowner nevertheless ticked off all those boxes in this relaxed, yet elegant all-purpose family room. And she was smart enough not to make what I think of as the cardinal error in open plan living: she did not give up the den.

Century Cornerstone sofa, Fair Haven, NJ, rustic coffee table

Sometimes you just need a place for some alone time, to read a book or watch Love Actually while the game is on, without having to retreat to your boudoir. Our custom Cornerstone sofa by Century Furniture sits snugly next to a reclaimed elm end table and coffee table (also from British Cottage) that give the room a rugged, yet modern vibe. And who does not love that plaid carpet?

Next up was a quick peak at an enormous house in Rumson to see what was what. We did not get any business from this visit but it was interesting to see how a neighborhood, that was once home to many friends and their once brand new, top-notch homes was completely transformed by the latest, even more top-notch 21st century versions.

Rumson mansion

Then we got a call to look over an estate in Locust that was recently put on the market. Sadly there was no role for British Cottage here either. But oh my gosh, what a beautiful century home on four bucolic acres overlooking the Navesink River; some lucky buyer is going to be very, very happy.

Locust estate, Heritage House Sotheby's Rumson, NJ

The property was beyond amazing; and every single room was more fabulous than the next in that over-the-top more is more old money, old school, multi-layered English country manor style that j’adore. If you want to see what I mean just pop over to the Heritage House/Sotheby’s listing and take a look for yourselves. Simply divine.

English country style living room

Next was a quick hop over the river to Middletown to help a young mom keep the living room from becoming just a playroom for their adorable toddler. We moved some chairs and corralled the toys and what a difference that made. Love how the British Cottage coffee table looks in this space.

Baluster Coffee table, British Cottage, pine furniture

This home is an up-size from apartment life and what a great start. Take a peek at the British Cottage trestle table in the dining room. This is proof that just because you are starting out, you don’t need to buy junk. Start with a few key pieces and build over time.

British Cottage, Dining room table, Trestle table

Then it was back to Rumson. You can tell we are really getting old because when we first went to this house the owner was probably 10–if that! His parents downsized; he went on to own one of my favorite homes of all time, ( you can read about it here) but ultimately a more family-friendly house and neighborhood was deemed necessary for his growing family, and so, as it turns out, you can go back home again.

Rumson, NJ,
shingle style house

Like the family in our first visit, these homeowners have found it is not as easy as you might think to downsize. You finally get to the point where everything fits and the scale is just right and them boom! It’s time to start all over again. Lots of their furniture stayed with the old house, so now, after some time to get their bearings, they are putting the pieces together. We got a start on the living room with a pair of mid-centuryesque leather chairs but I am hopeful there is more for us to here do in the near future so stay posted!

Mid-century Leather chairs, British Cottage, Rumson, NJ, living room furniture, navy blue sofa

Our last home, and possibly one that will require a whole blog someday in the future, is actually only half built. The owners are looking to retire to Sea Girt, one of the most lovely towns on the entire New Jersey shore. They’re building a new house on a nice, sunny corner lot at the edge of town, just blocks from the beach and you can tell this is going to be a winner.

Sea Girt, NJ, British Cottage

But, eventually, it was time to focus on getting some work done at the store. Keith and I cleaned out an area in the back that had become an unsightly mess and made it into our custom upholstery center. We hung the fabrics out where you can actually see them and made a work station for catalogs and tear sheets.

British Cottage, Upholstery Red Bank, NJ

We’re hoping this makes life easier for all of us. We have fabric and custom upholstery options for Hickory White and Lillian August,as well as Century Furniture. I’ve probably said this a million times but I will say it again–this is the good stuff. Higher end sure, but not crazy money if you are careful with your fabric choices, and all hand-crafted and hand-tailored by artisans in America. This is the best furniture money can buy.

Upholstery, British Cottage, Red Bank NJ furniture store

The good news is that even with all this running around we were able to come up with a great new recipe. I was unconvinced, even after reading the following description from Sunday’s New York Times One Pot Meal Section that I would like it very much, but trust me it was amazing. This may be the best recipe of the year so far and certainly one that we will make again and again.

Dijon and Cognac Beef Stew

YIELD 4 to 6 servings

TIME About 3 hours

“This rich, comforting stew was brought to The Times by Regina Schrambling in 2001, in the dark days immediately following the attacks on the World Trade Center. The accompanying article was an ode to the therapeutic benefits of cooking and baking: “Whoever said cooking should be entered into with abandon or not at all had it wrong. Going into it when you have no hope is sometimes just what you need to get to a better place. Long before there were antidepressants, there was stew.” This one, while complex in flavor, is not difficult to prepare, but it cannot be rushed. Make it when you have the time to indulge in the meditative qualities of chopping, sautéing, reducing, braising, waiting and tasting. You will be rewarded with an exceptionally flavorful dish that is just as satisfying to eat as it was to cook.”

INGREDIENTS

  •  1/4 pound salt pork, diced
  •  1 large onion, finely diced
  •  3 shallots, chopped
  • 2 to 4 tablespoons unsalted butter
  •  2 pounds beef chuck, in 1-inch cubes
  •  2 tablespoons all-purpose flour
  •  Kosher salt and black pepper
  •  1/2 cup Cognac
  •  2 cups beef stock
  •  1/2 cup Dijon mustard
  •  4 tablespoons Pommery mustard or other whole-grain Dijon mustard
  •  4 large carrots, peeled and cut into half-moon slices
  •  1/2 pound mushrooms, stemmed, cleaned and quartered
  •  1/4 cup red wine

PREPARATION

  1. Place salt pork in a Dutch oven over low heat, and cook until fat is rendered. Remove solid pieces with a slotted spoon, and discard. Raise heat, and add onion and shallots. Cook until softened but not browned, 10 to 15 minutes. Use a slotted spoon to transfer to a large bowl.
  2. If necessary, add 2 tablespoons butter to the pot to augment fat. Dust beef cubes with flour, and season with salt and pepper. Shake off excess flour, and place half the cubes in the pot. Cook over medium-high heat until well browned, almost crusty, on all sides, then transfer to a bowl with onions. Repeat with remaining beef.
  3. Add Cognac to the empty pot, and cook, stirring, until the bottom is deglazed and the crust comes loose. Add stock, Dijon mustard and 1 tablespoon Pommery mustard. Whisk to blend, then return meat and onion mixture to pot. Lower heat, partly cover, and simmer gently until meat is very tender, about 1 1/2 hours.
  4. Add carrots, and continue simmering for 30 minutes, or until slices are tender. As they cook, heat 2 tablespoons butter in a medium skillet over medium-high, and sauté mushrooms until browned.
  5. Stir mushrooms into stew along with remaining mustard and red wine. Simmer 5 minutes, then taste, and adjust seasoning. Serve hot.
Dijon and Cognac Beef Stew, NY Times One Pot Meals