Heads Up for 2020

Pancetta-Wrapped Roast Turkey Breast (Turketta) Recipe

Last week the Wall Street Journal, after consulting over 100 experts in the design field, reported they had identified 6 new decorating trends “that are winning and waning” for the upcoming year. Some I agree with, like buying disposable furniture is out–I’ve never understood why people buy crap just because it’s cheap, or figure their kids will wreck it anyway so why even bother buying something nice? 

Rather than mention that perhaps children should always be taught not to wreck anything–let’s focus on the thrift and environmental angles. This is why secondhand stores, garage sales, and your parent’s attic exist; they are all great sources for cheap furniture that is well made and fairly kid proof. Our landfills are too full and our resources too stretched to keep buying junk. So enough of not taking your parents’ hand-me-downs. Man up. Or save up and buy something worth keeping. We started in the antique business and like to think even when we sell something brand new we are selling tomorrow’s heirlooms.

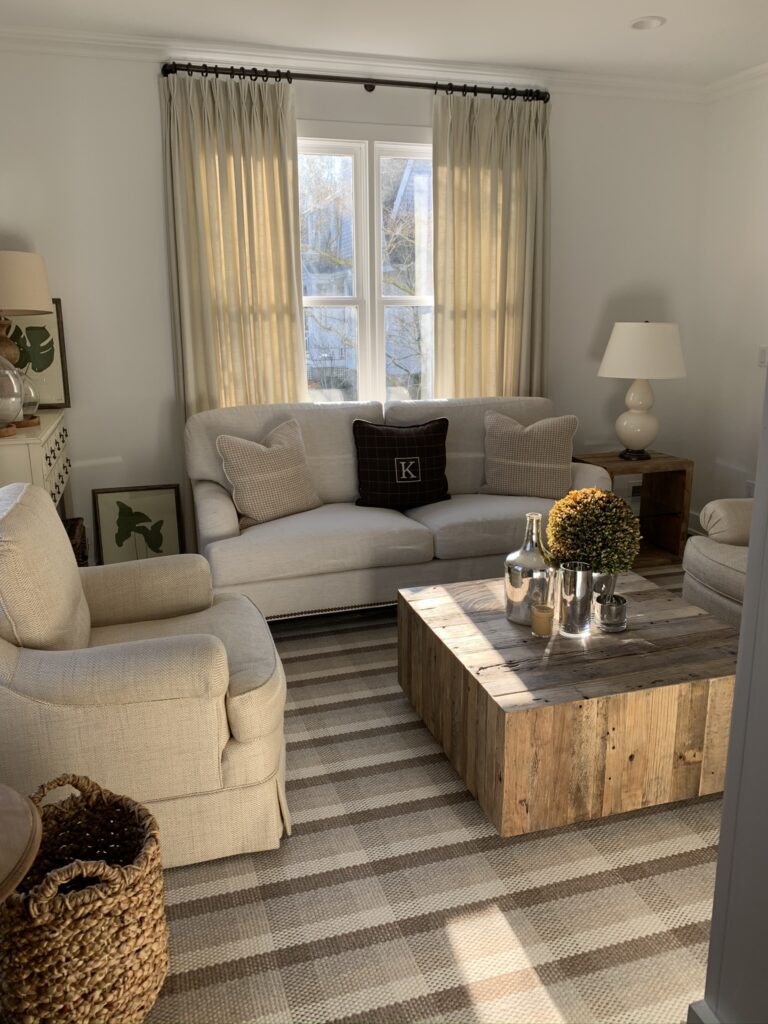
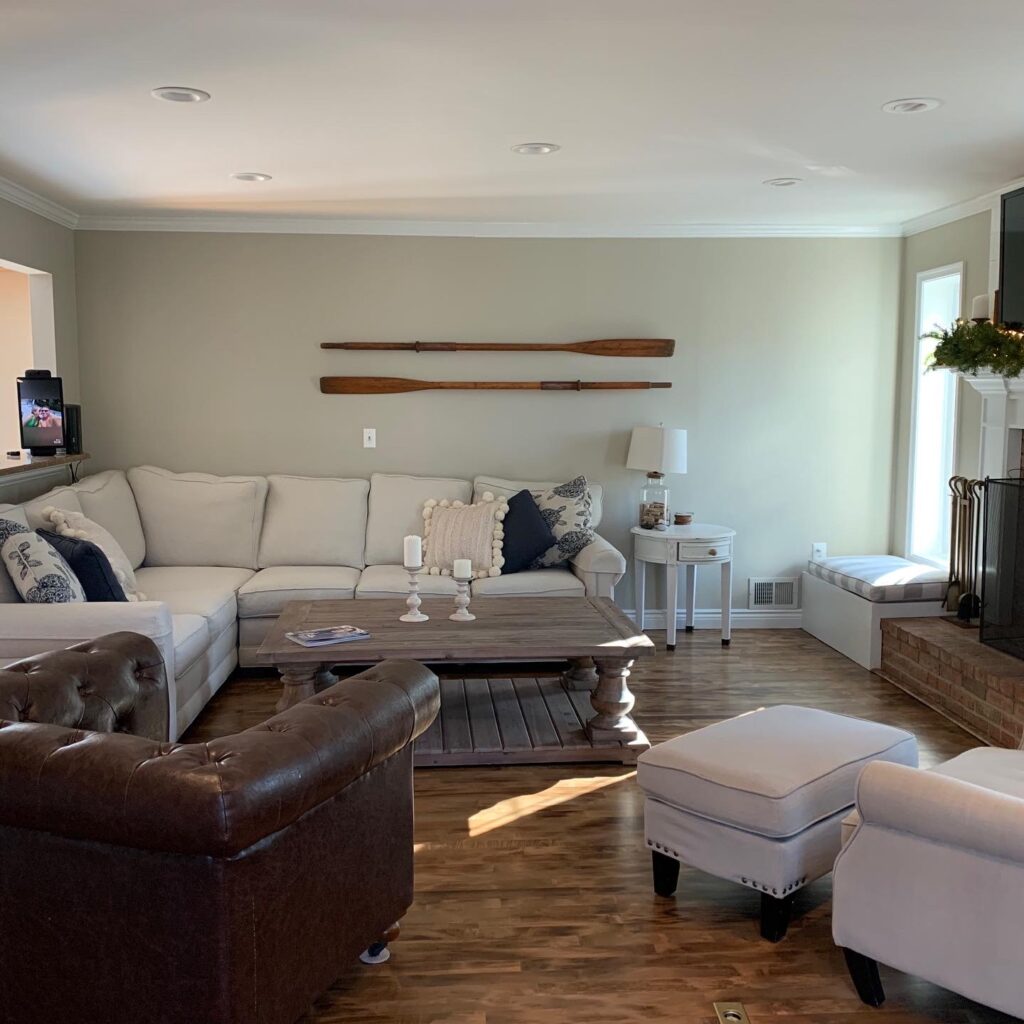
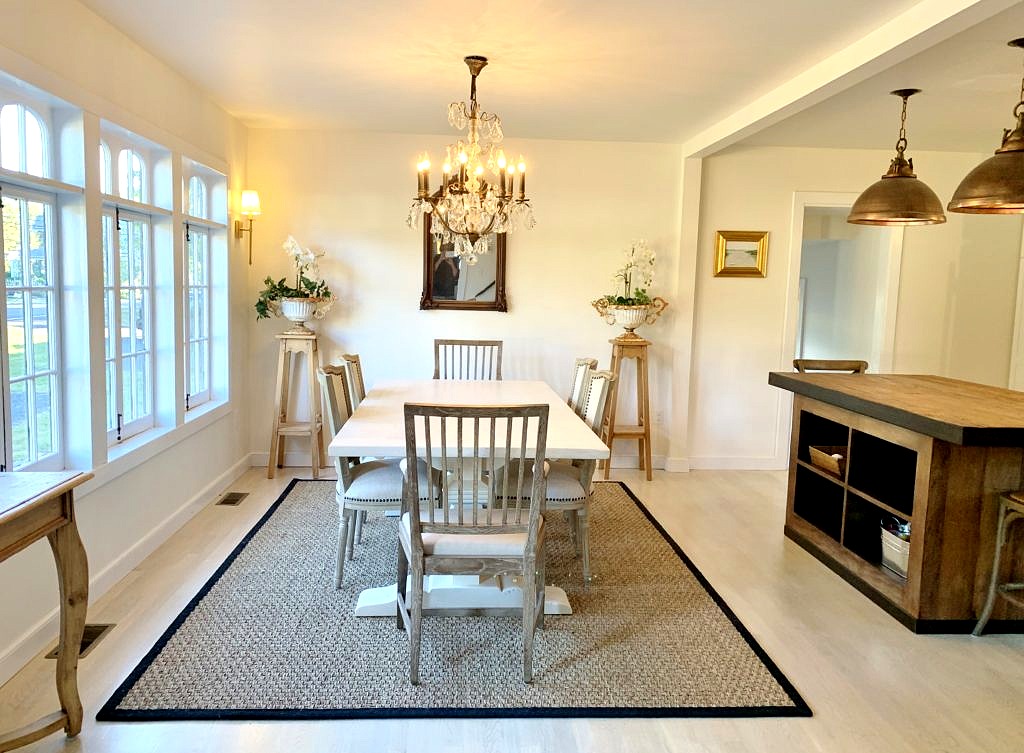
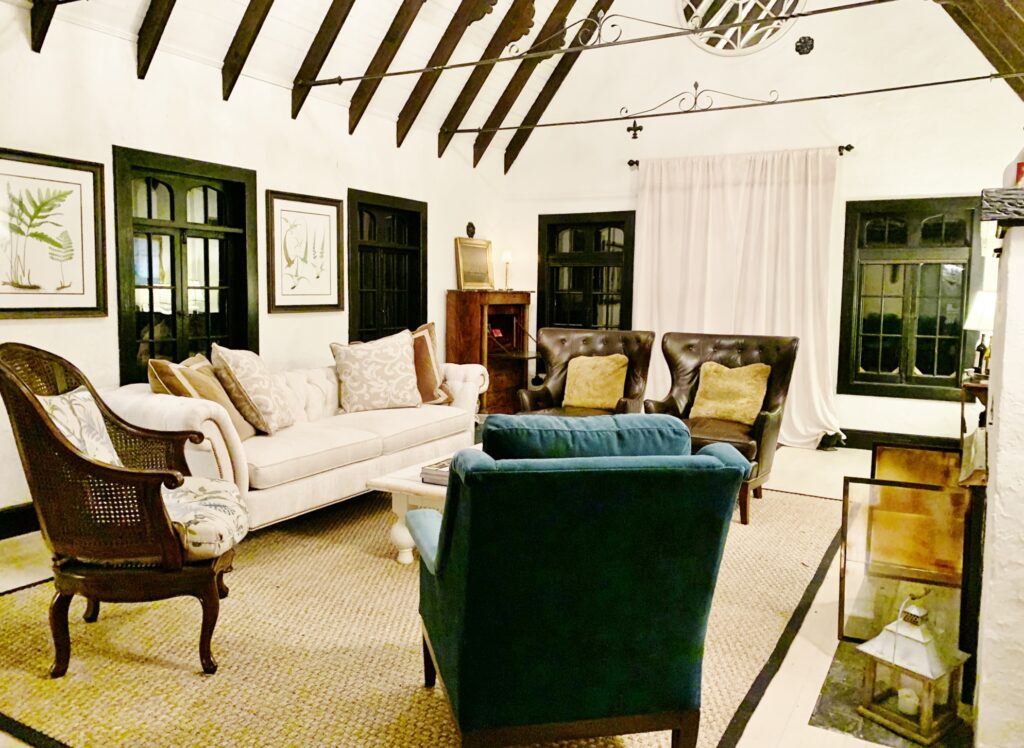
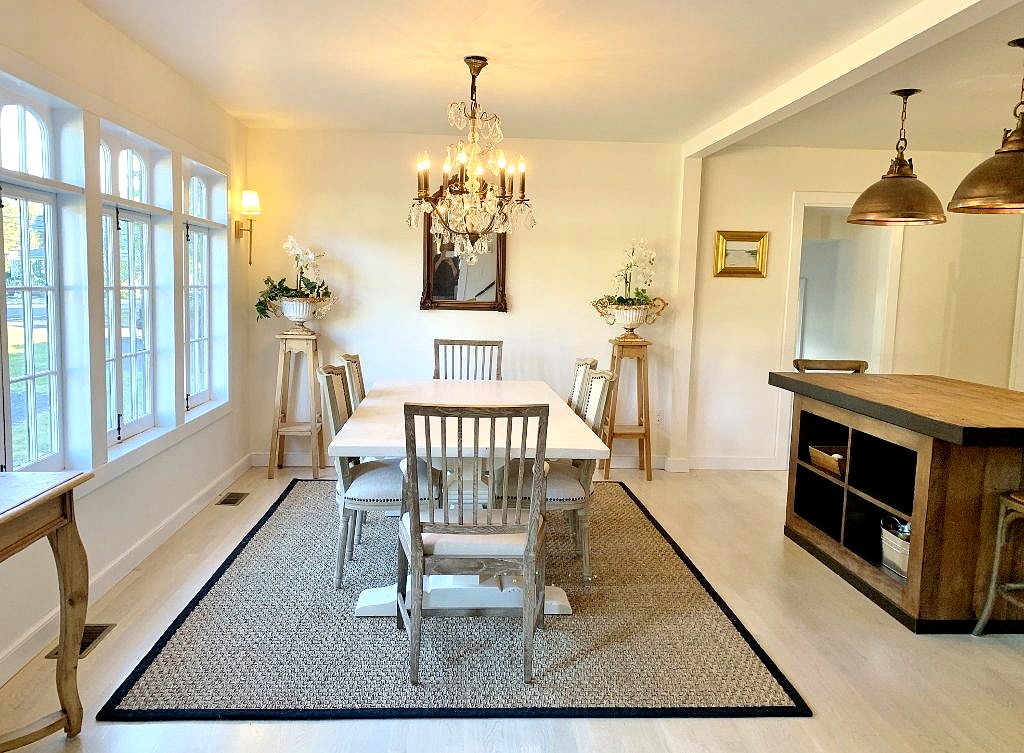
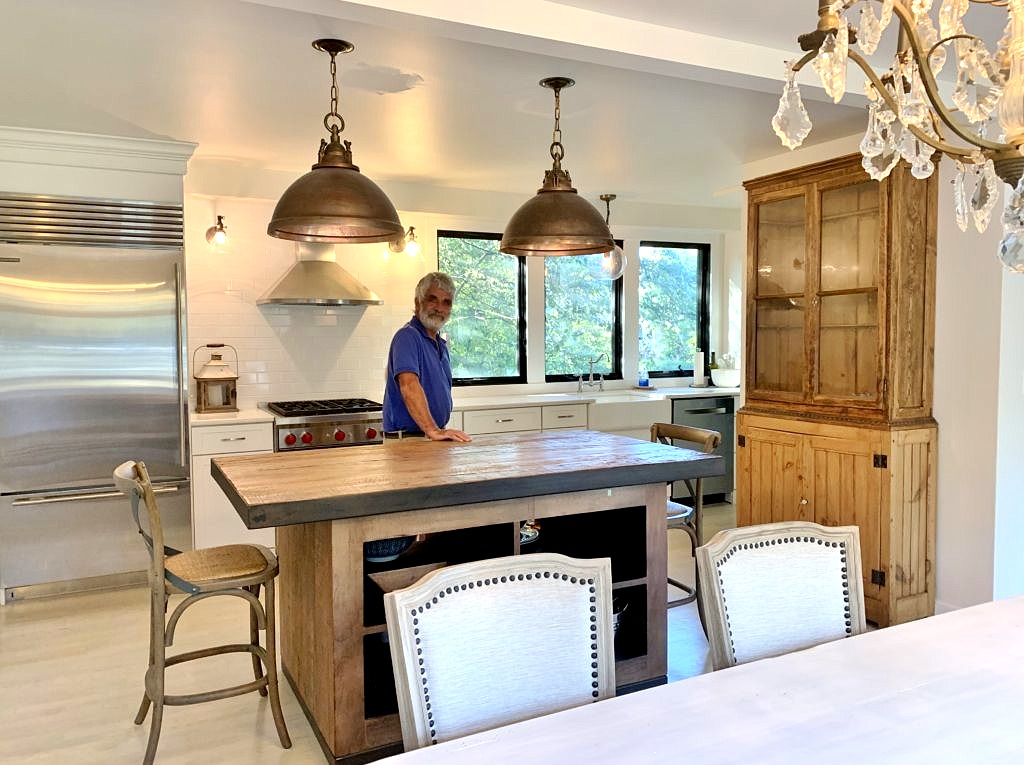
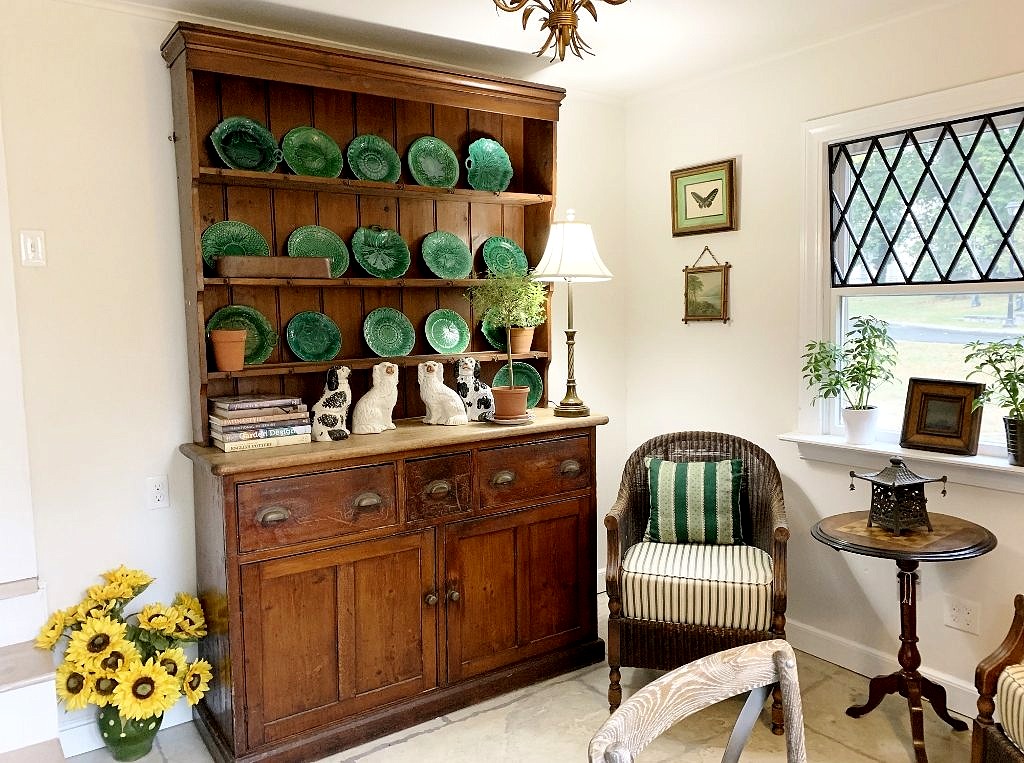
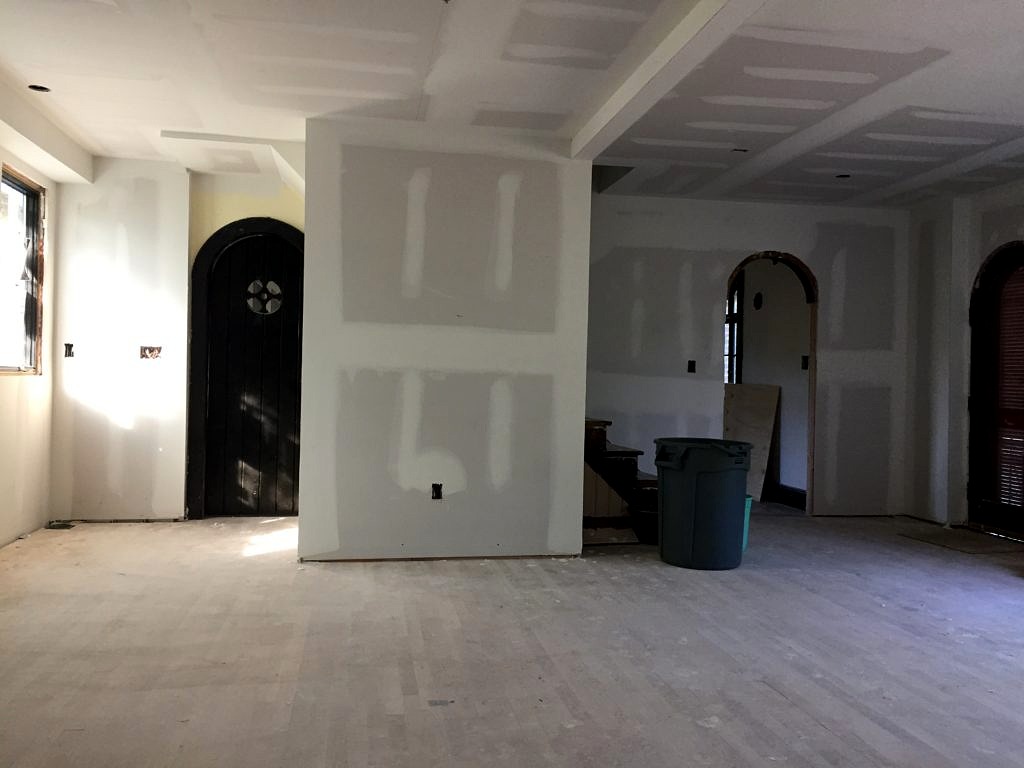
The next item on the list was a bit discouraging. Evidently  light or bleached floors are out–I’ll just have to concede that I may never be in because this is my house in the photo below. I have never had dark floors and really tried to give them a go in this house but there were just too many different woods involved (five) and no one darker stain would work on all of them.

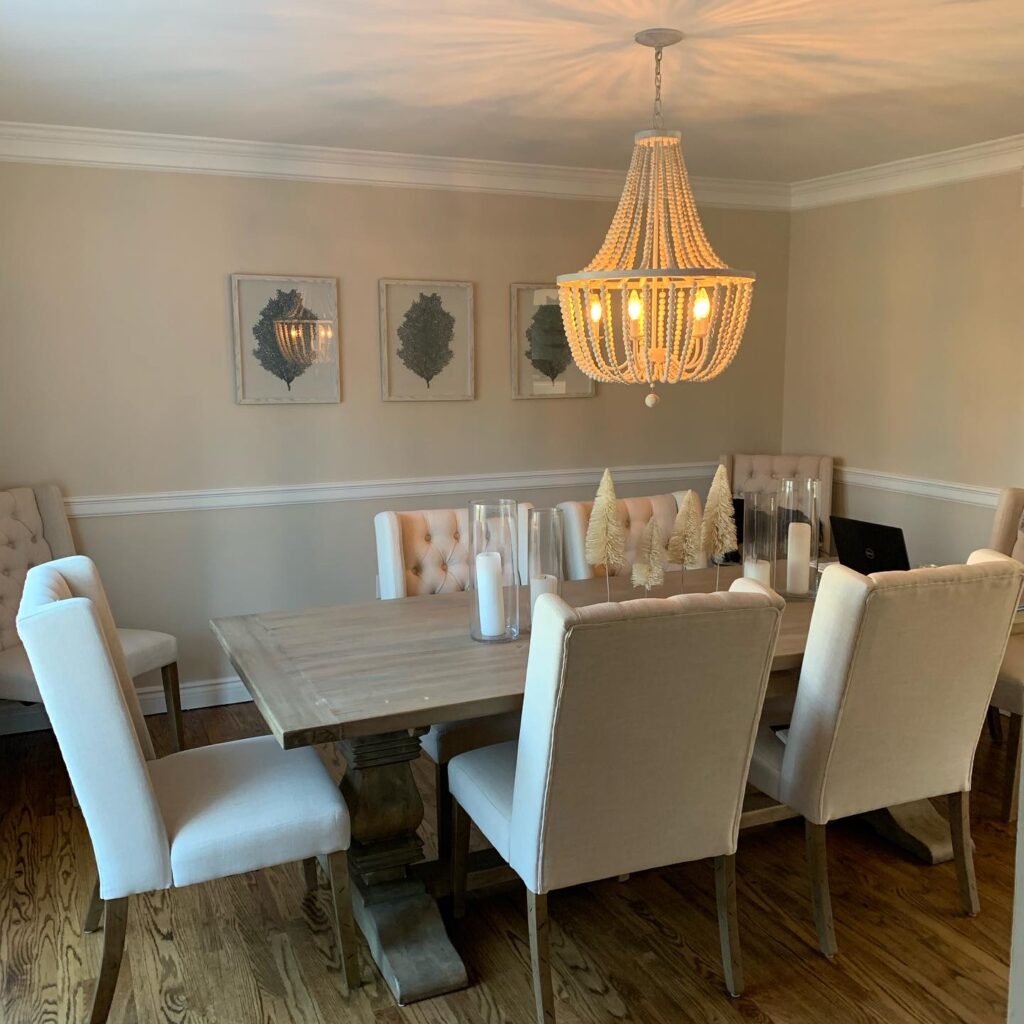
Also I am fairly certain floor color has to relate to what is going on in your house–not the world at large. I think in my case dark floors would have sucked the life out of this room.  The ceilings are low, the room isn’t huge and I am trying to carve out separate but equal prep and dining spaces.

Next up was wall color. The chief decorating honchos have been trying to dislodge grey as America’s go hue for several years now–unsuccessfully. Now they are all about deep olive greens (and clearly too young to remember the avocado kitchens of the 70’s) earthy reds and ochres–which is code for mustard–so beware. 

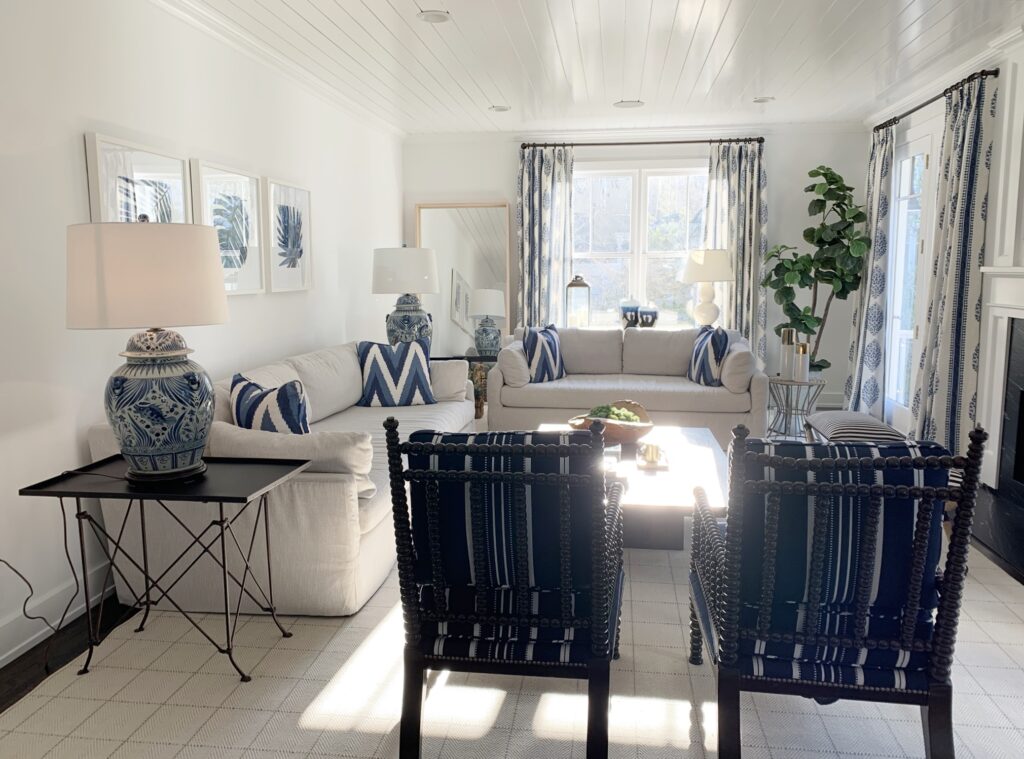
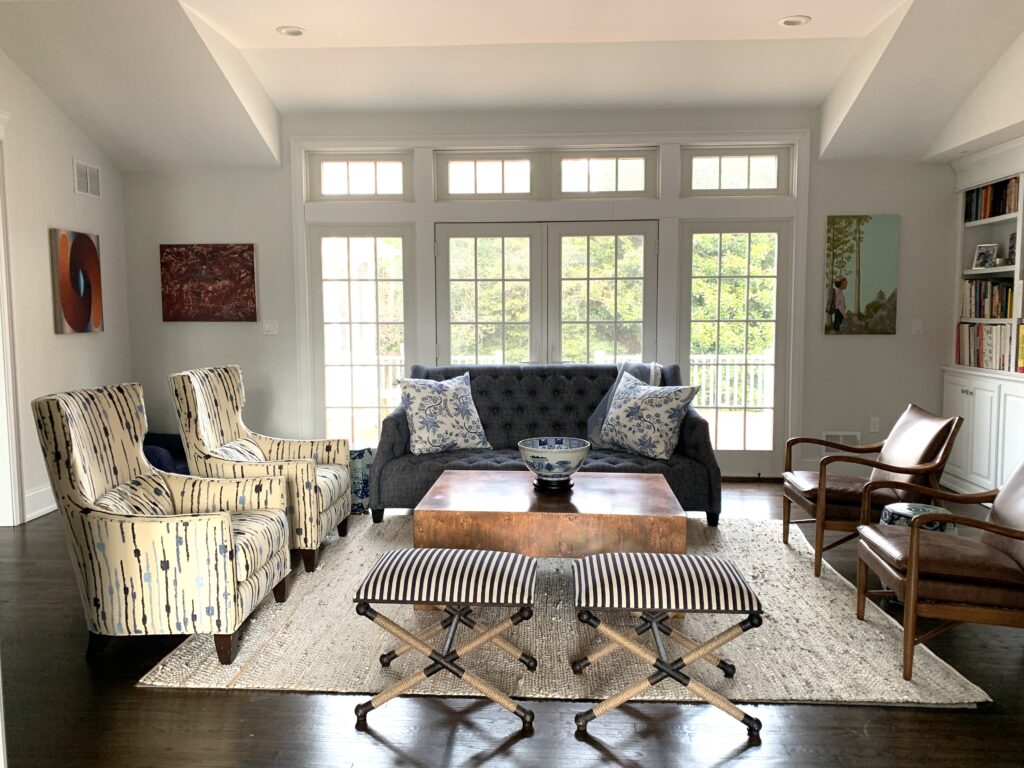
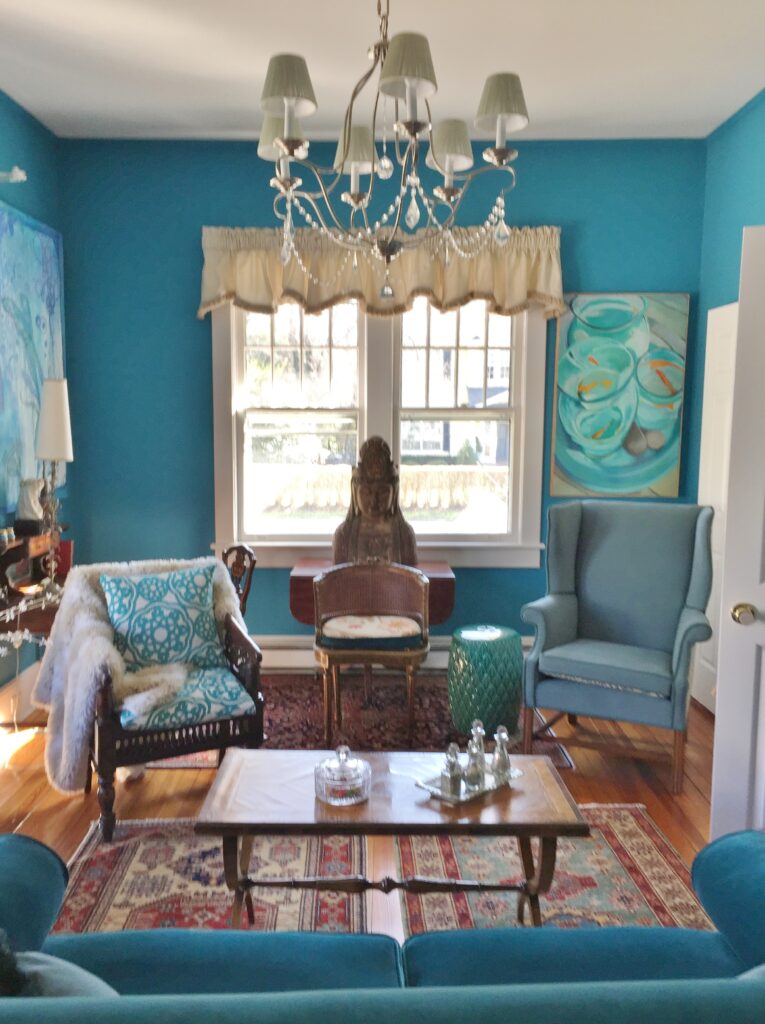
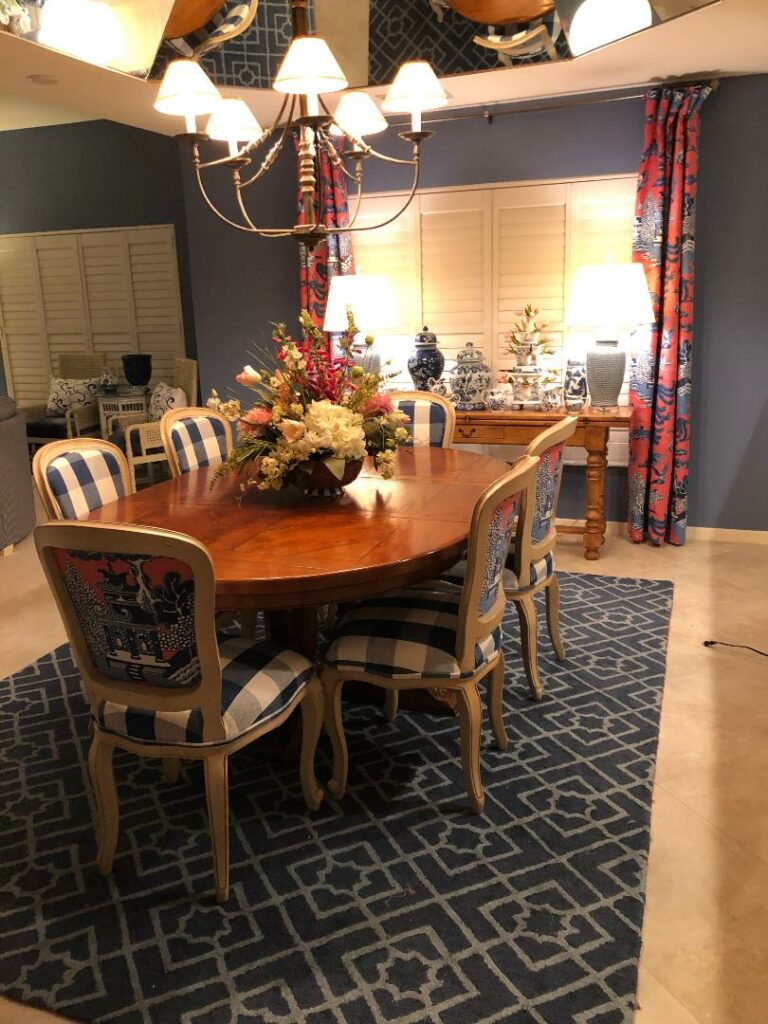
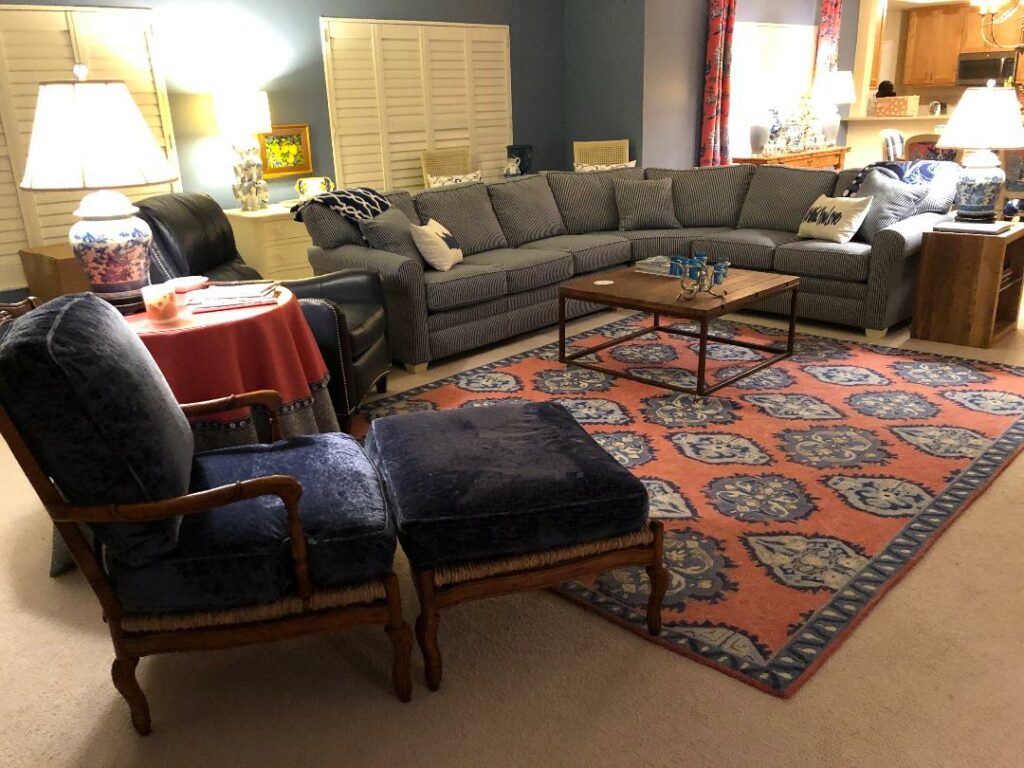
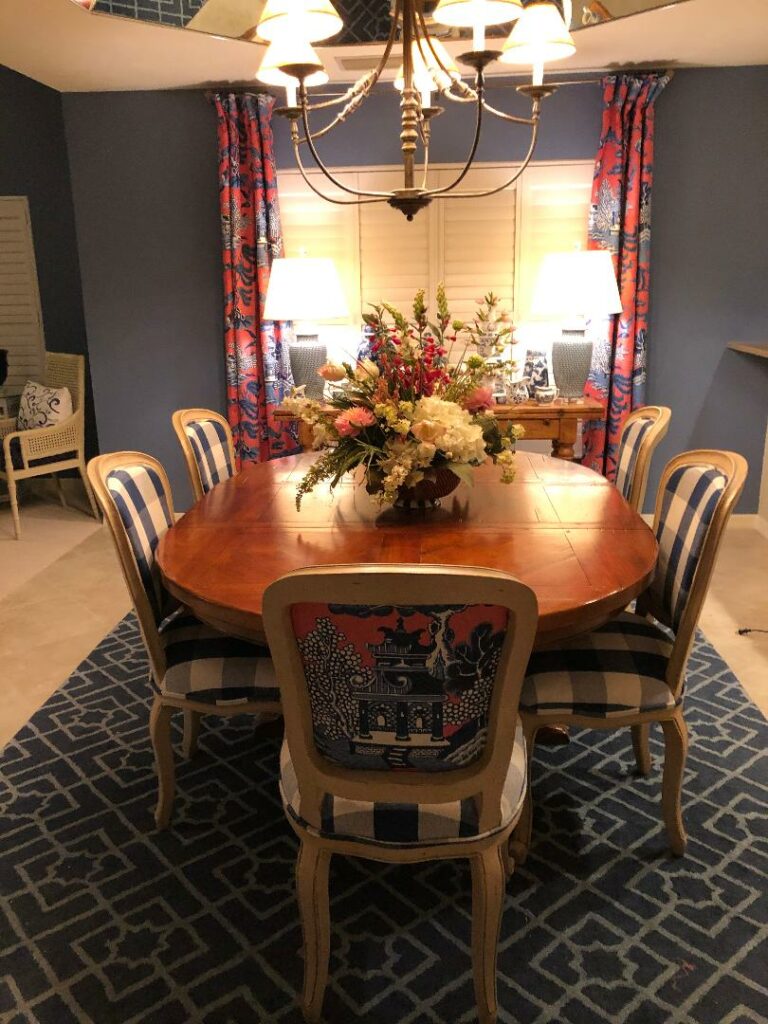
The color I noticed most towards the end of last year and hope to see much more of in the future is blue. Perhaps my most favorite house I visited last year was a rhapsody in blue. Take a look at Gloria’s Rumson living room:

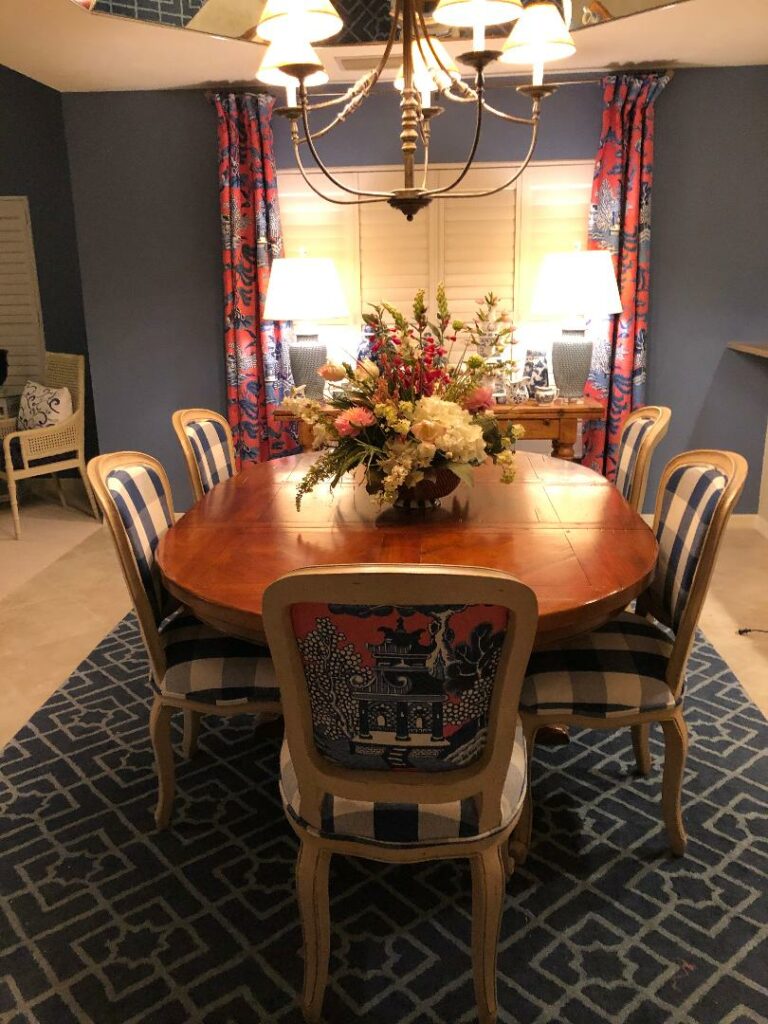
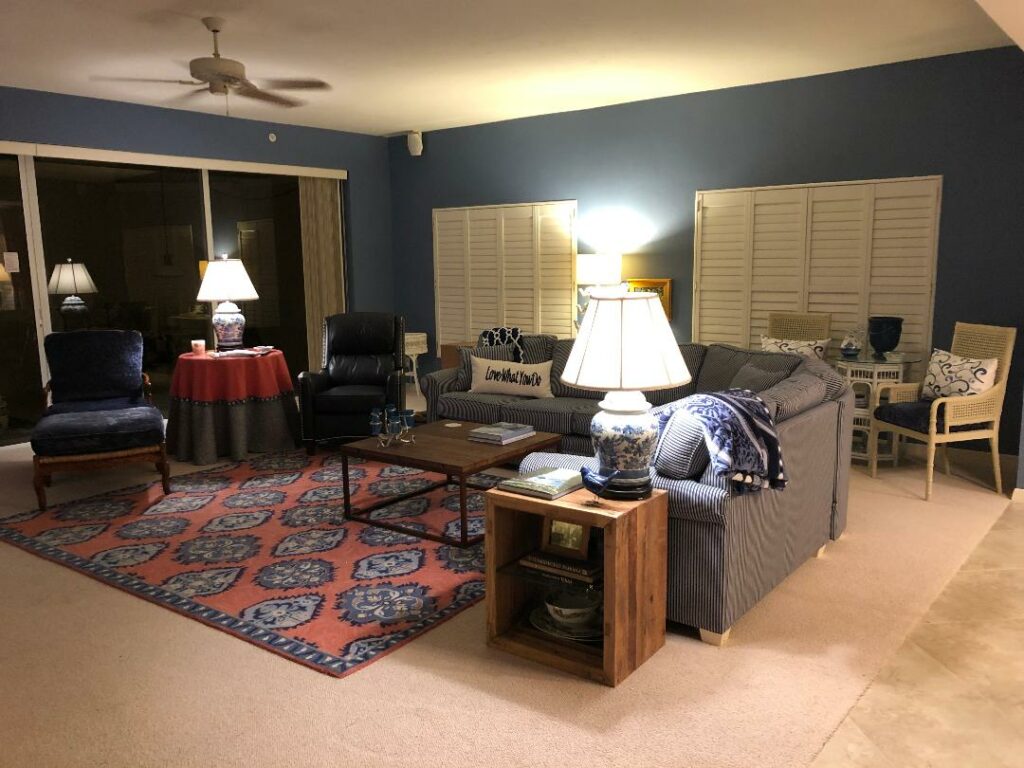
And I love this beautiful blue that Lori used in her west coast Florida condo.

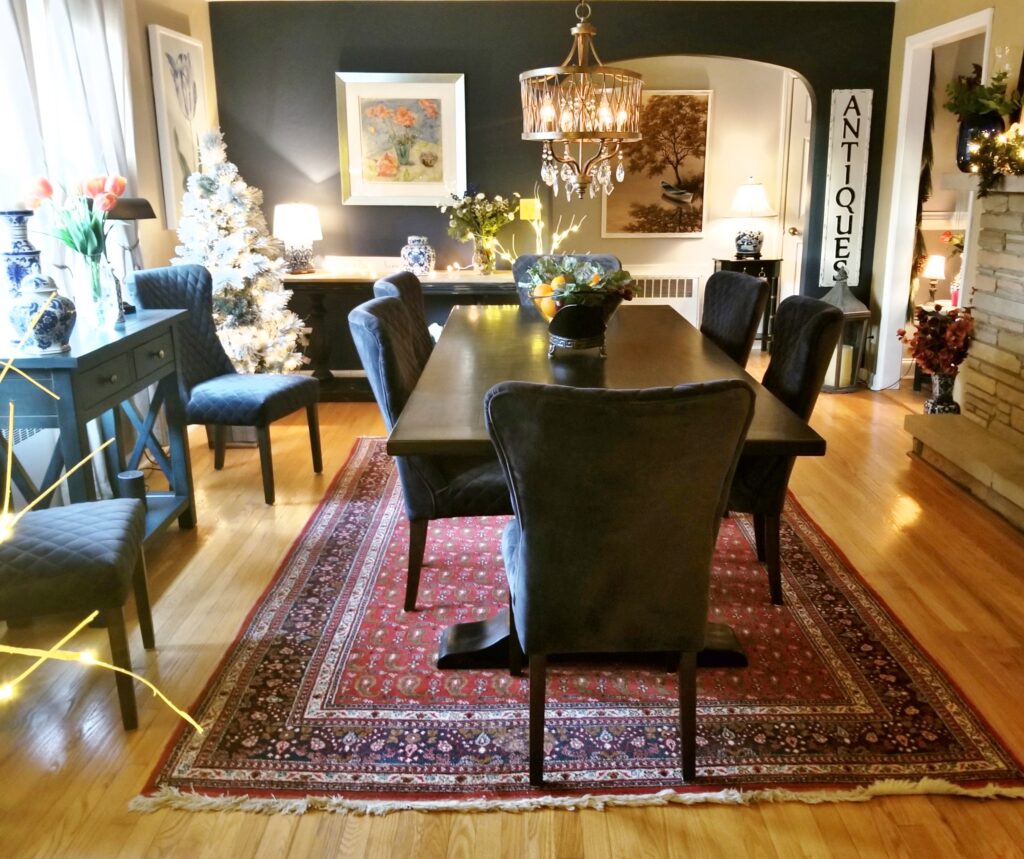
And how can I ever forget David’s vibrant dining room in Tinton Falls?  Trust me, you cannot go wrong  with blue!!!

Their next observation was one I definitely agree with–straight edged ultra modern furniture is out: “We’re embracing the feminine touches and a soupçon of the romantic,” said Ms. Huh, a renowned NYC designer. Like Lori’s, Gloria’s and David’s rooms in the photos above, why shouldn’t furniture be pretty? But I also must confess mid-century modern (which was all there was in my youth and seems to be all the rage now) never floated my boat.

But there is hardly any antique period: Victorian, Queen Anne, Edwardian, you name it, that I don’t love–in moderation. And you can see all those influences in the furniture I chose for my living room.  Note the antique Biedermeier secretary, the oak drop leaf table that was Keith’s grandmothers, alongside a glamorous classic Chesterfield sofa and the delightfully  proportioned high hoop-backed wicker and wood Chippendale influenced armchair. Whew.

All of the upholstery is by Hickory White, the higher end division of Sherrill Furniture, and what we carry in the store. Full disclosure–I originally had planned on a navy and white scheme for this room but by the time the house was ready for furniture we had already sold it all! Fortunately we found these Hickory White showroom samples at the spring High Point Furniture Market and now, I think, they look like they were made for this room. Kudos to the great designers at Sherrill who made this all work!

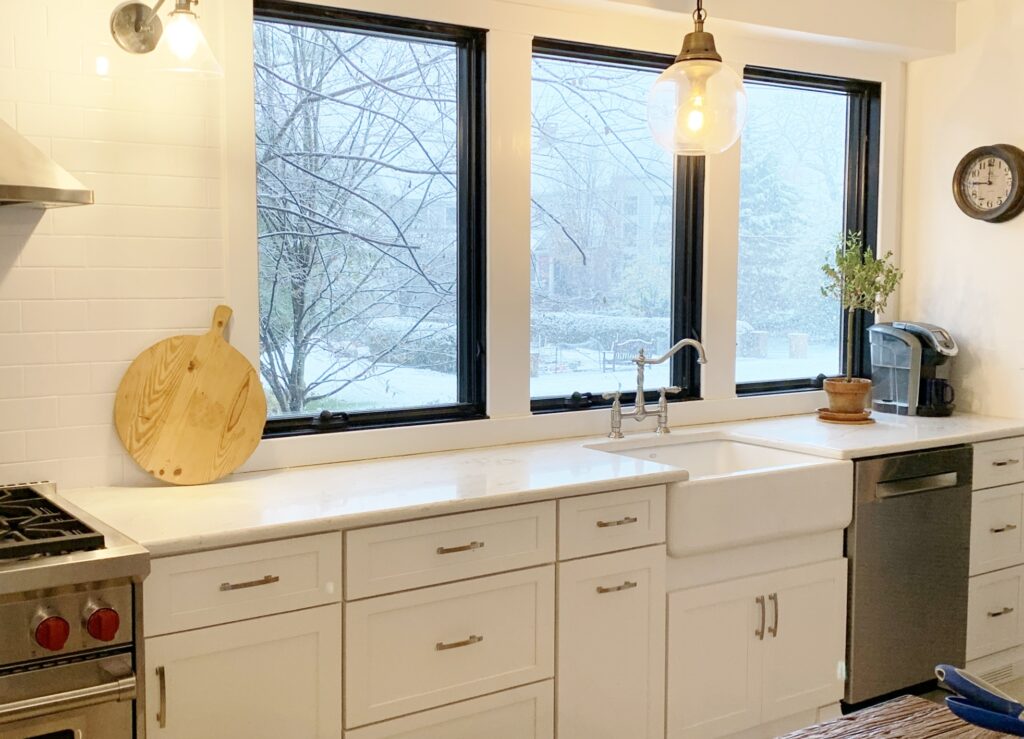
Meanwhile back to the out list: colorless stone is totally over. But I adore my practically white faux marble quartz so much that I will just have to dare to be square. Like many of you I’d had it with the dark, swirly granites and really wanted to go with a more subtle Carrara marble but knew that ain’t happening with me, the original messy chef, at the wheel.

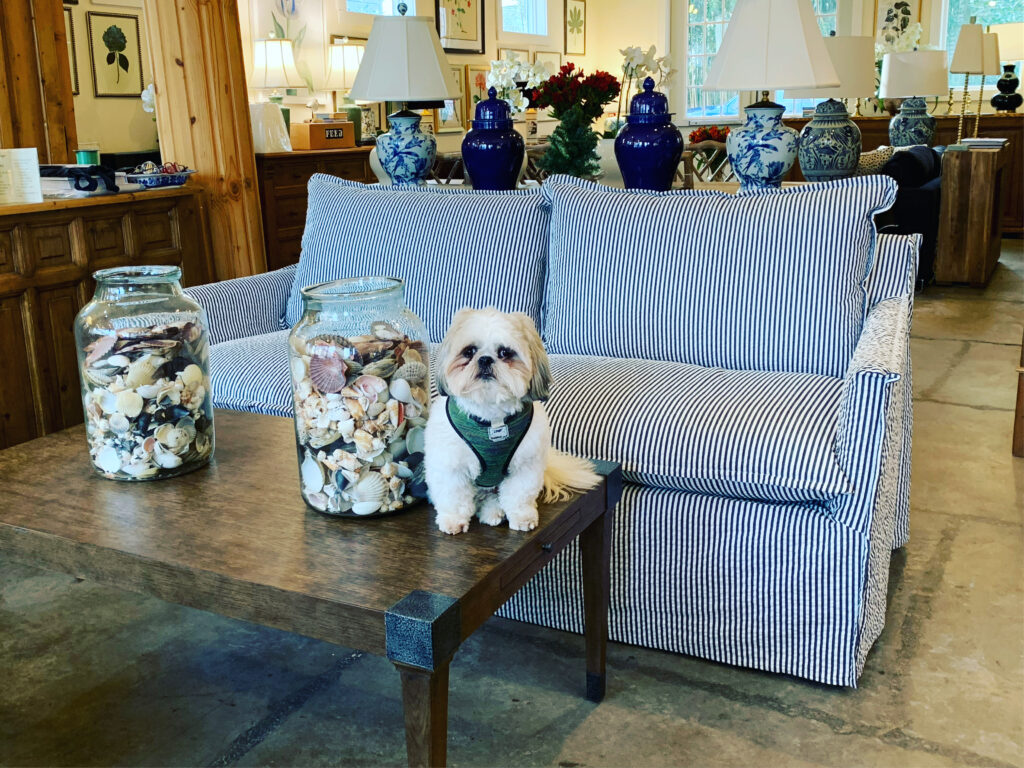
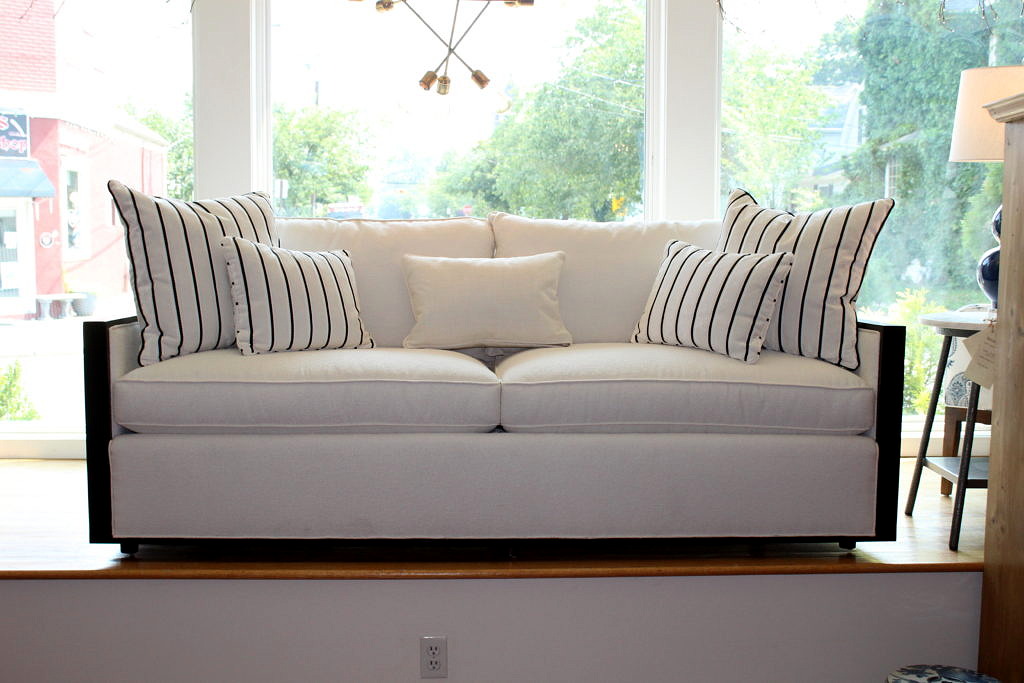
Next was slipcovers. Frankly I see nothing wrong with slipcovers and just picked up a Century sofa for the store in a dark navy and white seersucker slip that would look amazing in a small family room or beach house. But the point of the article was who needs slips when there’s tons of wonderful performance fabrics available now?  Providentially I do have a fabulous Century sectional in off-white performance fabric on the floor as well…
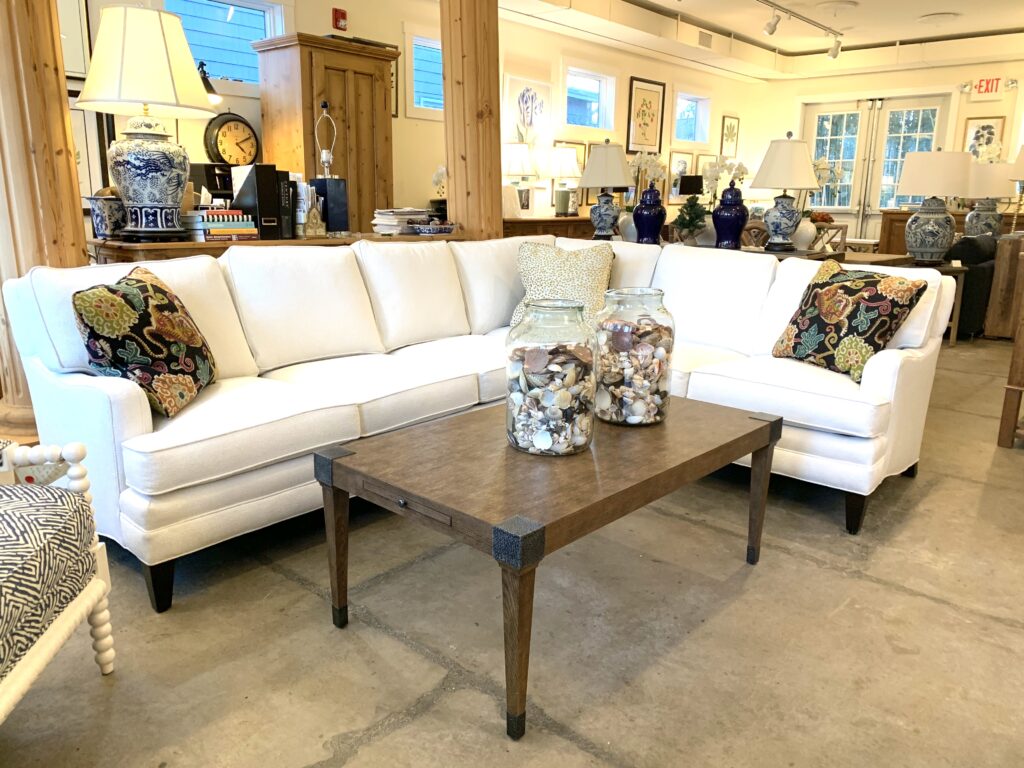
So, in conclusion, I think the point of the Wall Street Journal article is kind of well–pointless. What matters in home decor is not what anyone else, no matter how famous, thinks is in–or out–it is about your taste and what you like. 

It just makes sense to buy the best furniture you can afford, with an eye towards value and longevity, and don’t forget about comfort.  Please sit on that sofa before you buy it–all couches were not created equal. My advice would be to remember that paint is relatively cheap so go ahead and experiment with color on your walls, but floors and kitchen counters are expensive to redo so proceed with caution.

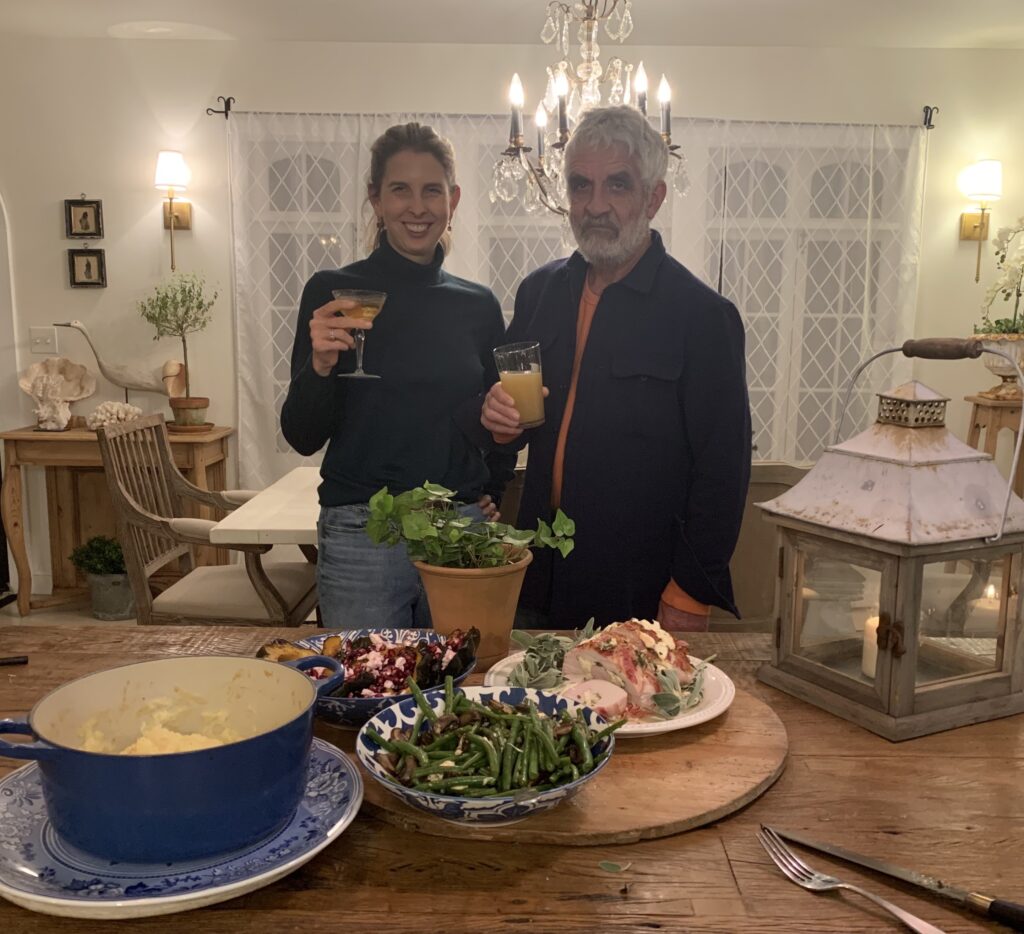
And in the end, let’s face it, the whole point of having a home is to have a place of your own to feast in and be festive. One of the best dishes we had all year was stuffed turkey breast wrapped in pancetta.  We’ve been trying to wean ourselves from beef and pork (not easy) and had already done the whole roast turkey thing for Thanksgiving and were beginning to despair of ever finding a meal worthy of Christmas when our daughter, Laird, found this recipe from Saveur .  Try it; you’ll love it!

Happy New Year.

Pancetta-Wrapped Roast Turkey Breast (Turketta)

Pancetta-Wrapped Roast Turkey Breast (Turketta)Matt Taylor-Gross

This preparation is inspired by porchetta—an epic Italian pork roast, the modern version of which often features a tenderloin capped with herbs and seasonings and wrapped in a layer of crispy, skin-on pork belly. The lean turkey breast is coated with a garlic and sage compound butter and layered with smoky cheese, enhancing the meats juices. And a thin layer of pancetta locks in the flavor and browns to a crispy exterior.

What You Will Need

Yield: serves 4-6
Time: 1 hour, 50 minutes

Ingredients

  • 4 tbsp. (2 oz.) unsalted butter, at room temperature
  • 14 cup minced fresh sage leaves
  • 4 medium garlic cloves, minced (1 Tbsp.)
  • 1 tsp. fennel seeds
  • Kosher salt
  • Freshly ground black pepper
  • 1 whole, single boneless turkey breast, skin-on (2 lb. 2 oz.)
  • 2 oz. smoked mozzarella, diced
  • 8 oz. pancetta, sliced about ⅛ inch thick, then unrolled slightly
  • 2 tbsp. extra-virgin olive oil

Instructions

  1. In a small bowl, add the butter, sage, garlic, and fennel. Mix well with the back of a spoon and season the mixture with kosher salt and freshly ground black pepper.
  2. Use a long, thin knife to butterfly the turkey breast, carefully slicing it along the longer side, and unrolling it until it is a long, even strip, about 1½ inches thick. With the skin side facing down, spread the turkey breast evenly with the compound butter, then top with the smoked mozzarella in an even layer. Starting with the narrow end, tightly roll up the meat so that the skin is once again on top and the seam is on the bottom. Neatly layer the pancetta slices over the skin side and use cotton kitchen twine to tie the turketta tightly 3 times crosswise and once lengthwise. Refrigerate the prepared meat (unwrapped) until you are ready to cook it, up to 24 hours ahead of time.
  3. 2 hours before you plan to serve, preheat the oven to 375°F. Set the turketta in a large cast iron skillet or medium roasting pan and brush it all over with the olive oil. Roast until a thermometer inserted into the thickest part registers 130°F, 55–60 minutes. (The lean meat will continue cooking in the hot skillet for several minutes out of the oven, so we prefer to pull it out a few degrees before it is fully cooked to around 150°F.) Remove from the oven, tent the turketta and the hot skillet loosely with foil, and let it rest at room temperature for 10 minutes.
  4. Immediately transfer the roast to a cutting board; cut away the twine and discard. Thinly slice the roast crosswise, and serve hot.
  5. This last note is from me. Do not fret about butterflying the turkey breast–have the butcher do it! We had great luck with the team at Sickles Market in Little Silver. And try to find smoked mozzarella–not easy but worth the effort.
Laird and Keith and our Christmas feast.

The West Coast Florida Condo

Clam and Sausage Stew Recipe

I first met the woman who owns this spacious west coast Florida condo over ten years ago. One of our vendors had just started importing French Country antiques–made in China–and the quality and design were amazing for the pricepoint. (That that vendor later surfaced as one of the new RH’s leading suppliers is a tale for another day). Long story short it was this country French look that first inspired Lori, a pharmaceutical executive living in Westfield, to visit British Cottage.

Lori is at the corporate executive level that enables her to keep her digs at home intact when she is moved to a new state–so she basically needed everything. While Westfield is one of New Jersey’s premier stockbroker belt towns, the houses, though pricey, are not huge. The table you see in the photo above is just 48 or 54 inches round but with both leaves in it jumps to a respectable 90 inches. Since her Westfield days I think this table moved to her new house, and job, in Philly but now looks right at home in the sunshine state.

Heaven knows where the console table in the background was in Westfield; I think possibly behind a sofa. We loved selling this table because closed it was just 14″deep but with the hinged leaves open it was 30″ wide and could seat eight. I think the moral of the story may be if you buy wisely in the first place, you will have bought well in the long run.

When Lori was in Westfield she covered all of her walls in fabulous patterned Thibaut wallpaper in the most vibrant of jewel tones; I’d never seen anything like it before. Some of us might get adventurous in a powder room, or two, but Lori did the whole goshdarn house! So I was not surprised to see all these saturated colors in her Florida digs. Go Lori.

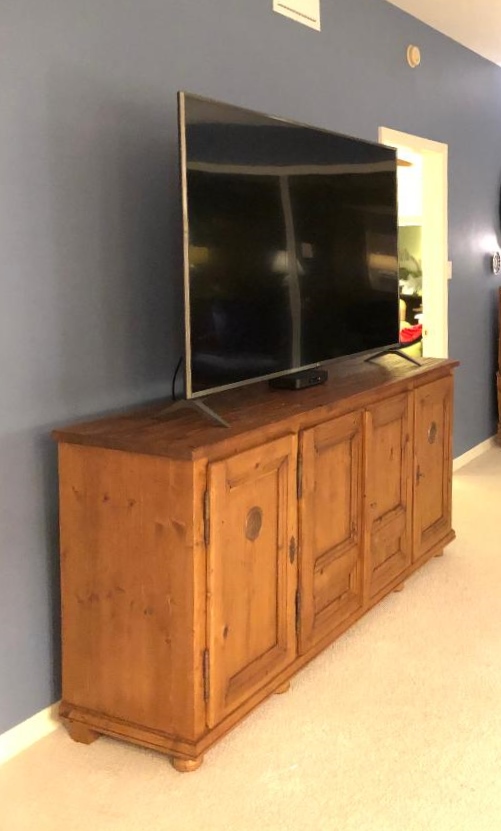
The condo is basically a great big concrete box but you hardly notice that with all the layering Lori has going on. The tile (limestone or marble?) is a sea of big beige but when topped with what looks like sisal and another layer of boldly patterned carpet you can see the living room take shape. She picked up the coffee table and the end table along with a few other pine pieces when she whizzed by in October and just now sent me these snaps to show how she pulled an entire decade of purchases all together.

The cabinet anchoring the television is from our factory in Hungary where they take antique pine doors and cut them down to repurpose into cabinets of varying sizes.

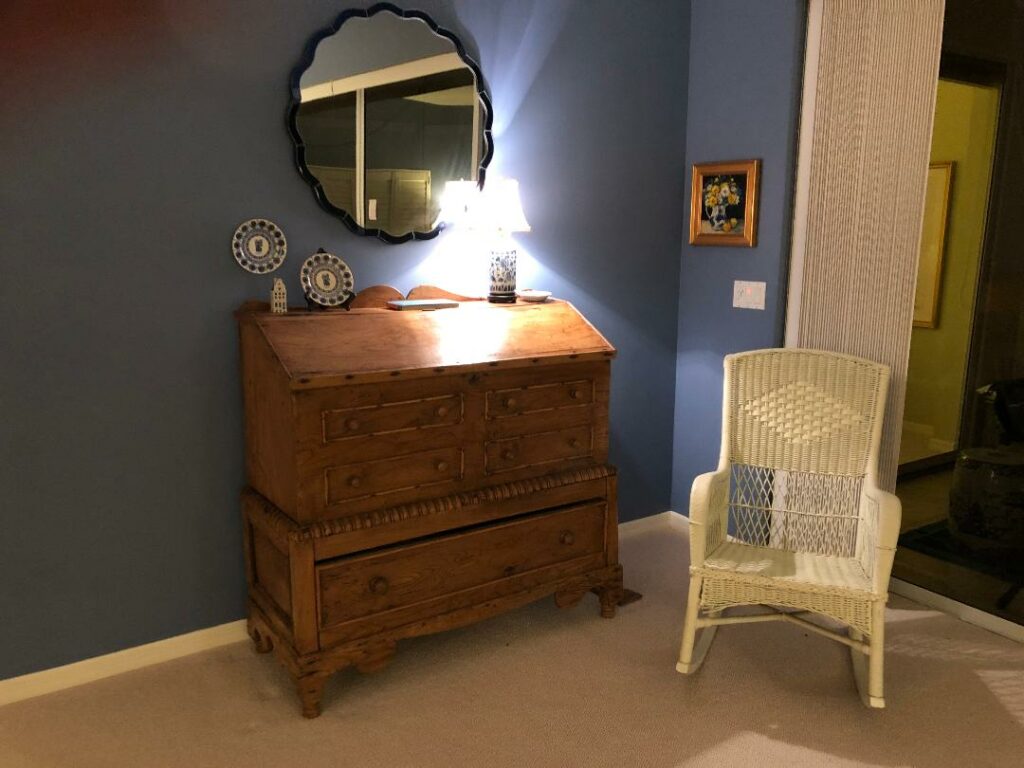
The antique pine and elm mule chest from Ireland in the photo below is one that Keith originally bought maybe 25 years ago when all we did at British Cottage was import antique English and Irish pine. I hated to part with it but there is only so much furniture a woman can hang on to and not be deemed a hoarder. 

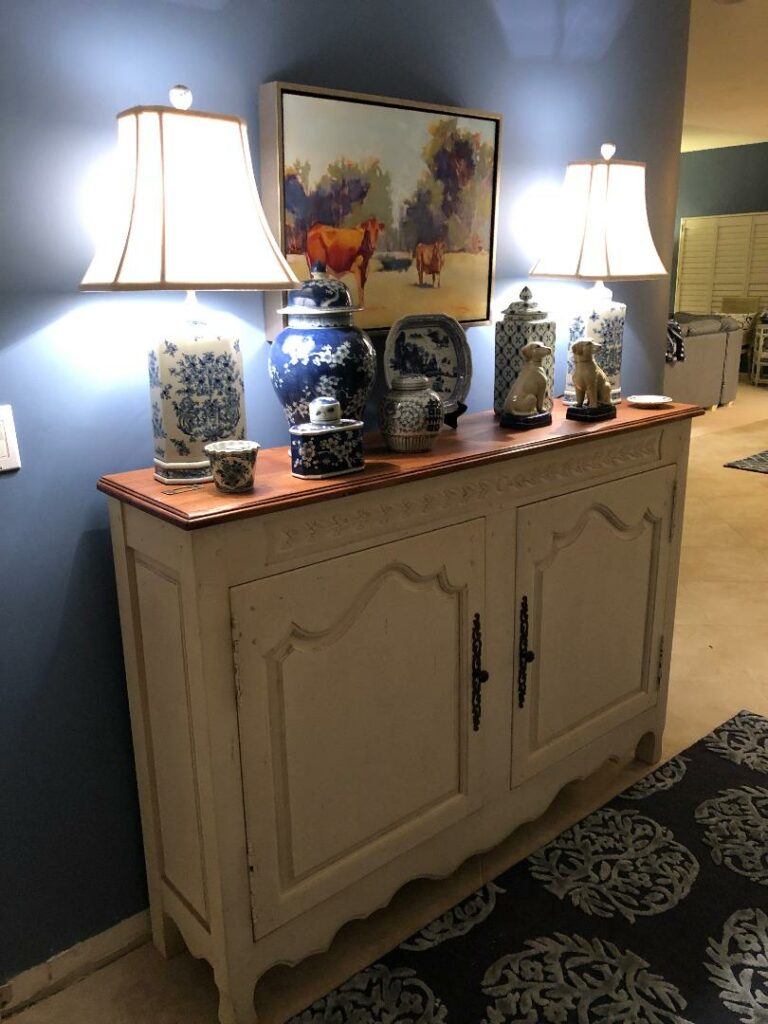
This cabinet, in what looks to me to be the foyer is from our French country collection (sadly bygone) and Lori bought most, if not all, of the blue and white lamps and ginger jars you see scattered throughout at British Cottage too. I will have to ask her what the wall color is; I love it.

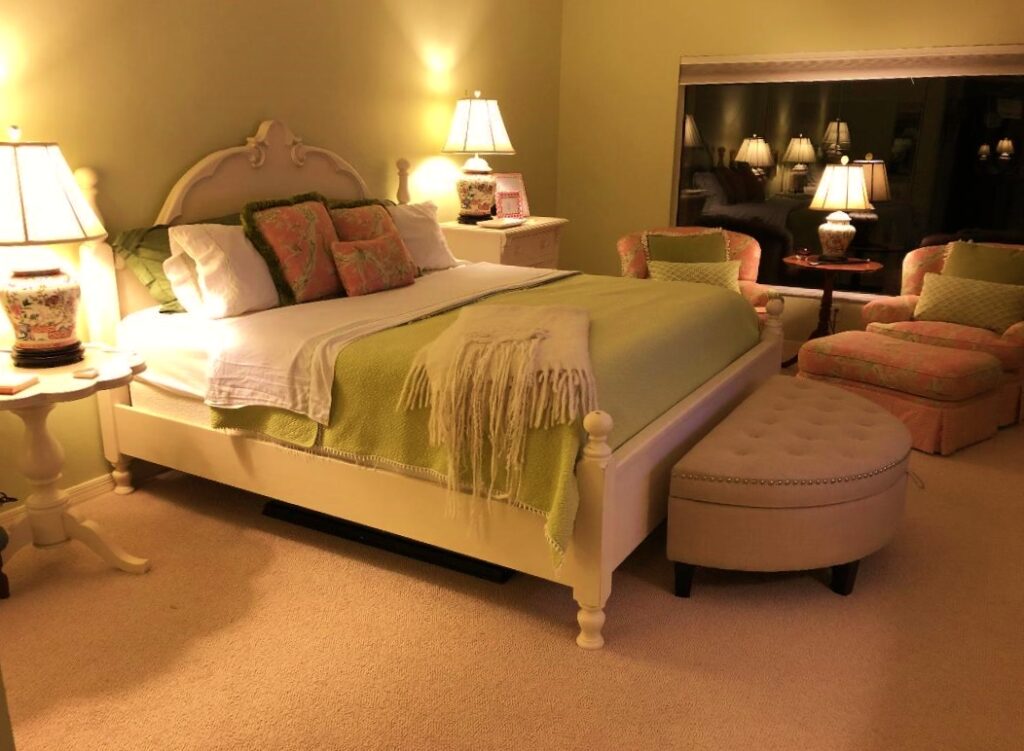
Too much blue you say. Pshaw I say–this is just the right amount. But Lori is no one-trick  pony. Her bedroom is the softest of greens punctuated by the perfect amount of pink. The bed is king sized and part of our British Cottage bedroom collection and the lamps are from us too.
Sadly that’s all the photos I have. I’m sure there is more to come: window treatments, artwork, and more–so let’s just say–“To be continued…”

While we wait for Lori to send me a recipe (you just know she has to be as fantastic in the kitchen as she is everywhere else) I’ll share this recipe that I saw in the Wall Street Journal last week. Full discretion I have not actually made it yet but may tonight. I mean clams and sausage, how can you possibly go wrong?

SHELL GAME The combination of briny clams and spicy sausages makes this comforting one-pot stew a winter classic. PHOTO: JAMES RANSOM FOR THE WALL STREET JOURNAL, FOOD STYLING BY HEATHER MELDROM, PROP STYLING BY NIDIA CUEVA

ByKitty GreenwaldDec. 4, 2019 2:22 pm ET

THE CHEF: JOHANNE KILLEEN

ILLUSTRATION: MICHAEL HOEWELER

Her Restaurant: Al Forno in Providence, RI

What She’s Known For: Cooking that applies an Italian sensibility to Rhode Island’s bounty.

THOUGH THE COOKING at Al Forno in Providence, R.I., typically skews Italian, certain dishes veer in a different direction. This clam roast, for instance. “The idea behind it is definitely more Portuguese,” said chef-owner Johanne Killeen —a reflection of Rhode Island’s rich Portuguese heritage.

In Ms. Killeen’s third Slow Food Fast recipe, clams and sausage stew with tomato, onion, endive and minced chiles. Once the pot boils, it shifts to the oven to roast until the clams pop open and their brine cooks down along with butter and white wine. The chef recommends parboiling the sausage links before adding them to the clam roast, to remove excess fat. As the sliced sausages finish cooking with the clams, they release their flavor into the briny broth.

This delicious one-pot meal has remained on Al Forno’s menu for almost 40 years—a testament to the area’s exceptional local seafood as well as its vibrant Portuguese community. “Rhode Island’s clams come from clean waters,” said Ms. Killeen. She’s sourced them an hour from Al Forno since 1980. In wintertime, when little else grows that far north, the clams, and this warming stew, are at their best.

Clam and Sausage Stew

TIME: 30 minutes SERVES: 4

Kosher salt

4 (about 1½ pounds) hot Italian sausages

48 littleneck clams, cleaned and scrubbed

3 large onions, peeled and thinly sliced

2 tablespoons minced garlic

1 jalapeño chile, seeded and finely chopped

1 Scotch bonnet chile, seeded and finely chopped (optional)

2 medium endives, sliced into ½-inch rounds

½ teaspoon red pepper flakes

¾ cup white wine

1½ cups canned chopped tomatoes

6 tablespoons unsalted butter

3 scallions, julienned

1 lemon, quartered

Crusty bread, to serve

1. Preheat oven to 500 degrees. Fill a small pot with salted water and bring it to a boil over high heat. Add sausages and parboil until they partially cook, about 5 minutes. Drain and set sausages aside. Once cool enough to handle, after about 8 minutes, slice sausages into ½-inch rounds.

2. In a wide, heavy pot, arrange clams in a single layer. Top with onions, garlic, jalapeño, Scotch bonnet, if using, endives, red pepper flakes, white wine, tomatoes and butter. Bring everything to a boil over high heat. Add sliced sausages, and transfer pan to oven. Roast until clam shells just begin to open, about 8 minutes. Turn clams and roast until shells fully open, about 7 minutes more.

3. Distribute clam roast among 4 large heated bowls, and pour broth over top. Garnish with scallions and lemon wedges. Serve immediately with bread.

The Holmdel Farmhouse

Roasted Lemon Chicken Thighs with Artichokes and Kalamata Olives Recipe

Keith and I have owned our store for 33 years and during that time our customers have had babies, moved, had more babies, moved again and then, the next thing you know, everyone flies the coop and the nest is suddenly empty.
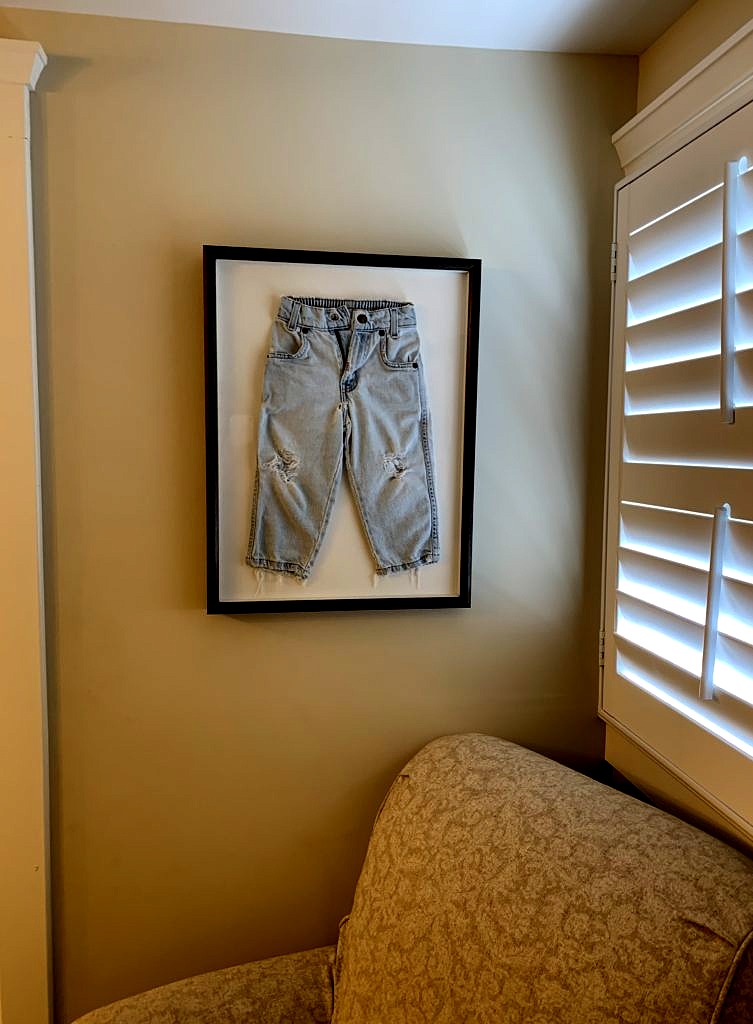
However, for one family in Holmdel, that did not happen. With their kids mostly grown up they downsized from a more or less mansion to a relatively modest farmhouse on a couple of acres down the street–but no one is budging. The upstairs is chock full and there are a couple of more kids living over the barn. Luckily Mom and Dad are happily ensconced in their downstairs suite and convinced the more the merrier.

I can’t remember when they first came to British Cottage but I do remember toddlers, and lots of them. The young family had just spent a couple of years in London and were happy to fill their spacious home with British pine furniture. They bought hutches and armoires and large farmhouse tables and lived happily ever after until it was time for a change…

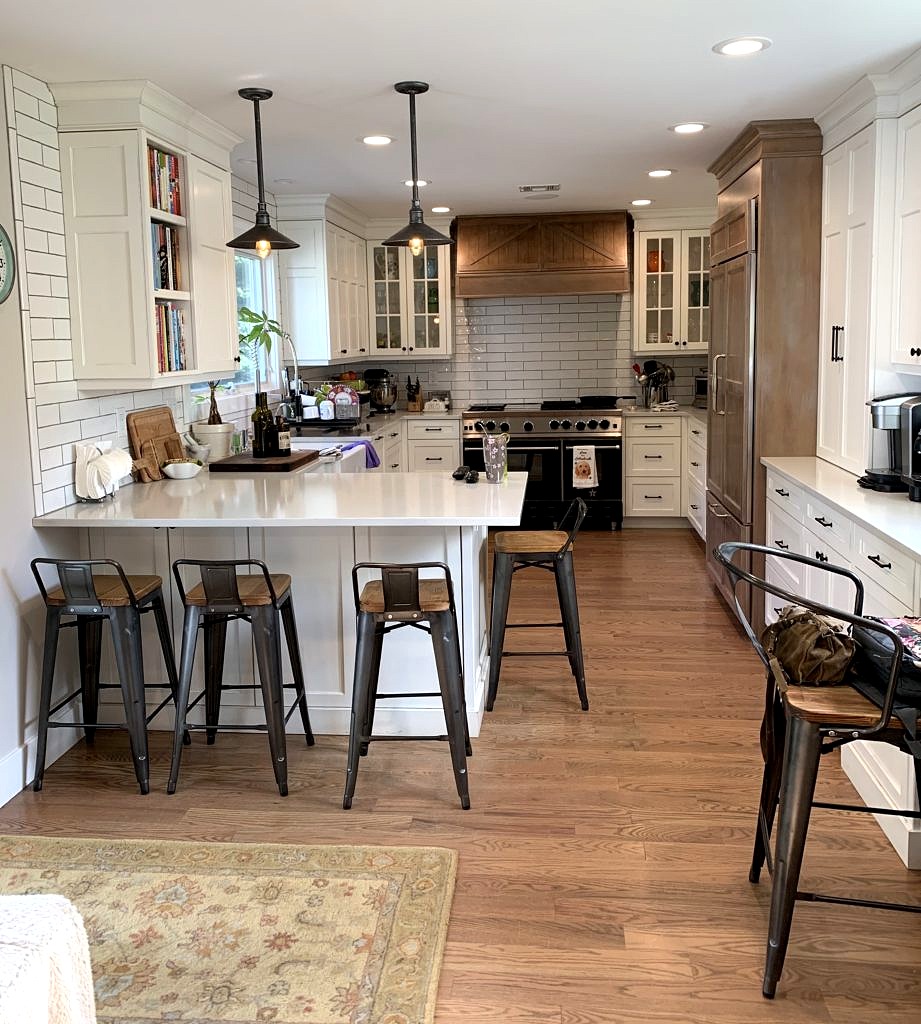
And what a change! On a gorgeous fall day I popped in to see how they transitioned to the new house, which they transformed from a chopped up, timeworn, century old building into a seamless home perfect for modern living. And it was immediately apparent that what they lost in square footage they gained back in charm and function. And I am pleased to say that they managed to reuse most of their British Cottage furniture–kudos to them. (We like to think we sell forever furniture but in this day and age of mid-century modern minimalism I am not so sure about that).

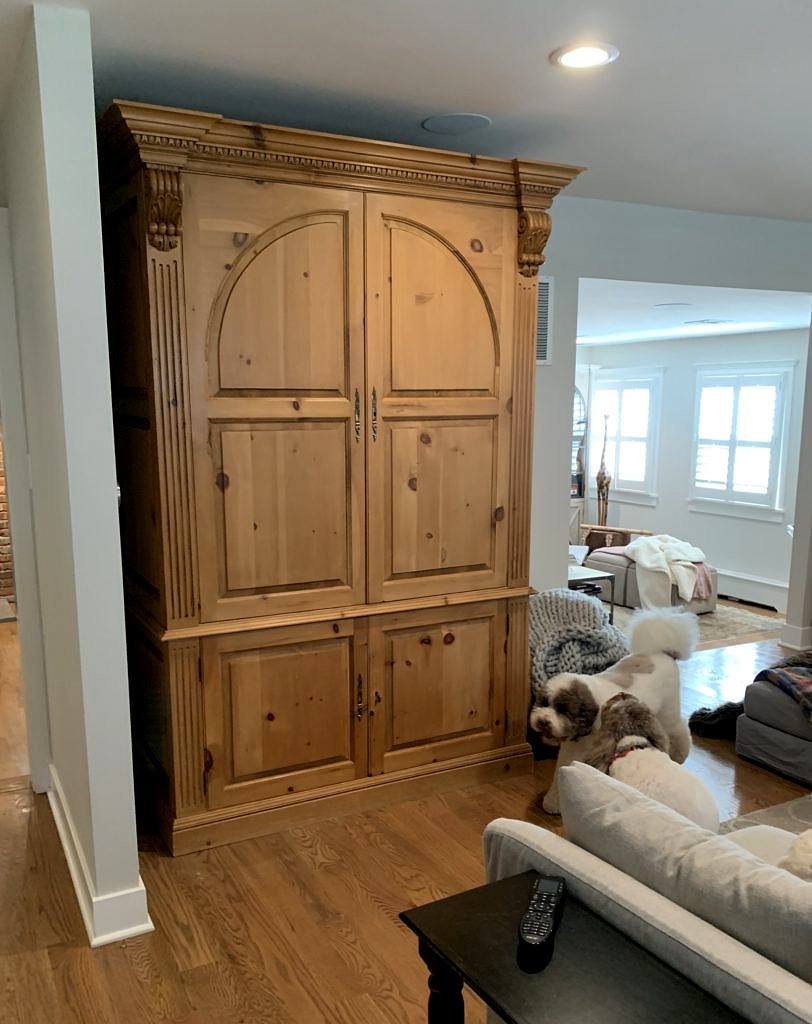
Take for example this television armoire. We still get calls from people who bought one of these  in the eighties asking if we want to buy it back. (The answer is no). But I always say repurpose it; use it to store your office equipment, tools, scuba gear, golf clubs whatever. In this case this cabinet,  from their former gigantic master bedroom functions as the hall closet and is chock full of all the stuff they don’t want to see but need to have. Is it big? Sure. But a built-in closet would take up just as much space, and it wouldn’t be as near as architectural.

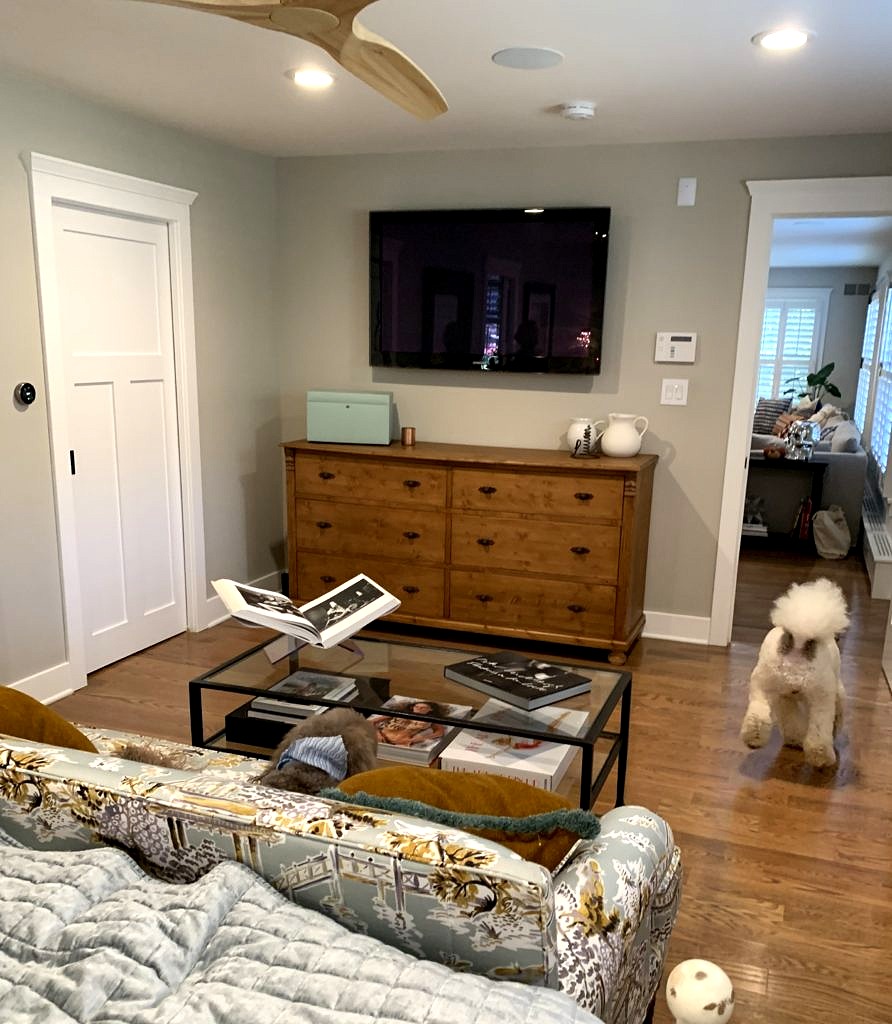
Now, in their much smaller master bedroom, the television is mounted on the wall (over the British Cottage double dresser). Perfect.

They were able to use their British Cottage bed and nightstands in the new bedroom. Love this modern farmhouse look with the shiplap wall–which is what you might expect to see from a Joanna Gaines fan, and who isn’t these days?  Not so typical is the Century Furniture loveseat in the chic chinoiserie print–clearly this homeowner has her own ideas about color and design. Although I have no clue how she got dogs to match the decor; maybe this will be the start of a new trend!

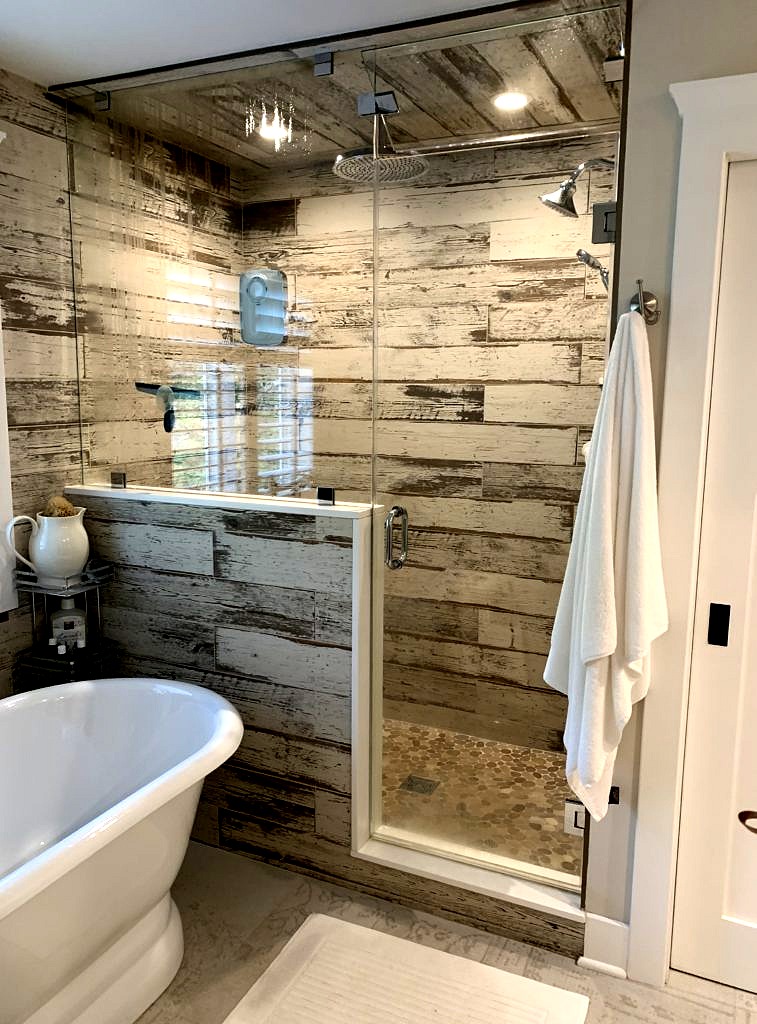
And boy do I love the master bath!

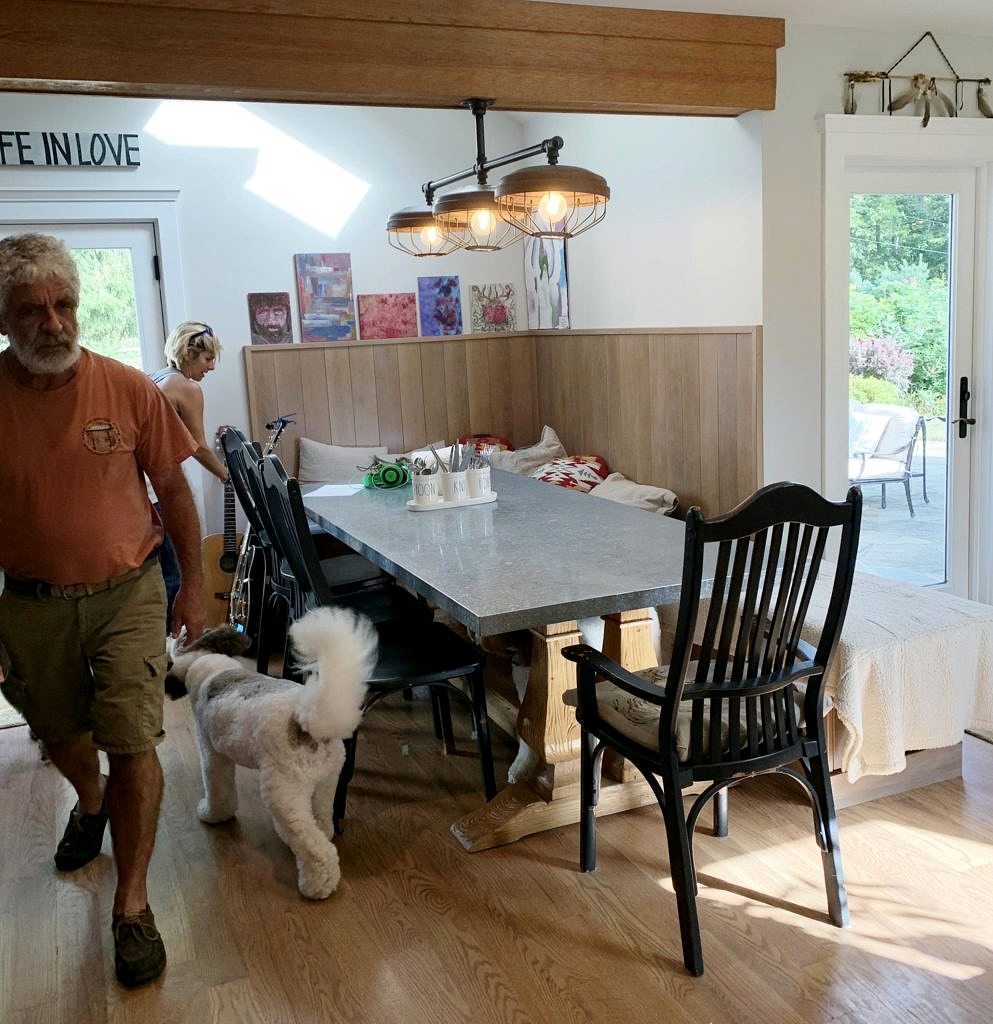
They were able to use the large (nine foot maybe?) zinc top table from their old house by building a banquette into a nook.

Even though the old house had a kitchen three times larger and a formal dining room, the homeowners like this arrangement much better. You don’t need to walk six miles to get to the fridge–everything is one step away–and, like many of us, they hardly used their old dining room so why bother to have one?
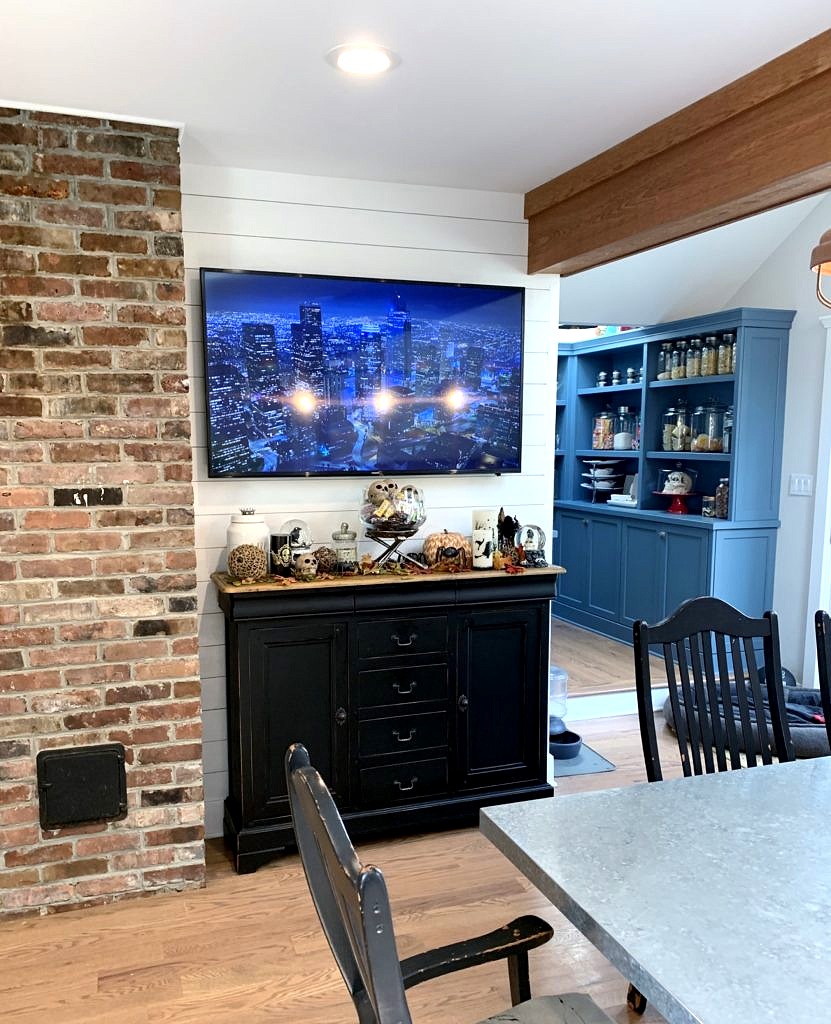
The narrow cabinet from the foyer (I think) in the old house makes a great anchor for the tv –which seems to be an essential element of the modern kitchen.  Cool screen saver!
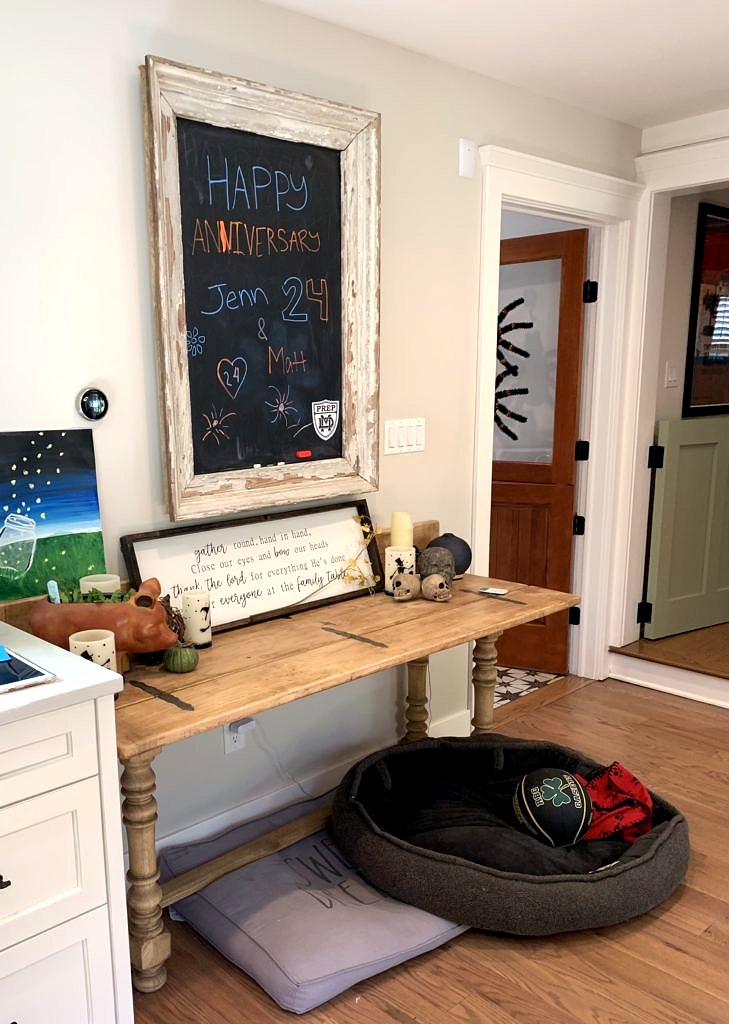
And look how the flip top table that functioned as a server in the old dining room makes a great desk here in the kitchen area.

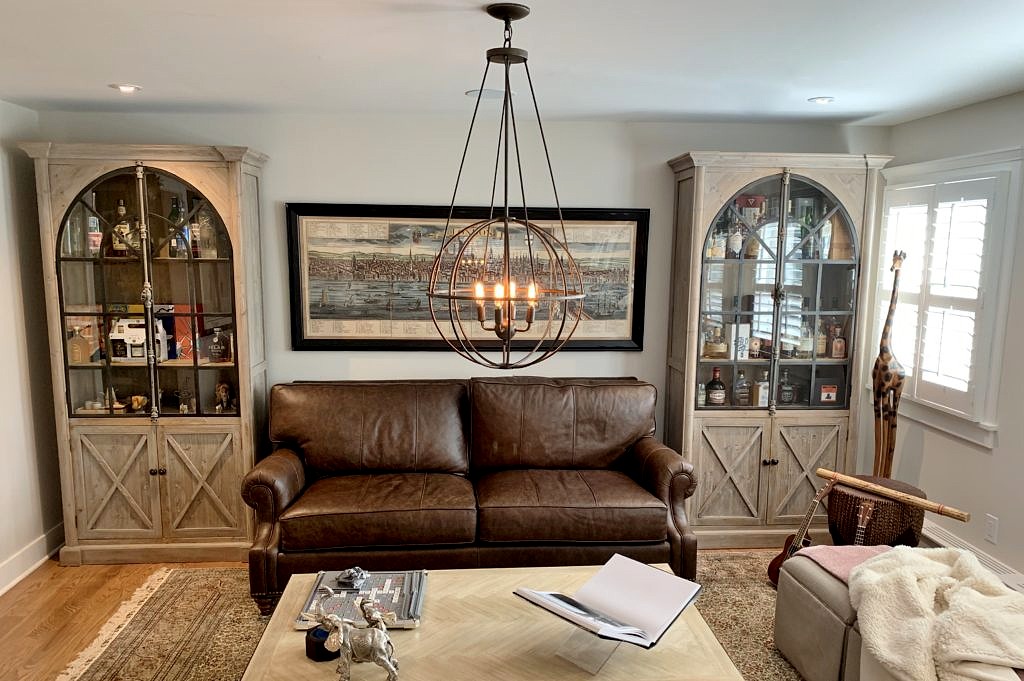
Fortuitously a new leather sofa from Century fit perfectly in between the two matching cabinets that used to be in the second living room in the old house but look like they were made for the new family room.

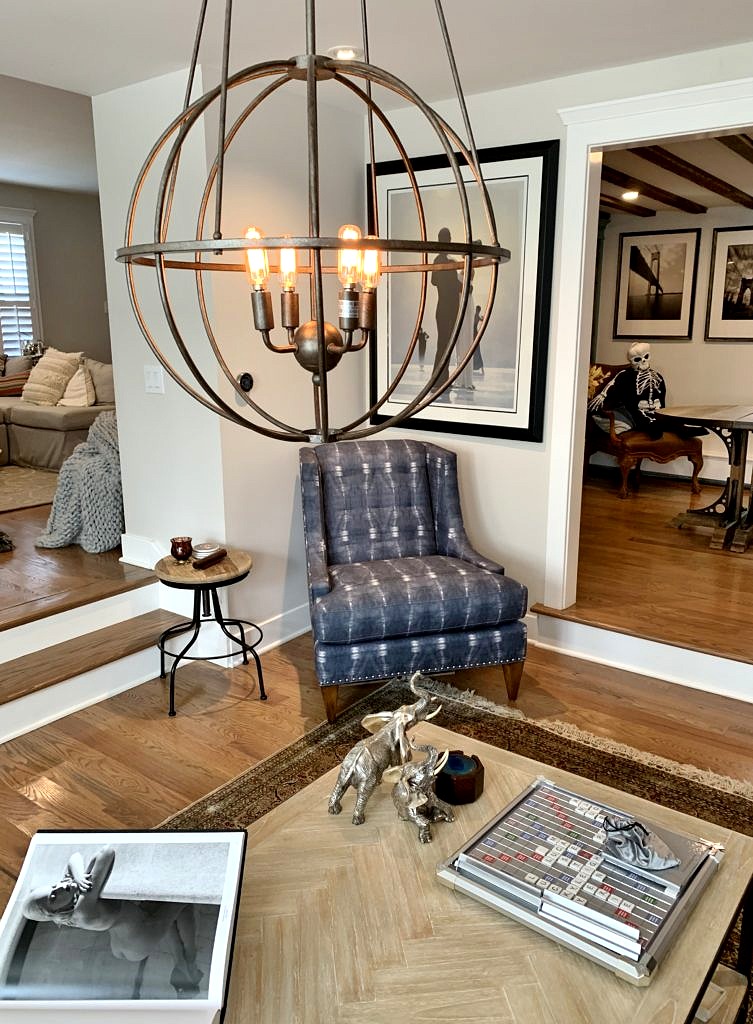
As does the armless wing chair from Hickory White tucked into the corner. Clearly you can see how there is nothing cookie cutter about this house! I love how the rooms ebb and flow every which way. I don’t know who the architect was but the builder was Kurt Connor from Fair Haven and he did a fabulous job–this could not have been easy.

Here we combined two oak demi lune tables by the gang at Schwung Home to make a round table in the center hall for stacks of books or games or dining. I wonder if this was the original kitchen space from 100 years ago?
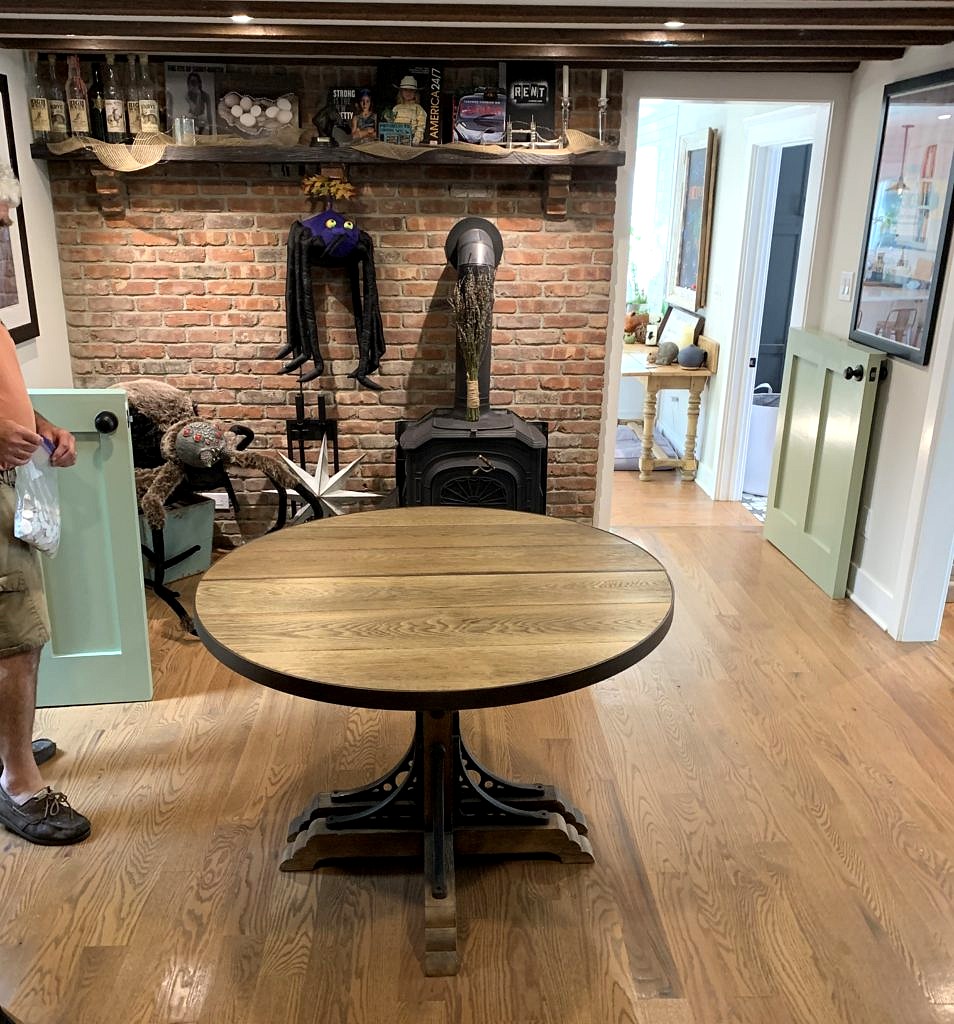
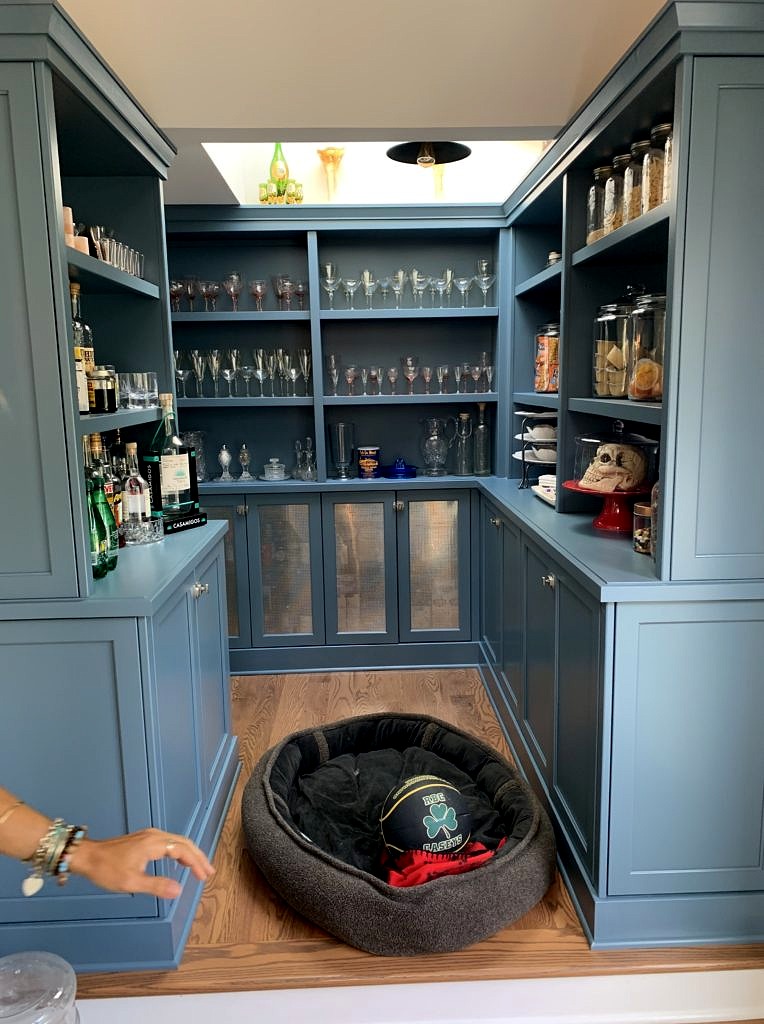
Everything about this house is unique; note the half doors to the kitchen and pantry areas–what a great way to corral all those pups–as opposed to the horrible looking and impossible to maneuver baby gates. And in this day of all white kitchens (guilty) when did you last see a Wedgewood blue pantry? Gorgeous.
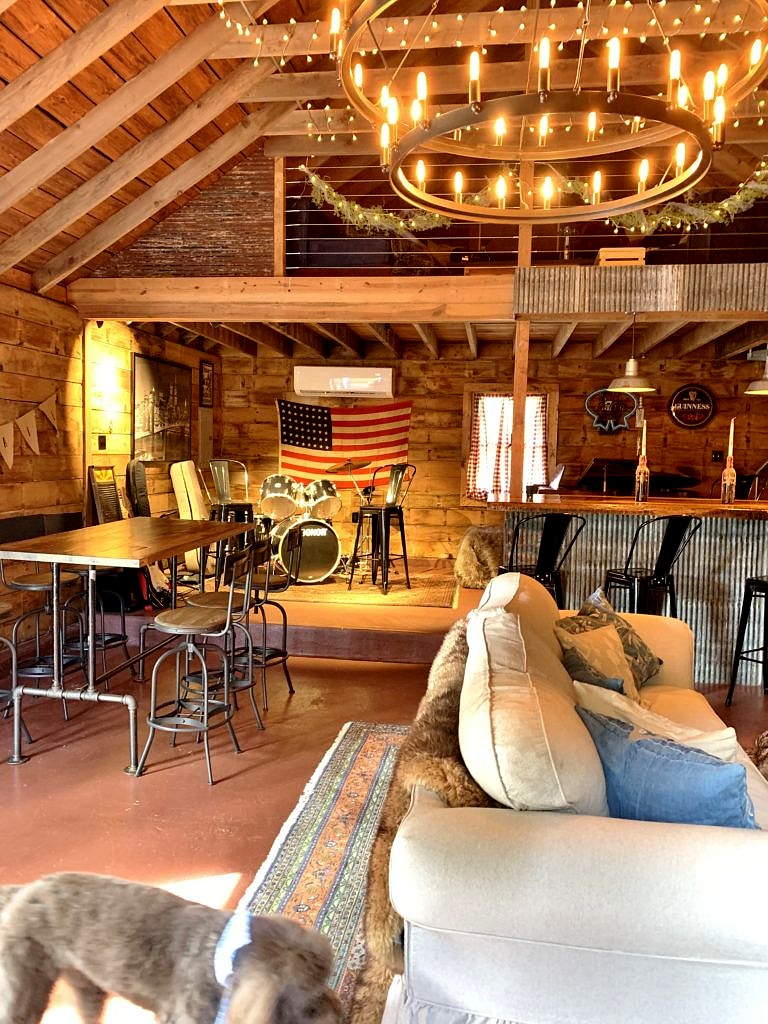
Too much fun. Well almost too much fun. The most fun may be in the barn that the owners turned into a music room complete with a full bar and lounge area. No wonder the kids aren’t moving out!  Note how the slipcovered sofa and oriental rug from the old master bedroom look great and add some warmth and texture to the space. 
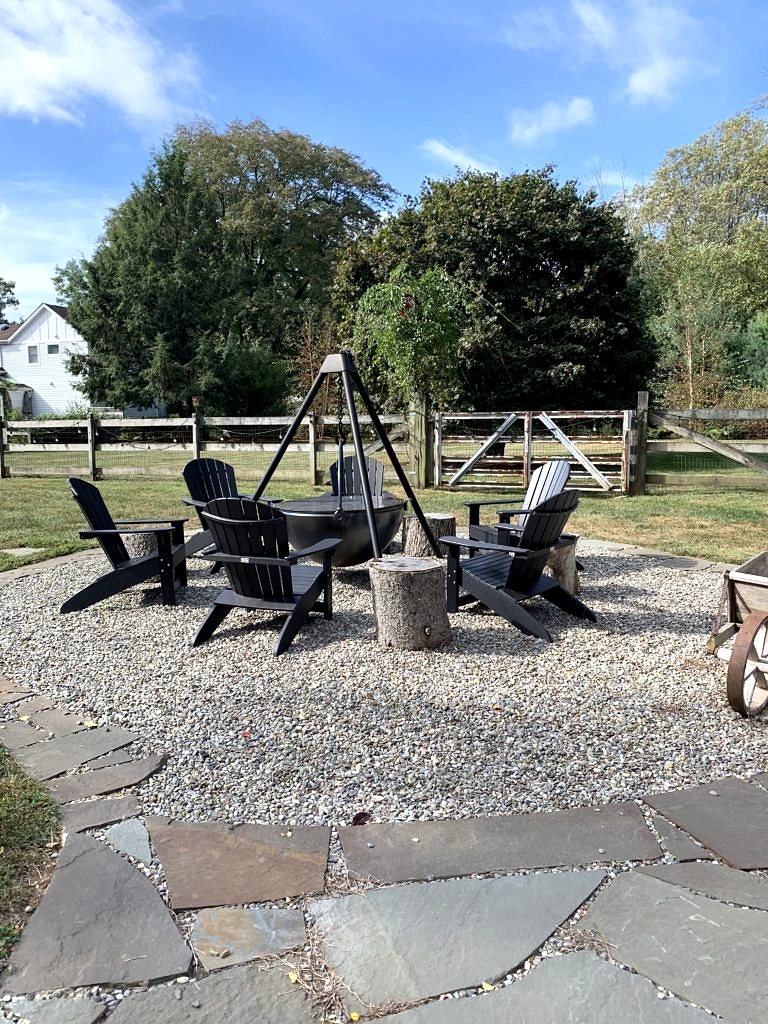
And did I mention the yard yet? The house came with several paddocks and multiple outdoor spaces. So not the ultra-manicured lawn they were used to,  just a great space with room to run around, or sit and enjoy a few brews.
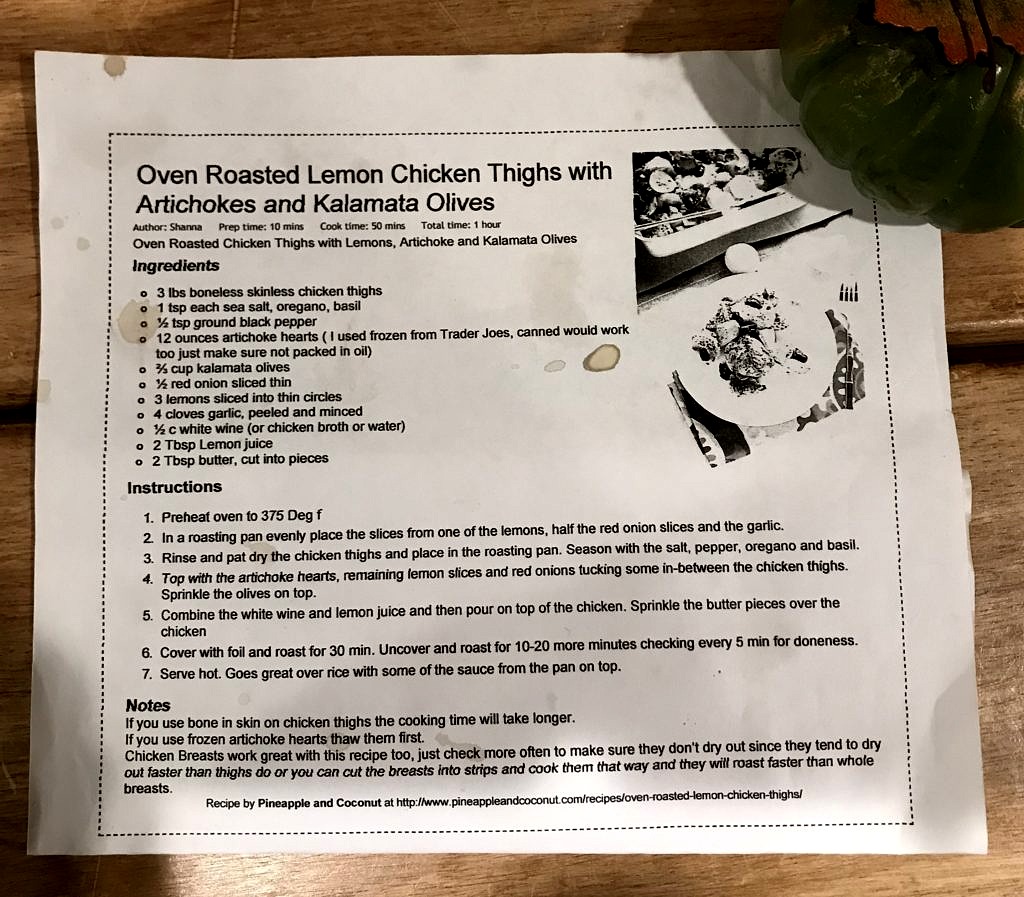
But at the end of the day big kitchen, small kitchen, banquette or none someone has to get dinner on the table. Even with their crazy busy schedules this is one family that makes sure that at the end of the day they all sit down together for a family meal. This recipe for oven roasted chicken thighs is one of their favorites, and now mine too. Just when I think I will never find something new to do with chicken, voila!

Printable version of recipe.

Fair Haven Fixer Upper – Chapter 9

It’s over when it’s over

Recipe for Maangchi’s Cheese Buldak (Fire Chicken)

Unlike what you see on the  TV show Fixer Upper, an actual home is never done–it is forever a work in progress. There is always something that needs fixing or tweaking, day after day, month after month, year after year. But the time has come to wrap up this Fair Haven Fixer Upper blog and get back to showcasing all the wonderful Two River homes we’ve been lucky enough to help decorate this year.

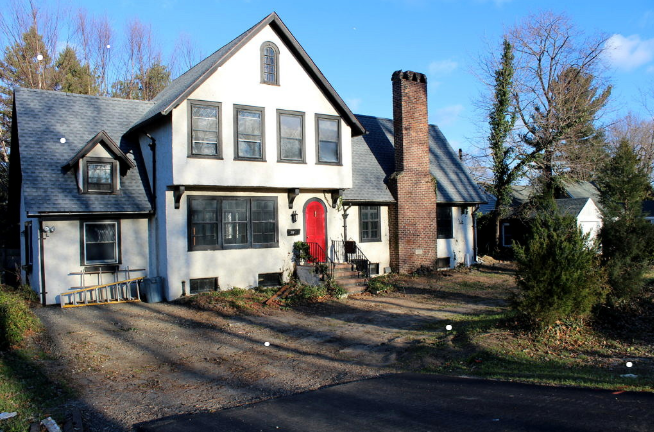
Chip and Joanna always start the reveal with a before–And then an after shot:
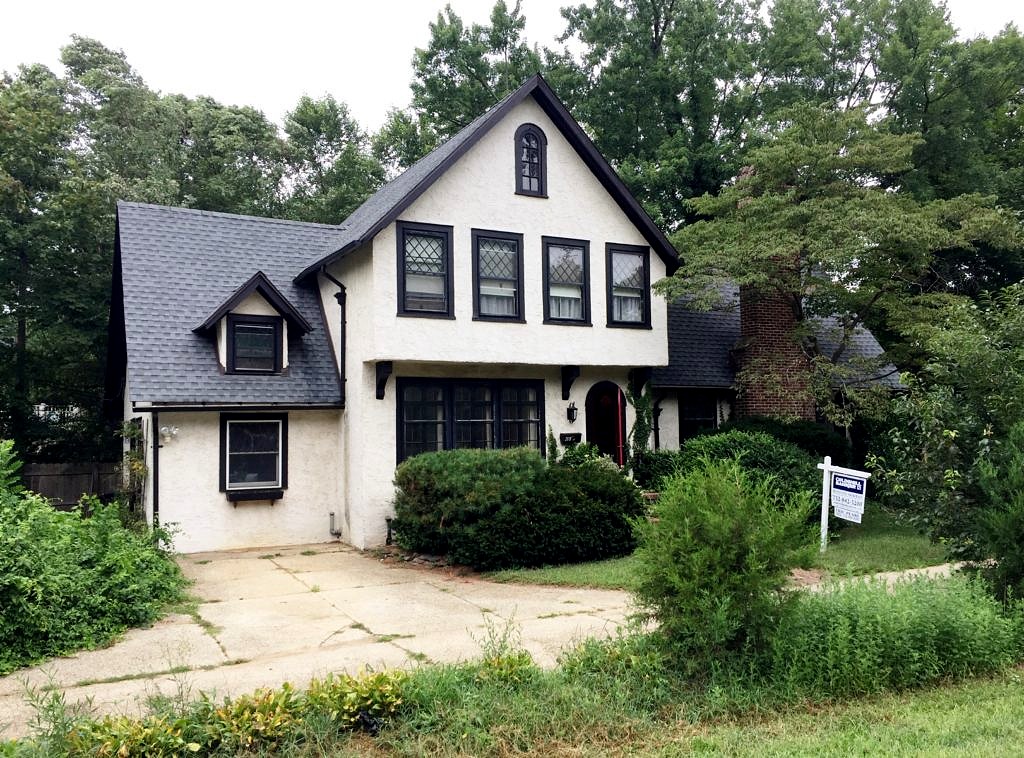
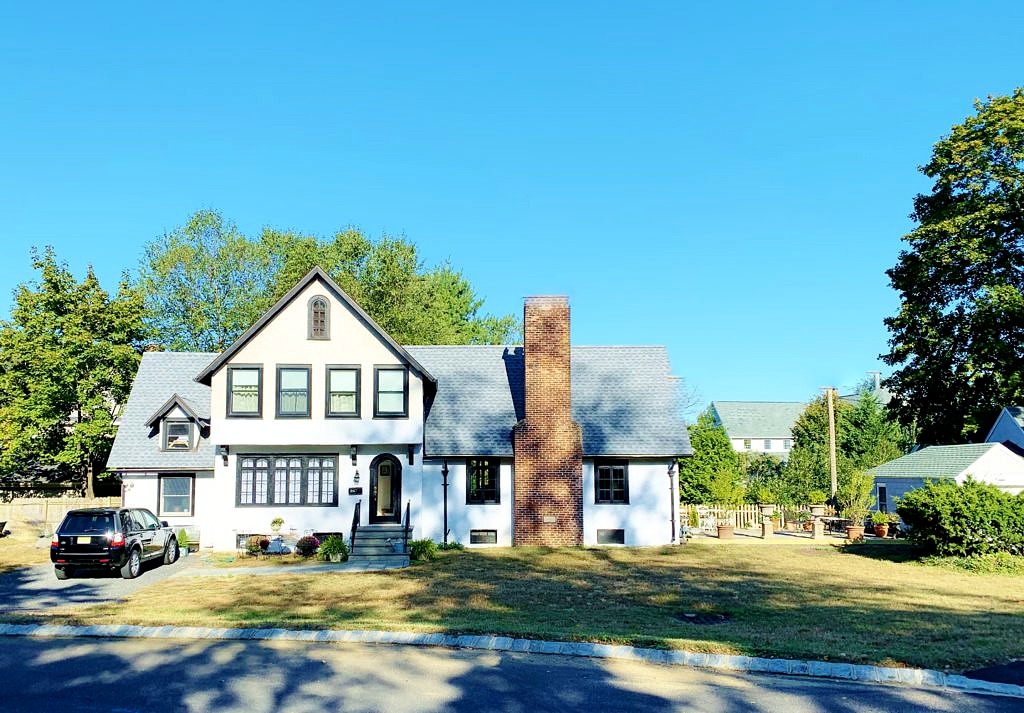
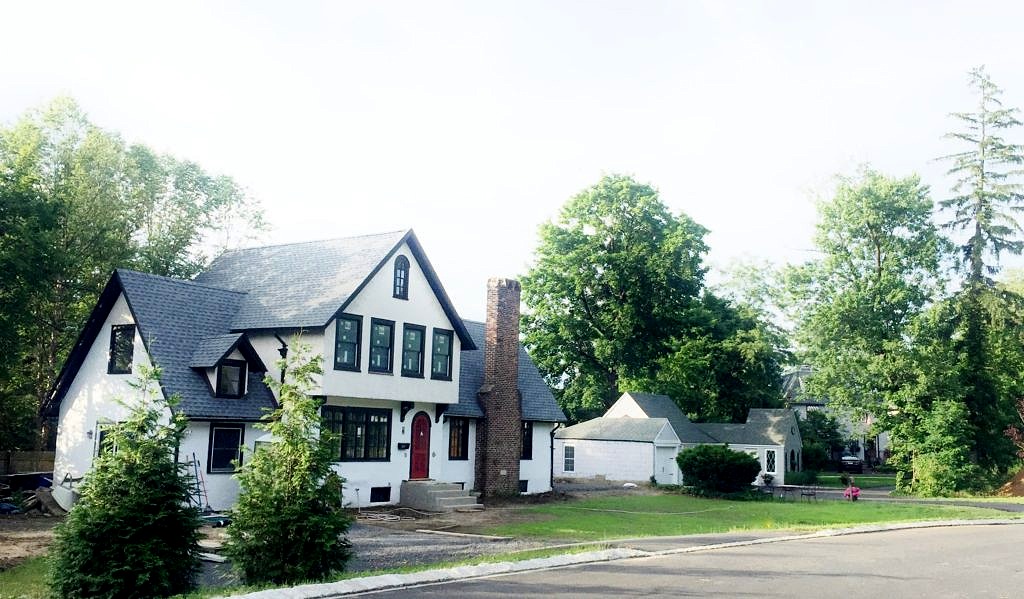
While we have yet to do much landscaping you can see we made some big changes to the property. The old driveway was demolished; it was a shared driveway from the main road for three homes and we were the guys in the middle. Now there is direct access to the new street in front of the house. That, combined with the removal of the monster maple tree growing into the basement, and all the overgrown shrubbery along with the rotten deck, really opened up the yard.
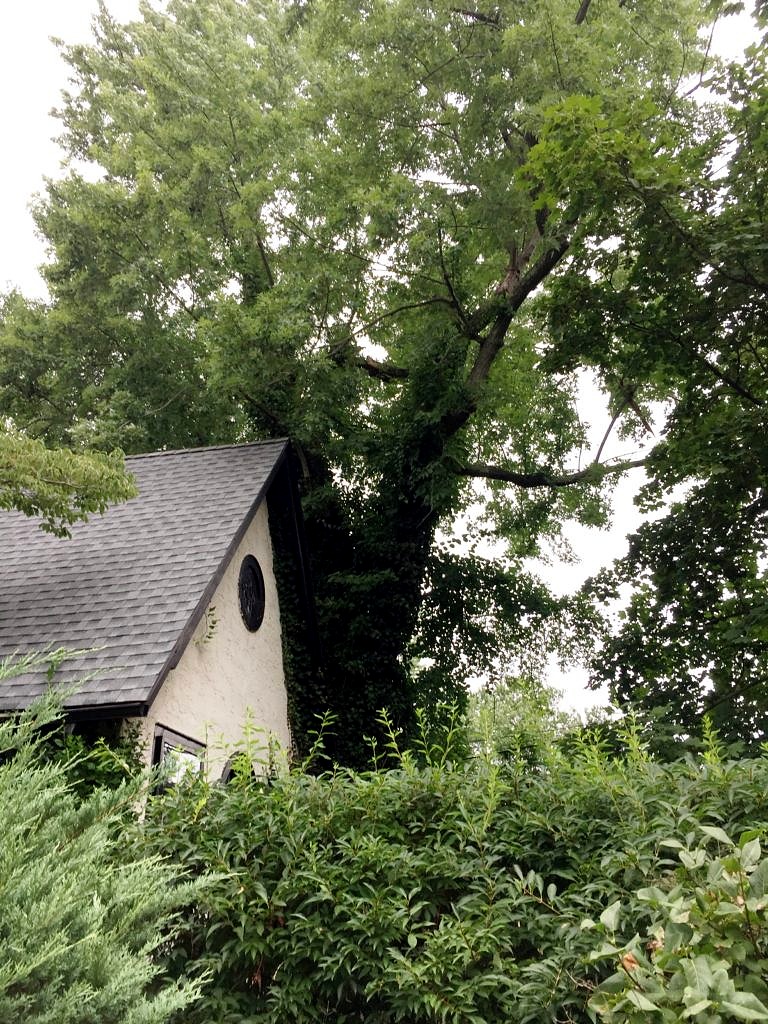
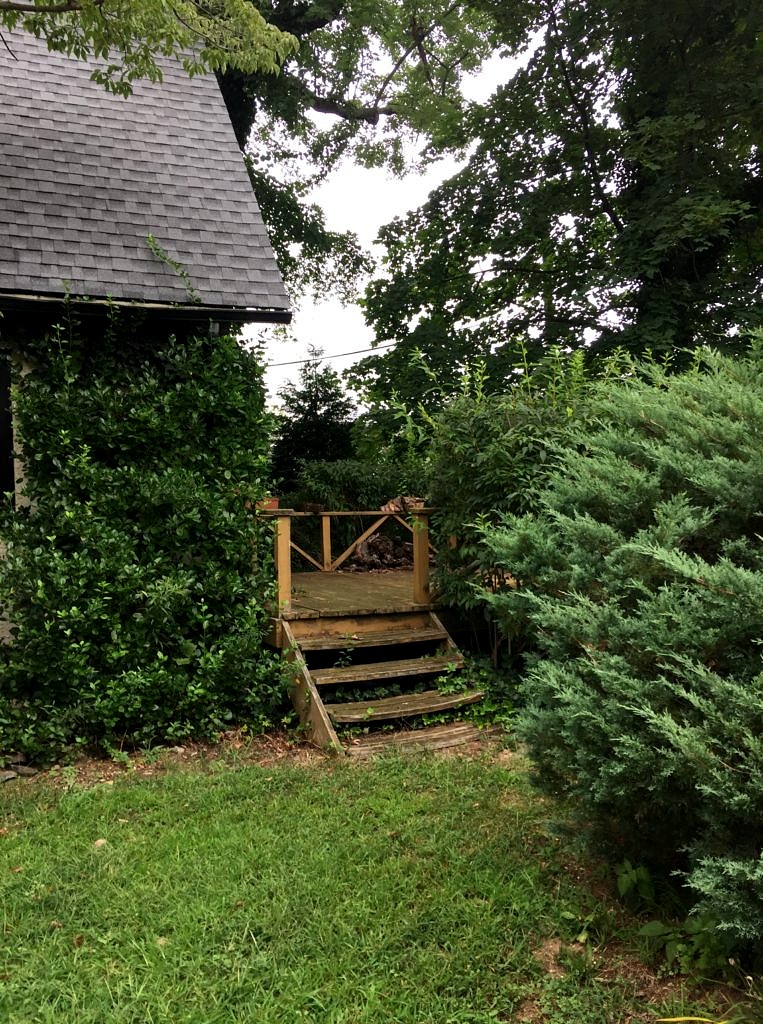
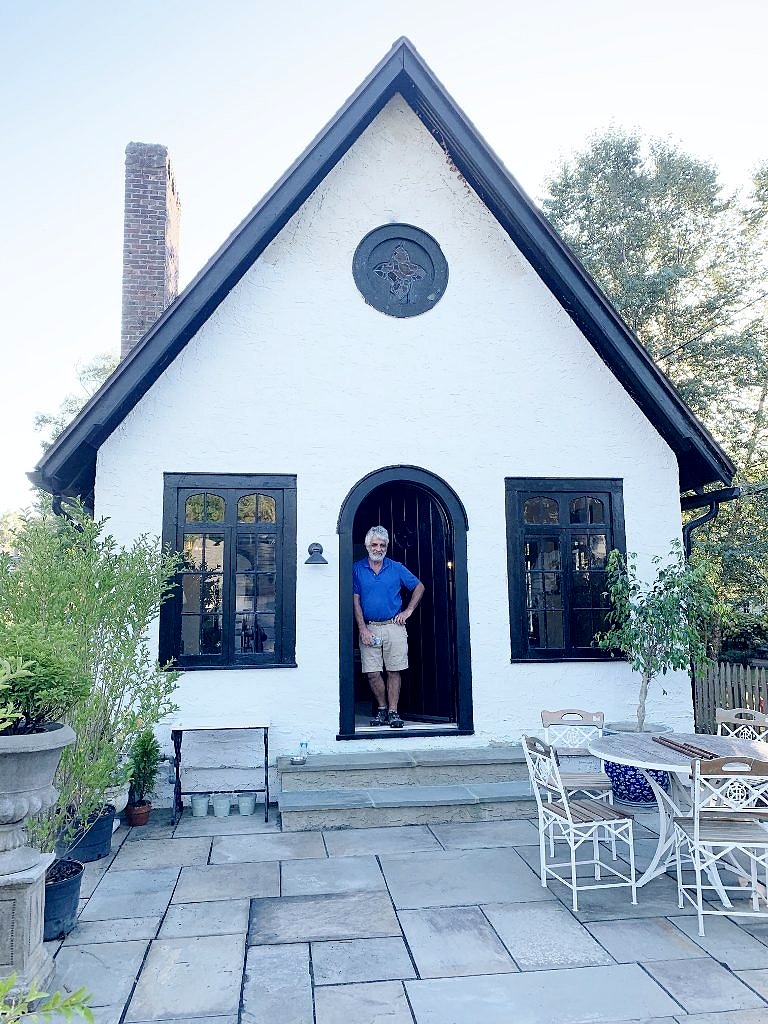
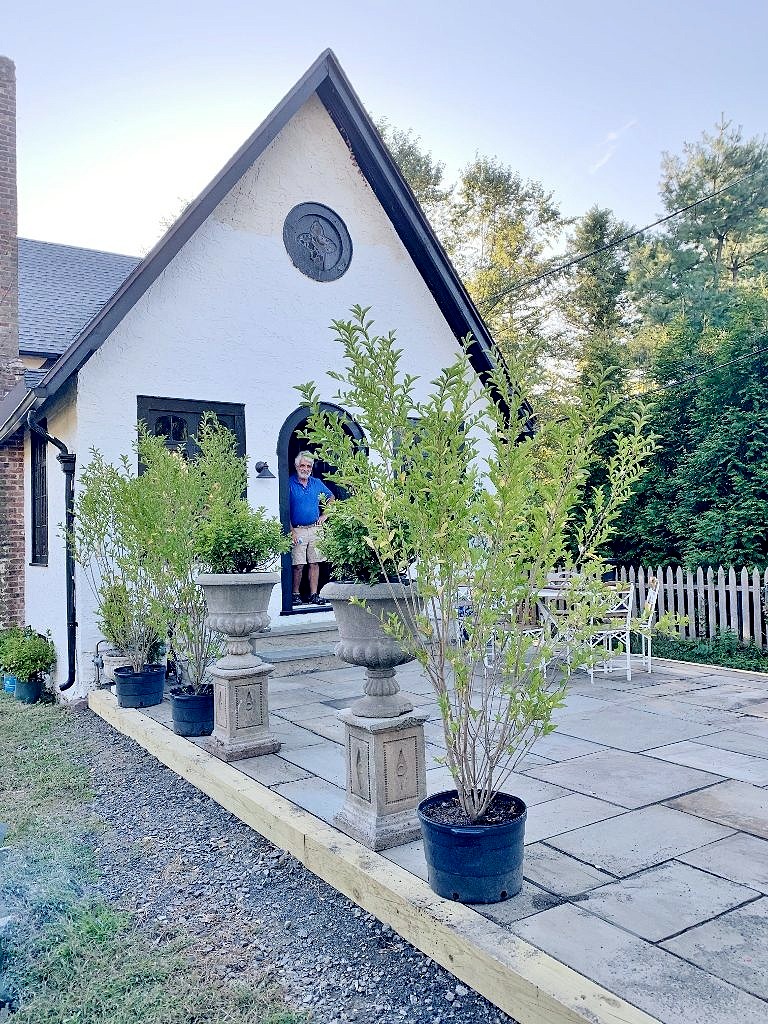
Here is Keith admiring the large bluestone patio that Mike Papa, our mason from heaven made us. Mike painstakingly handpicked every stone and then arranged it all just so. I was like hurry up already, but there is no rushing Mike. Fortunately it is lovely and just what we wanted after six years of living in an upstairs apartment–a nice wide open space to wine and dine and relax–outside.
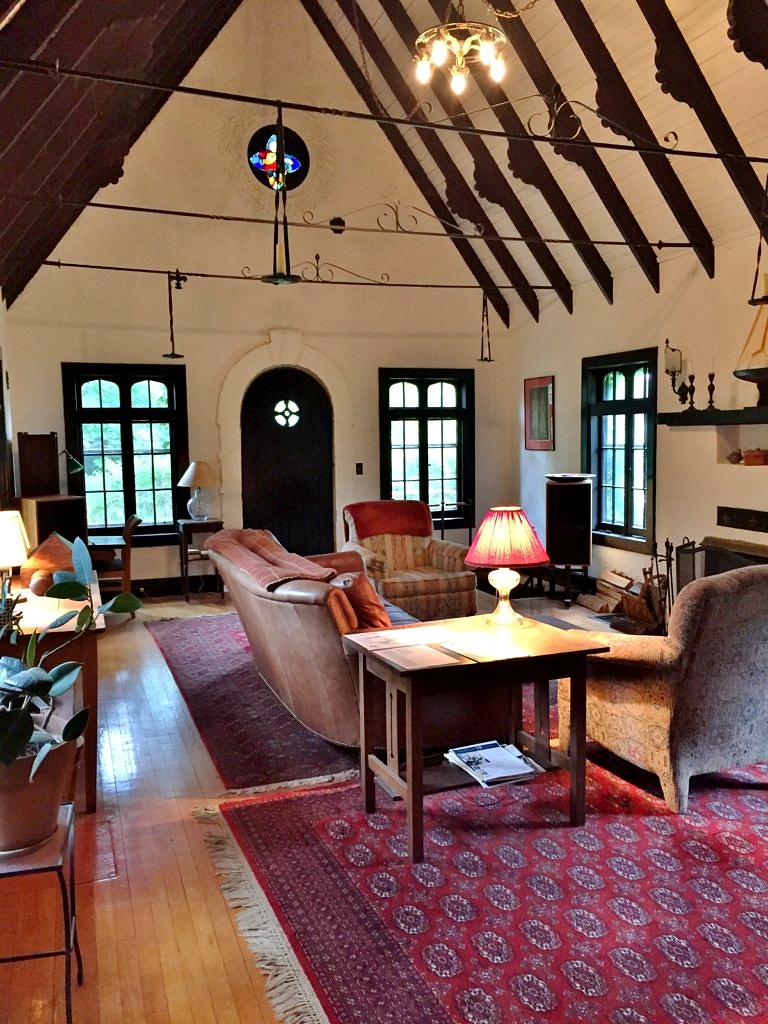
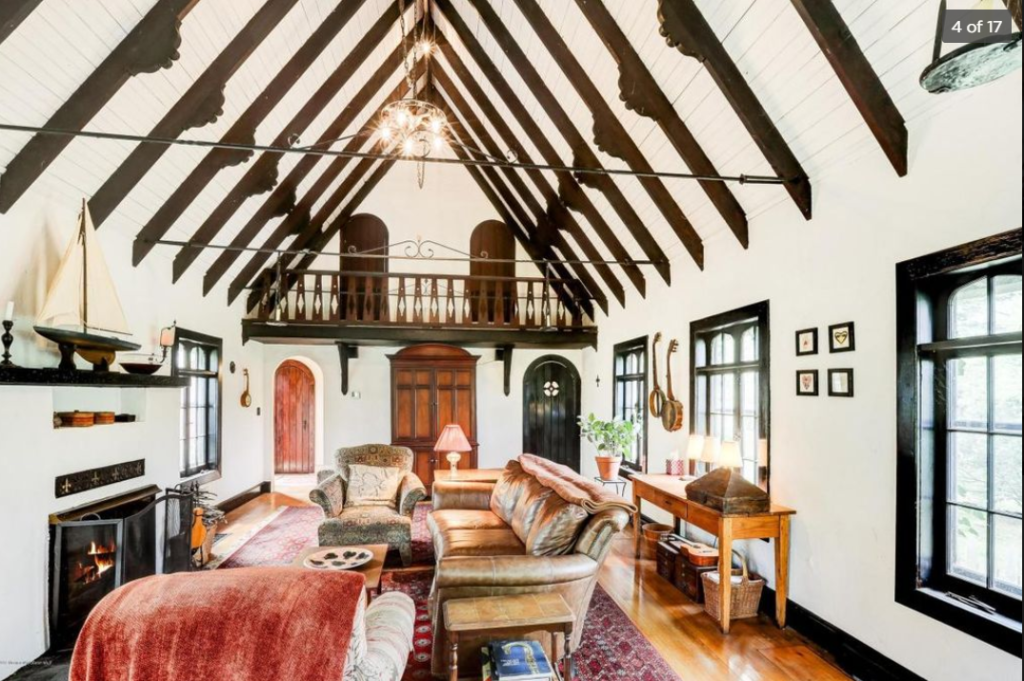
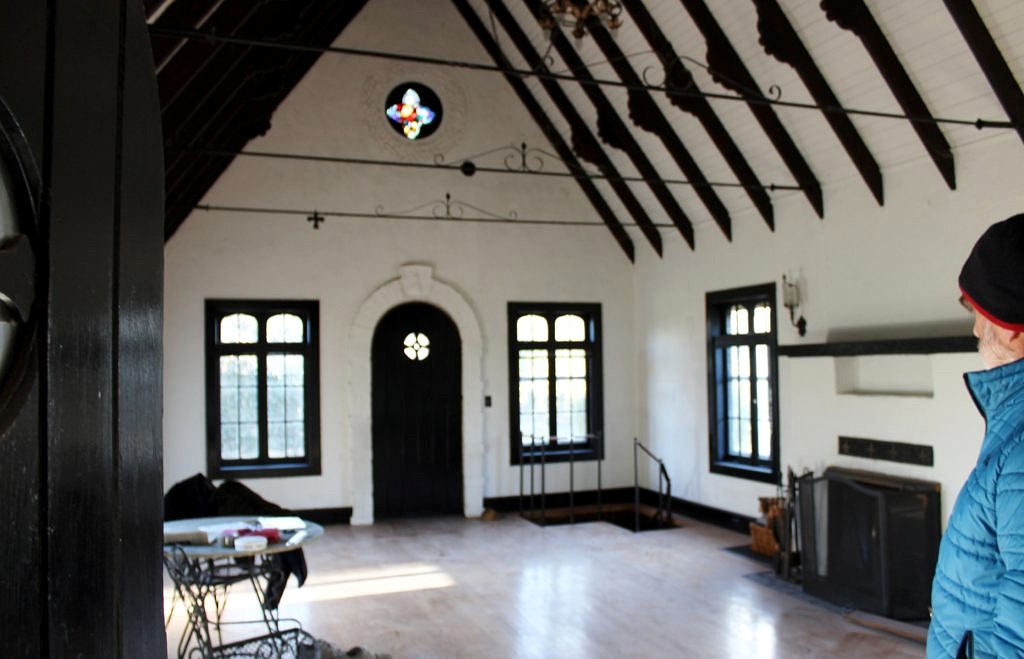
When we were looking at the house the main attraction for me was always the great room.  But you might agree with Keith that it looked way too ecclesiastical, what with the stained glass window and fixtures straight out of the Spanish Inquisition era. 

I found a big mirror to hide the window and took away as much of the wrought iron as I could without having the ceiling cave in. Now it is a bit calmer and–more secular–although there is no hiding that cathedral ceiling!
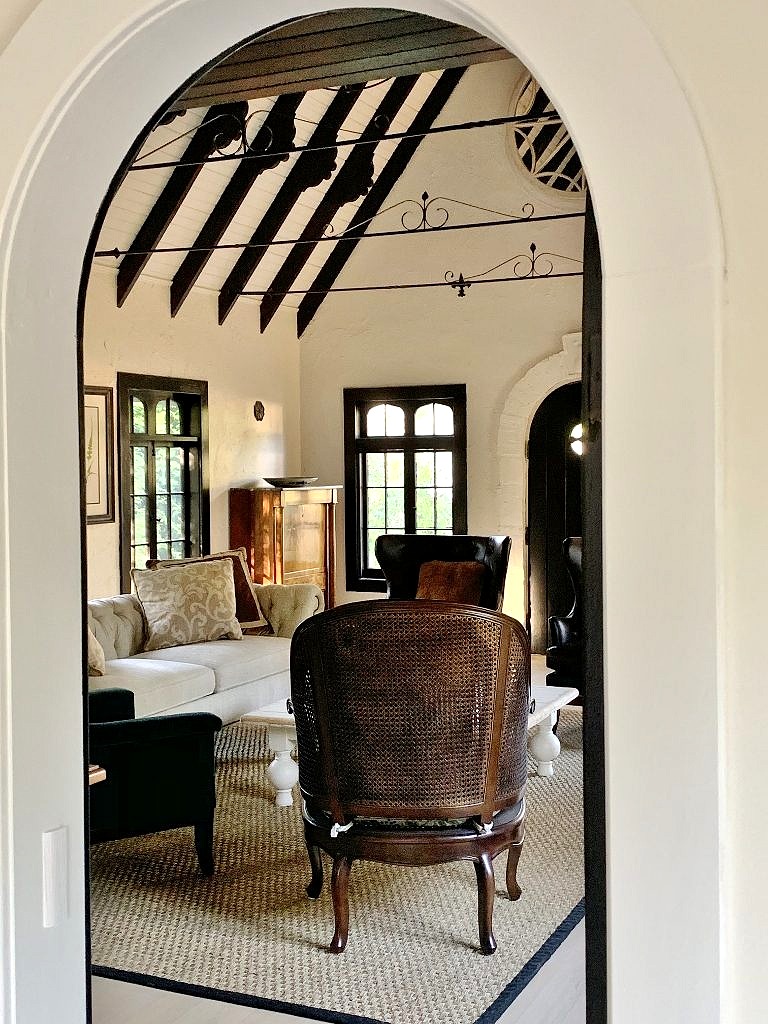
We had the floors stained white. (It was the only way to have the five different woods that were used on the various floors installed in the house over the last nine decades look relatively, and I mean relatively, the same).  And honestly I would have painted all the woodwork white too but, because we are the painters and I don’t do ladders, for now, I am willing to leave well enough alone–as clearly so is Keith.
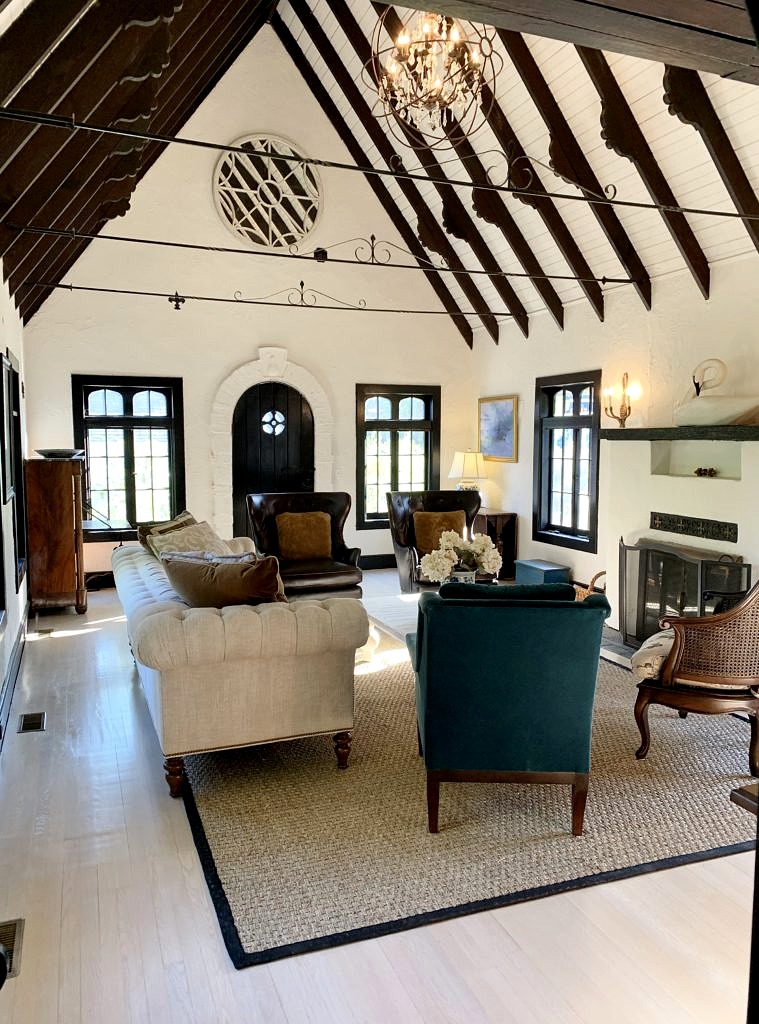
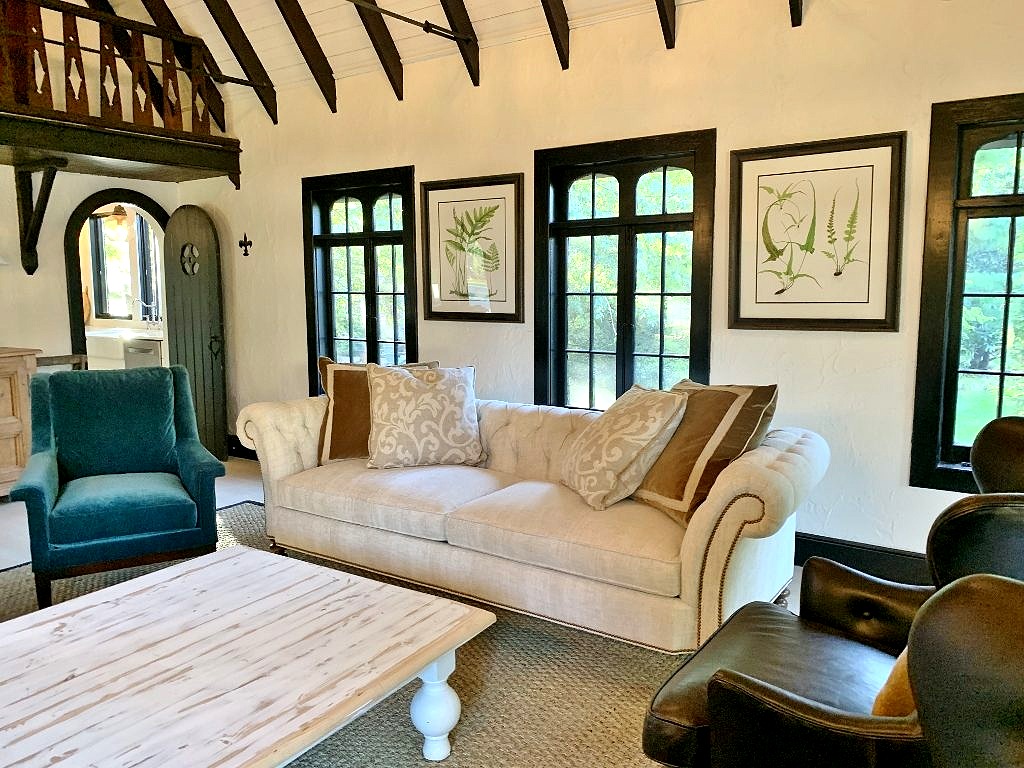
All the upholstery in the living room is by Hickory White, the higher end division of Sherrill Furniture. Originally I planned for a blue and white scheme and had a large navy blue sofa and four contrasting armchairs custom made for this space. The problem is they came in in April and we weren’t anywhere near ready so they got put in the store, and guess what? They sold.
Fortunately later that spring we were able to buy the pieces you see in the photos from the Hickory White Showroom during the High Point Furniture Market.  I’ve wanted a Chesterfield sofa for years and it was serendipitous that the interior design team at Hickory White had put this collection all together–seemingly just for us.  Leather is perfect for day to day use in what is also our TV room and the velvet and the wicker chairs add some texture and style. The coffee table came from the depths of our warehouse, as did the antique Biedermeier secretary.
The sea grass rug is from Safavieh. For years I’ve been telling everyone just get a natural fiber rug and call it a day but this is the first time I’ve actually practiced what I preach. Now I can’t figure out why I waited so long. I love the way it looks, feels and even the smell–it has a slightly grassy odor–like you just mowed the lawn.   

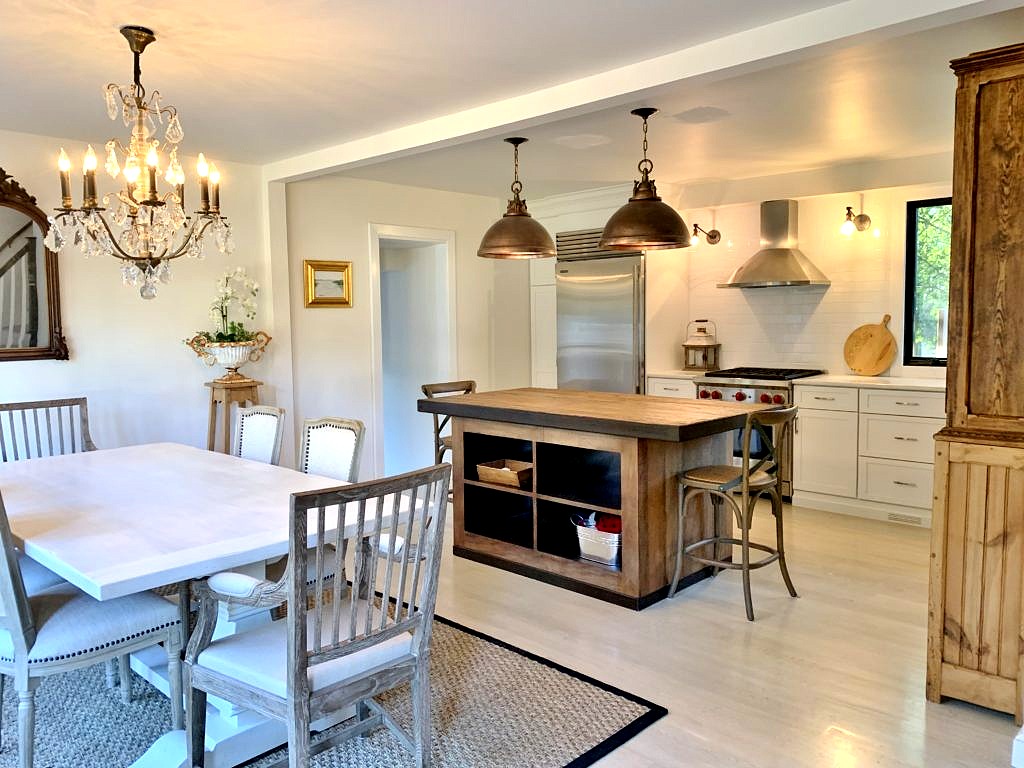
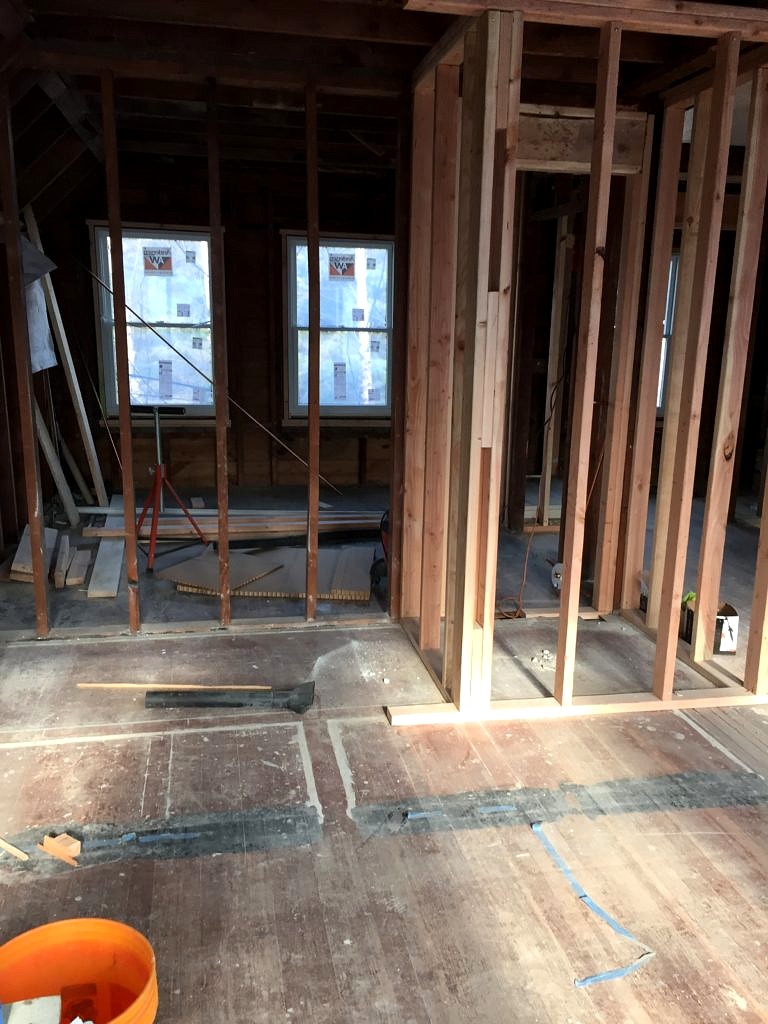
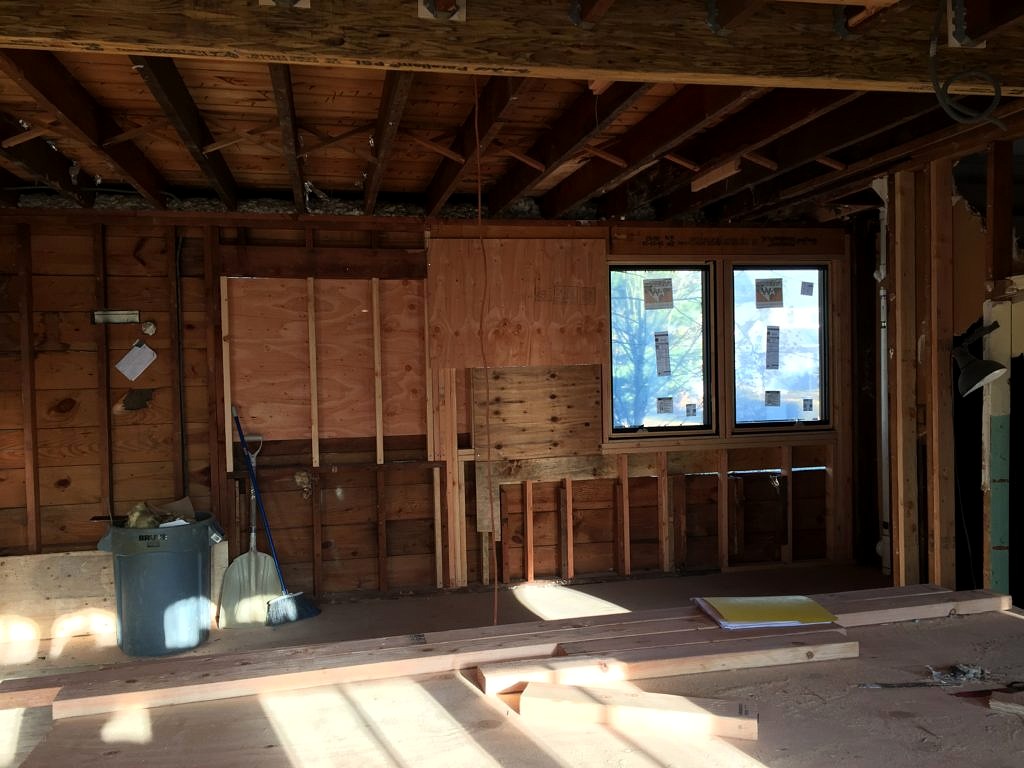
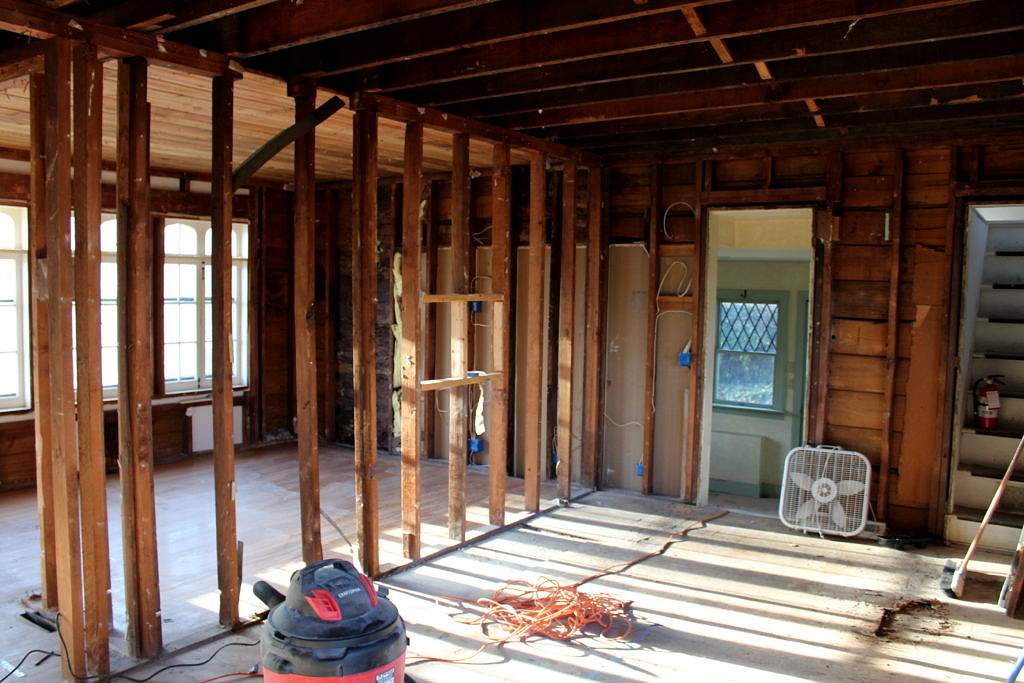
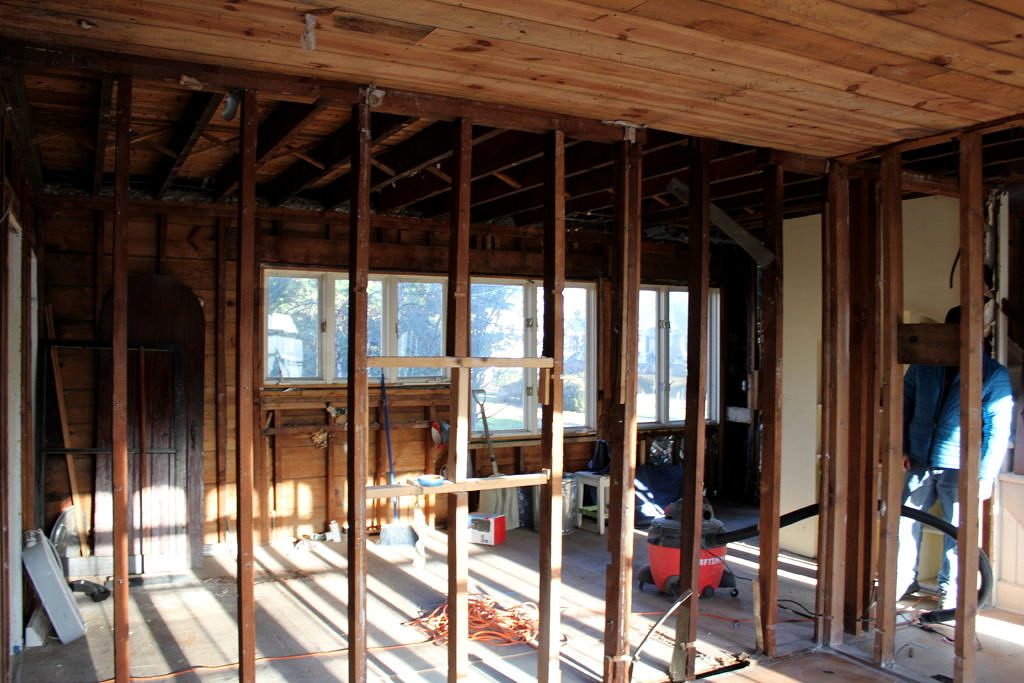
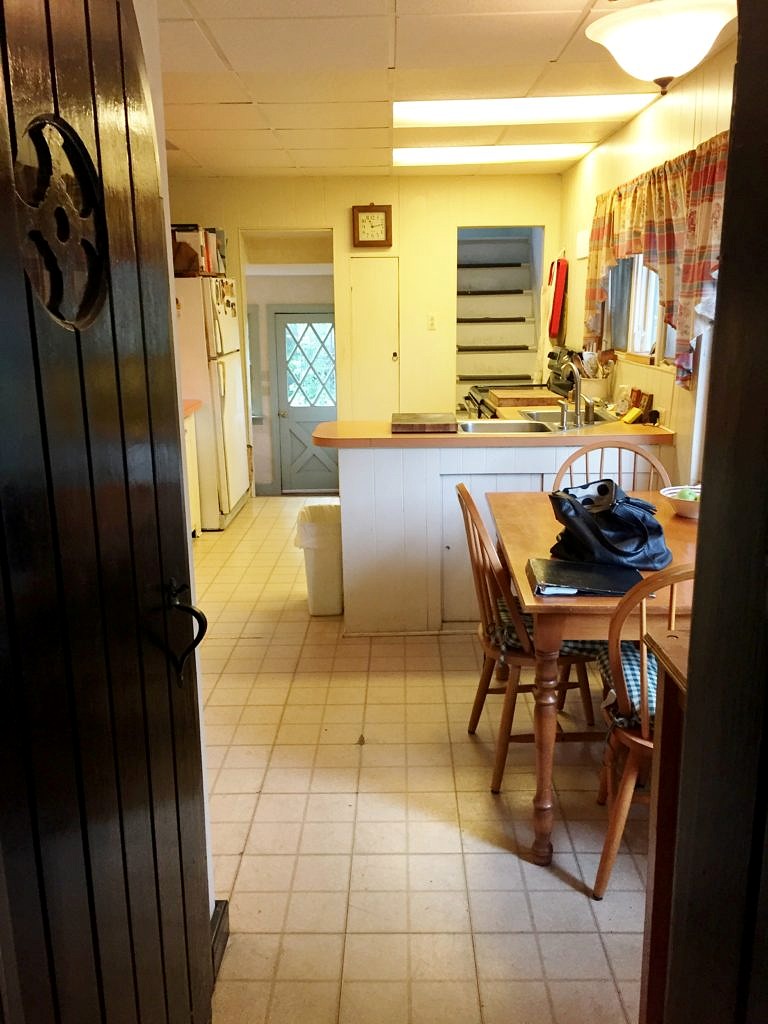
But, by and large most of my design thoughts over the past year went to figuring out how to create a new kitchen and dining area. First we decided to eliminate the back stairs. Even though I love a back stairway this served no real purpose and the extra doorway just mucked up the kitchen cabinet layout. Next we removed all the walls between the dining room, kitchen area and foyer to create one open space.That meant the original built-in cabinet in the kitchen (which I had hoped to save) had to go.
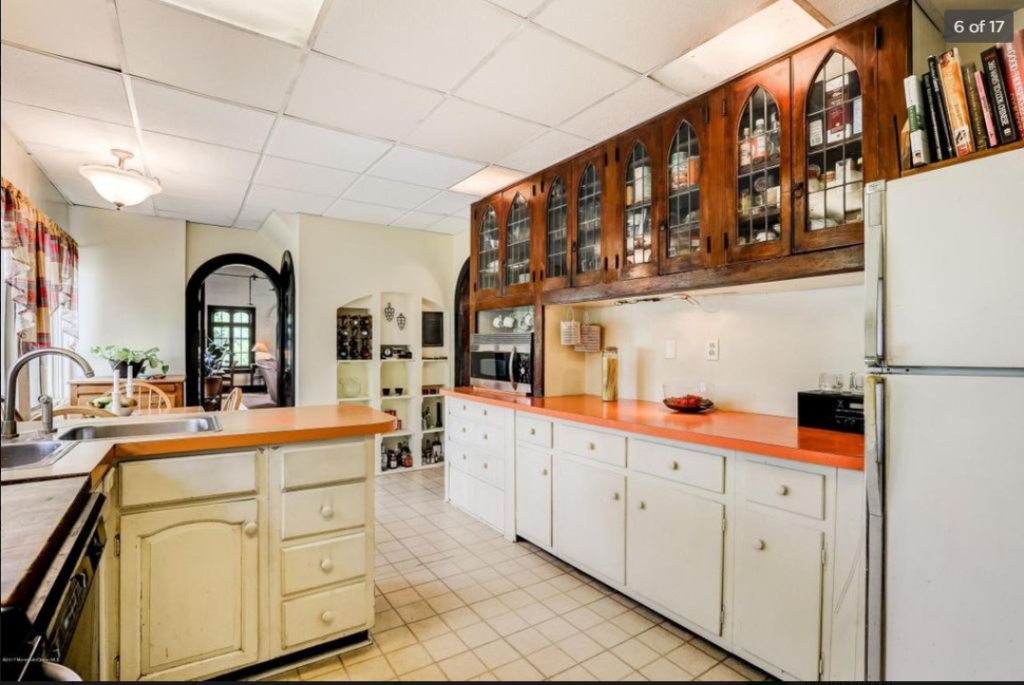
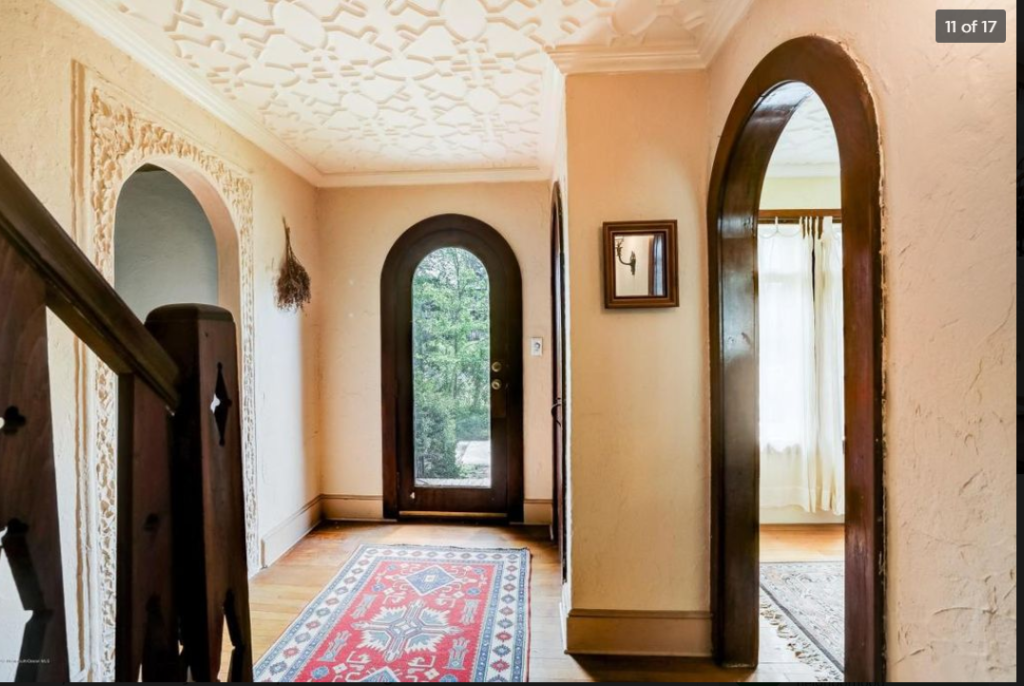
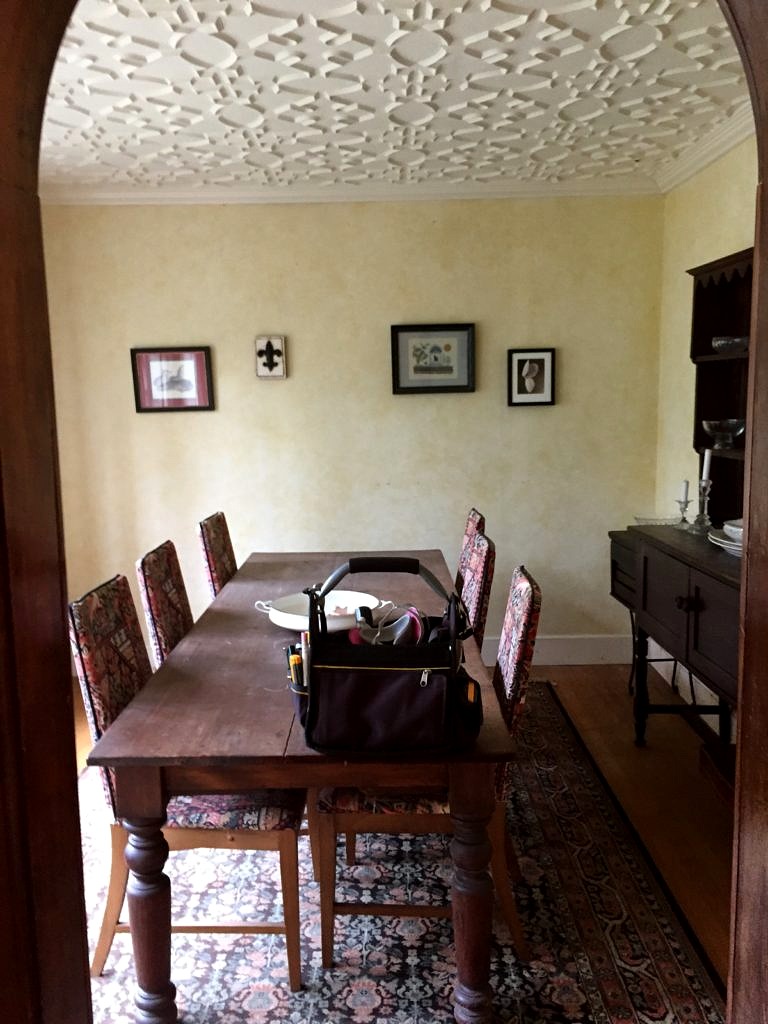
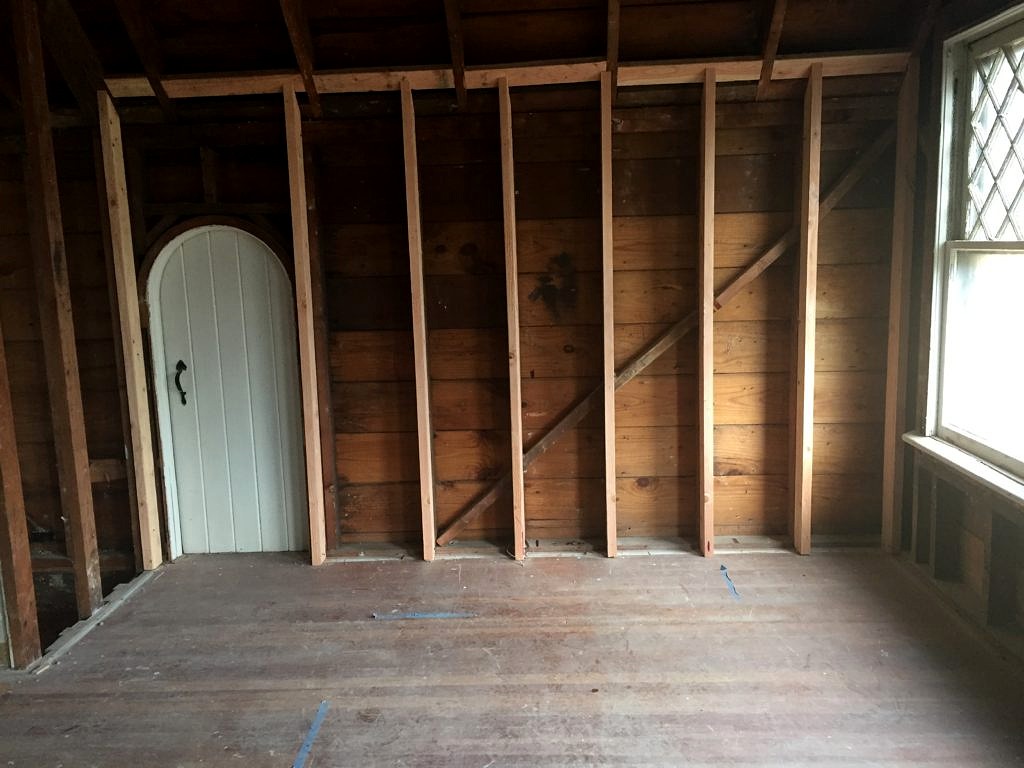
As did the fun foyer with all the hobbit doors, and the crazy ceiling which I had no interest in keeping.

Didn’t exactly love it in the dining room either!Now we have one room with our British Cottage trestle table front and center. Keith stained it white mainly because we thought we had enough stained wood action going on in the great room and honestly couldn’t figure out what color would work with the island.

Originally I planned on a built in island with a microwave drawer but in the end thought not seeing a microwave on the kitchen counter was a lame reason to build a custom island–for $7500. This island, from a company out of Austin Texas called Four Hands, was a third the price, adds a kind of rustic, urban chic, works as a server, has some storage and gives me just the right mount of separation from the kitchen work area.

We took away half of the  kitchen windows so we could fit the refrigerator along the back wall and avoid looking straight into our neighbor’s kitchen windows. The good news is the replacement windows we did install on the other side are generous in size and let in plenty of light, and–this is the best–offer prime views of our other neighbor’s lavish gardens!

In the end, and a long story involving Community Appliance and a year’s interest free line of credit, we went with the most deluxe appliances we could possibly never afford, quartz countertops that happily look like marble to me, white subway tile, and white Shaker style cabinets. (I can’t believe that I just wrote in one sentence what took me ten months to decide and execute!)
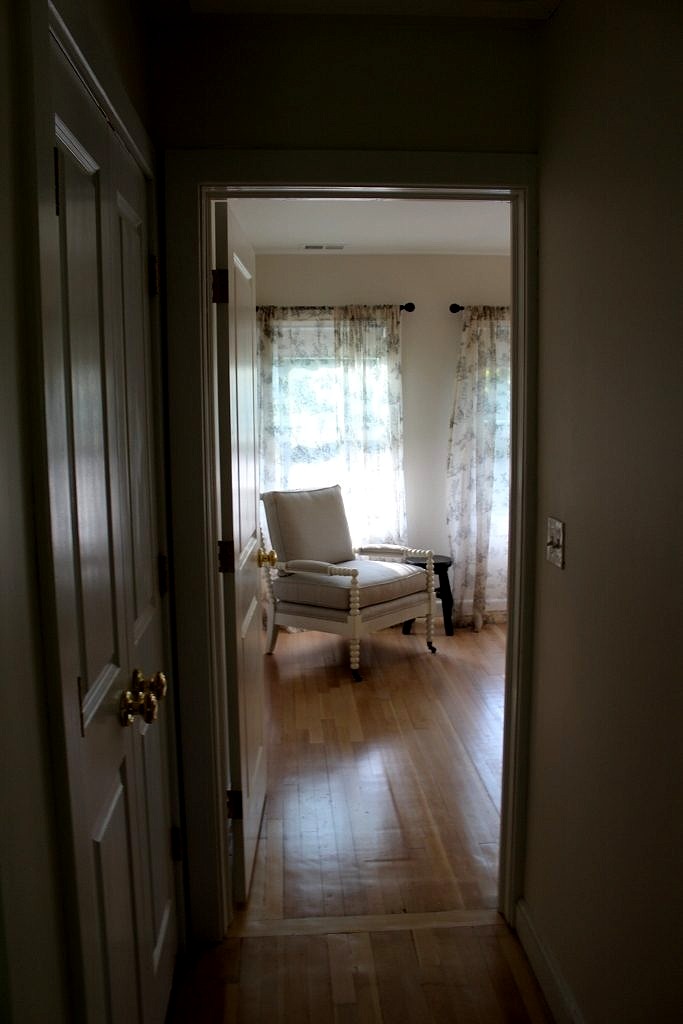
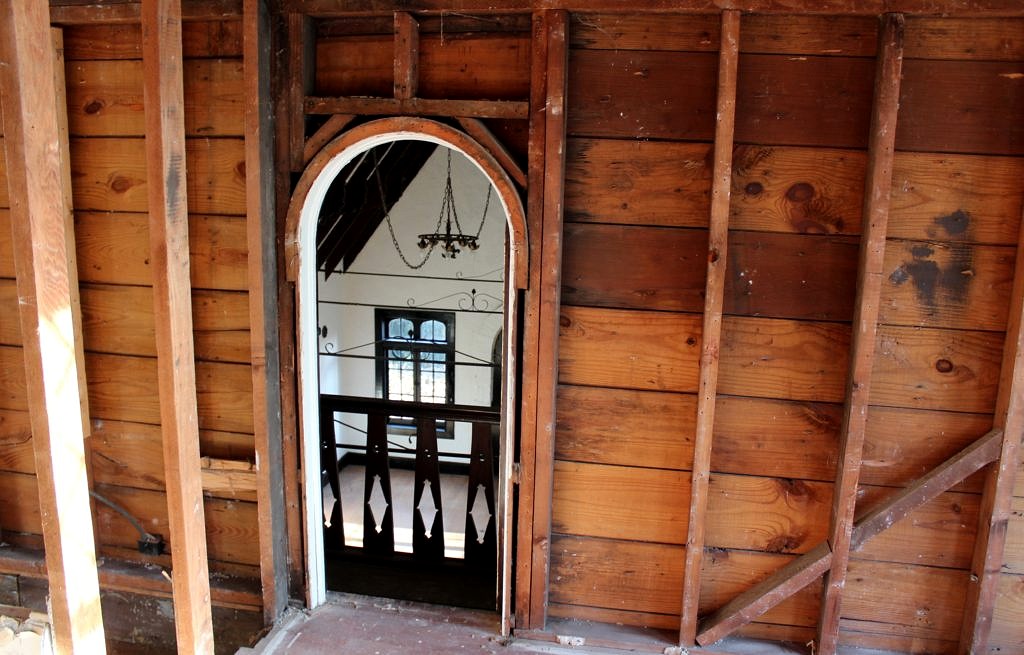
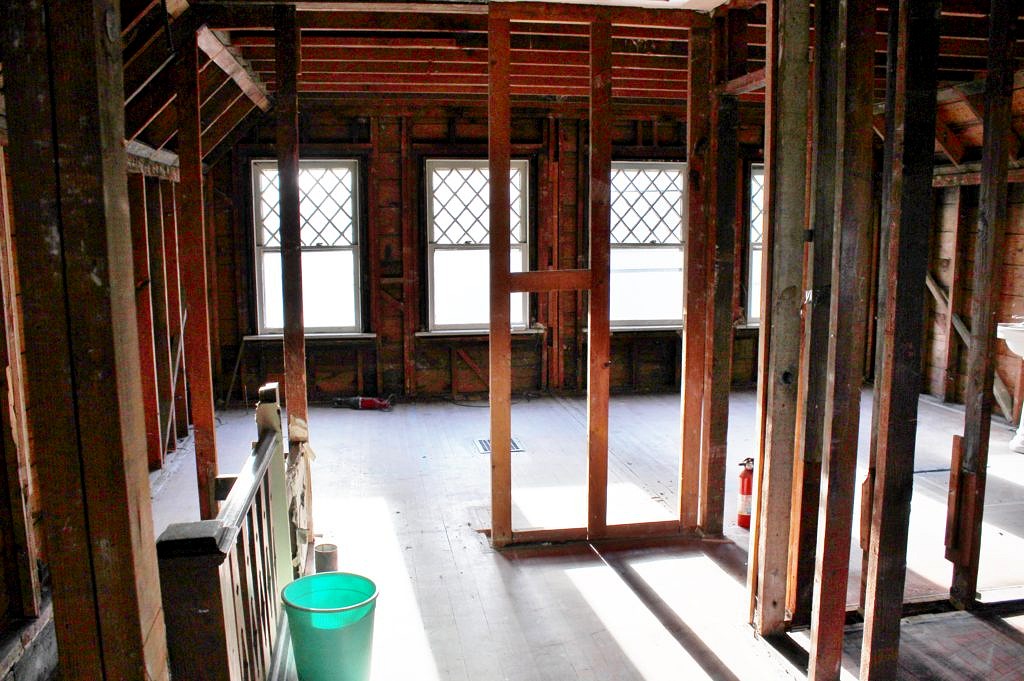
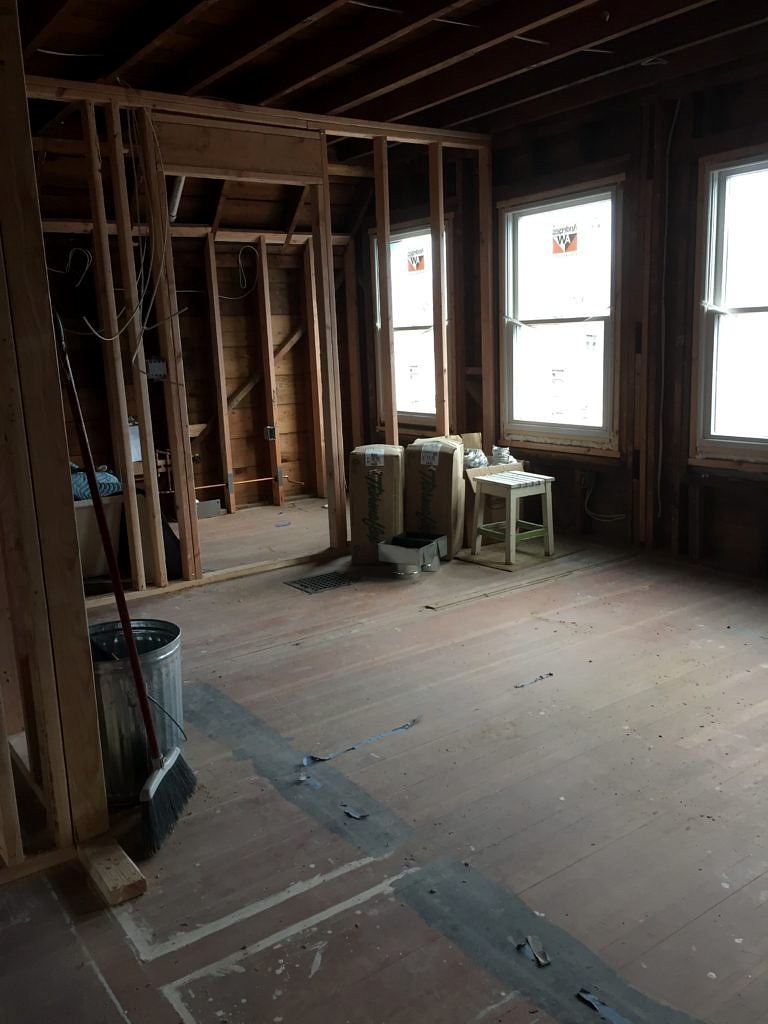
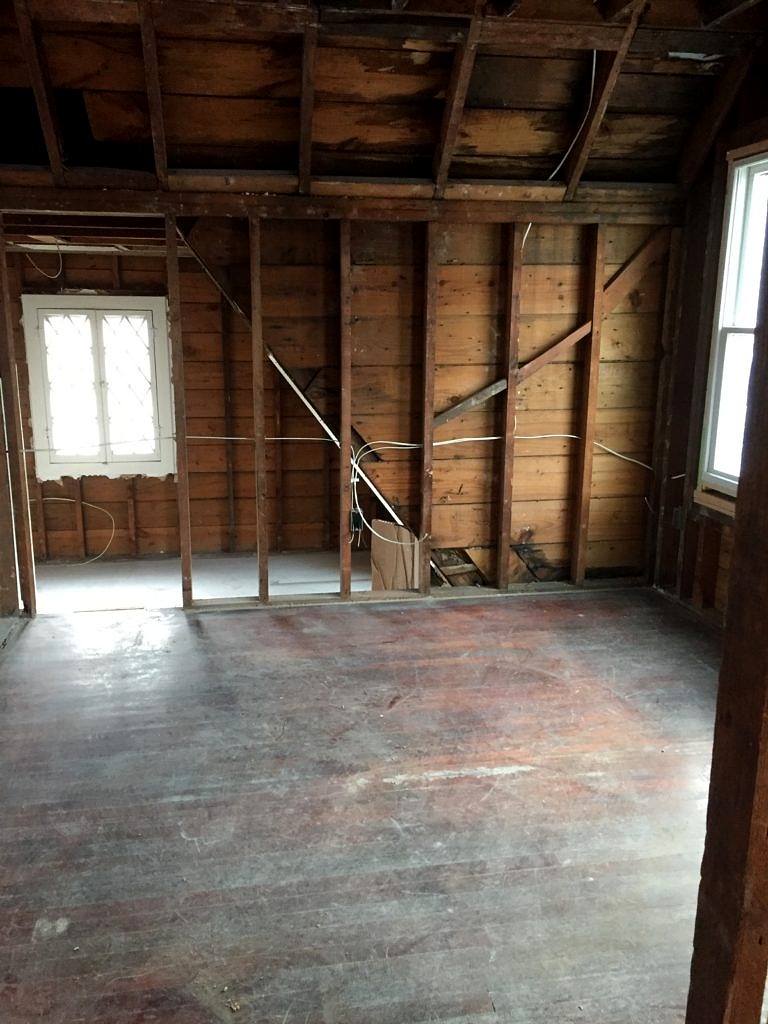
Renovating the entire upstairs was a ton of work. We (that means Keith) had to remove all the sheetrock, so we could insulate, rewire, replumb, and reconfigure the closets. Our first job was to come up to code and the second was to make it all flow. We painted all the walls and ceilings with BM China White, and the trim in Decorator’s White. Floors are bare and will stay that way for a while. We had the 90 year old fir sanded and then applied a white oil-based stain and three coats of poly. Our floor guys were concerned because the color is not even and they still show a lot of wear– but that is exactly what we were hoping for.

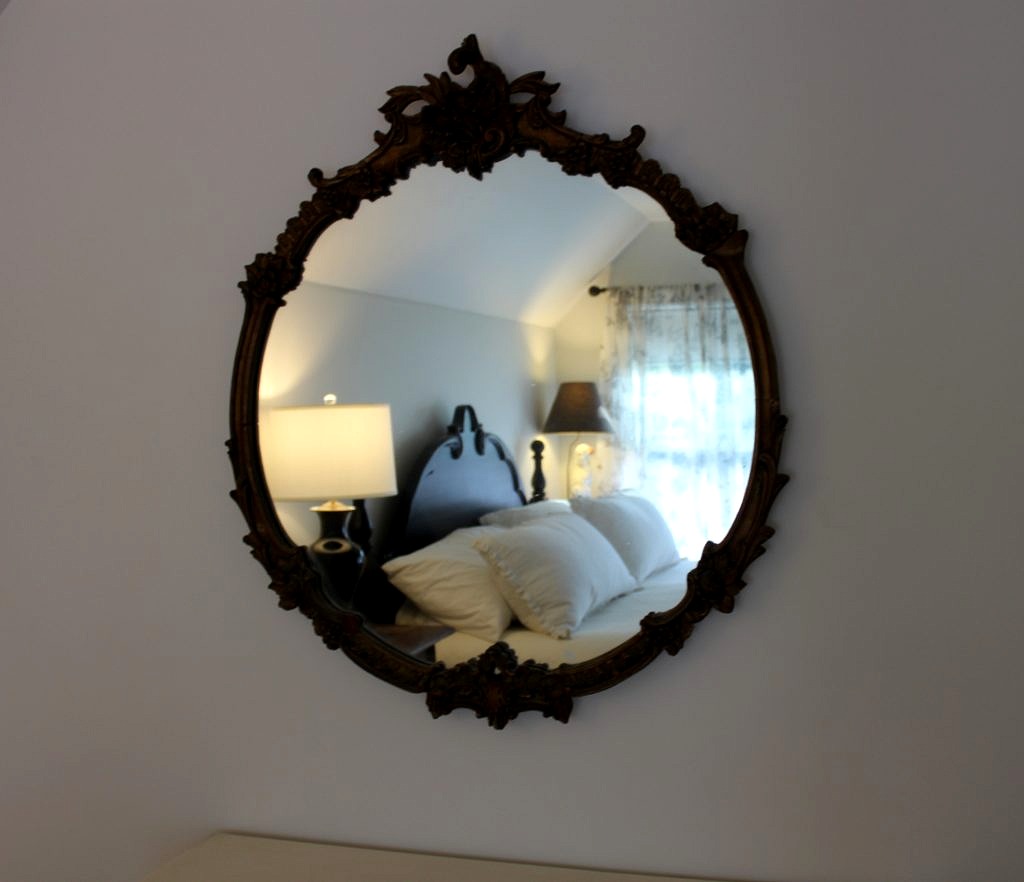
Providentially we had a British Cottage kingsize bed in antique black, normally a color we do not stock, in our warehouse. I pondered white or pine–but think that black adds the pop we need. Window treatments on hand included toile sheers with a charcoal vignette and they seem to work just fine for now.

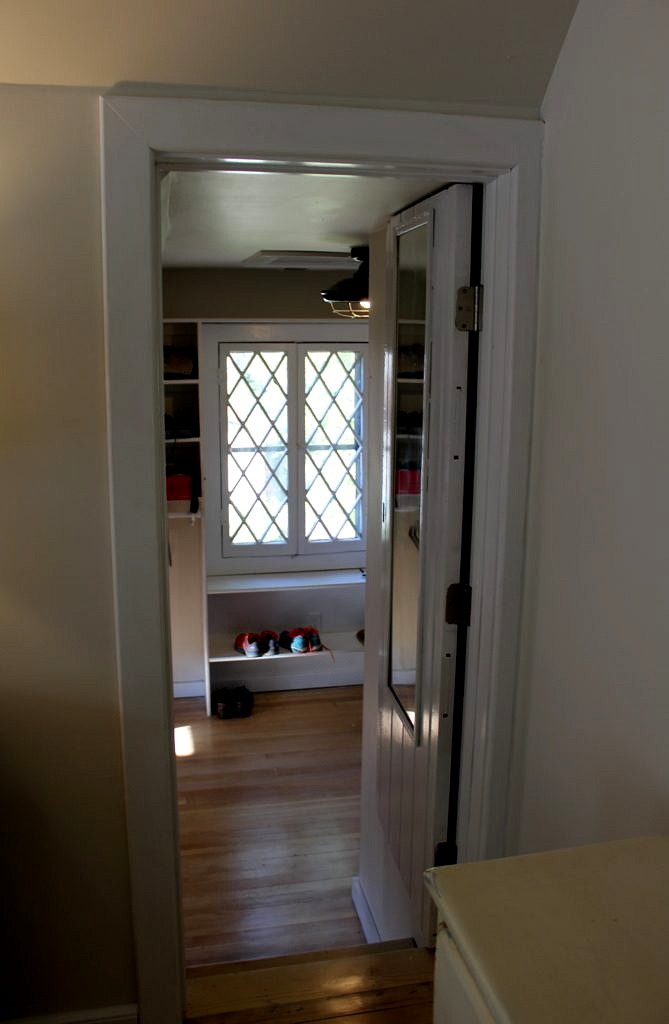
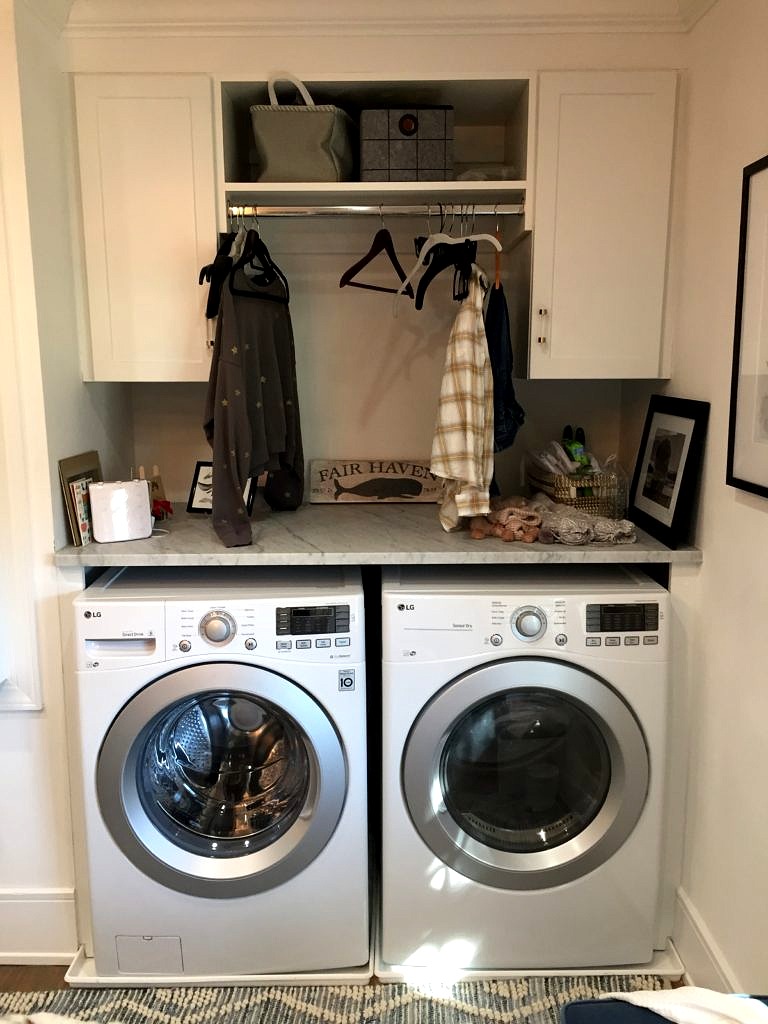
What was used as a third bedroom has become our closet/dressing room. I had a dressing room growing up and it makes a small bedroom seem a lot bigger once you remove the clutter that comes with clothing and putting the wash away. Which also just got a whole lot easier because we squeezed (literally) a washer/dryer into the room too.

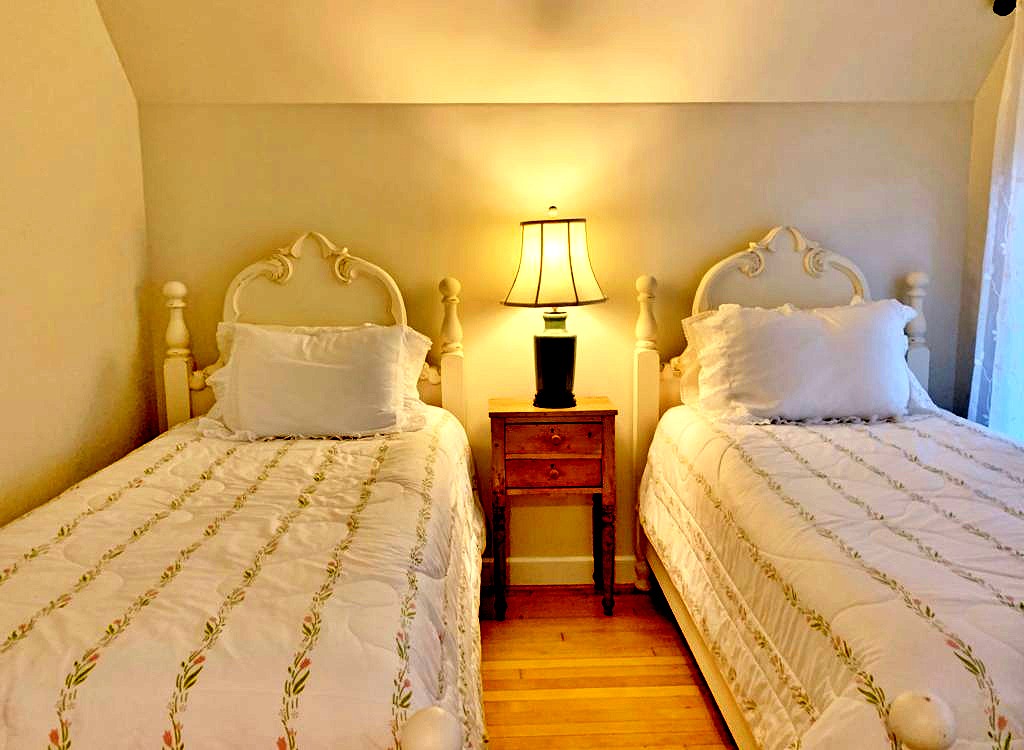
The other bedroom also got taken down to the studs and the closet moved to another wall.

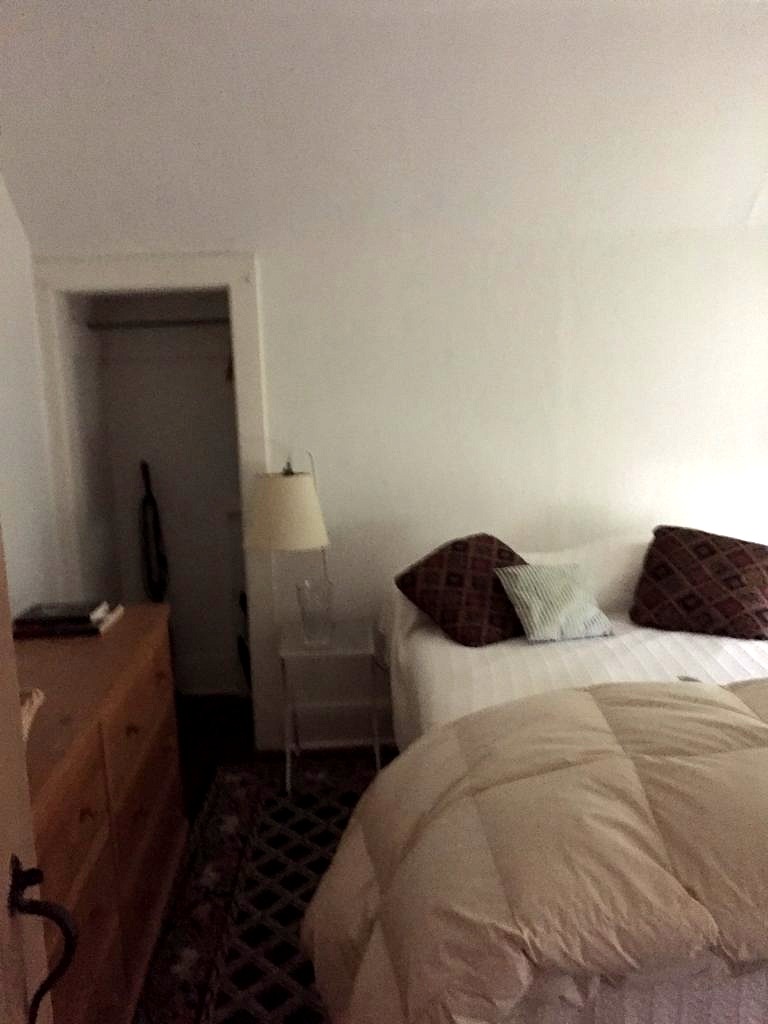
But once painted all that it needed (and could fit) was a pair of twin beds (by British Cottage of course) and an antique pine table to get us up and running for guests. Although the ancient Laura Ashley comforters from the old, old house might not be what my rough tough cowboy grandsons are expecting, they work just fine for now.
That leaves just one room to reveal. The former garage off the kitchen that the previous owner used as an office.
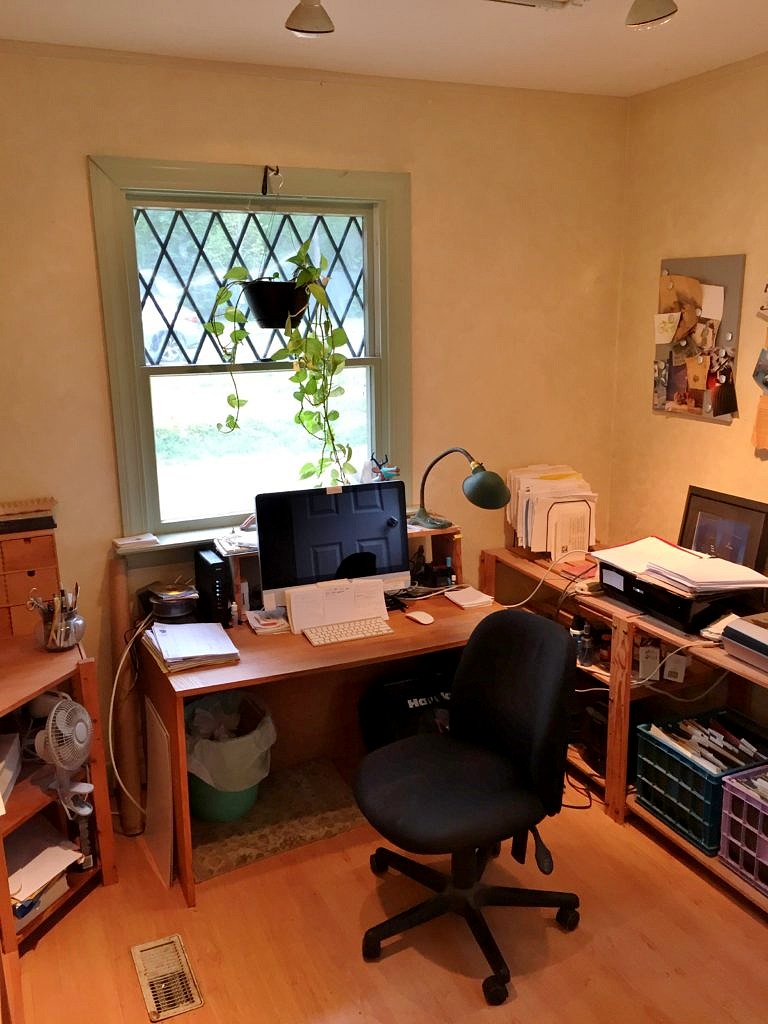
We made it into more of a sunroom, replacing the engineered wood floor with a concrete-like mix that Mike created so it looks and feels like stone.

Then we put a laundry sink in the adjacent bathroom. I agonized over this decision mainly because the darn sink cost a fortune–or nearly–and it certainly isn’t at all what you would expect to see in your normal suburban powder room. But this is right by my back door and I am a very sloppy gardener. Now I don’t need to sully my brand new white ceramic farm sink, white kitchen floor, or whatever else I can get my dirty hands on!
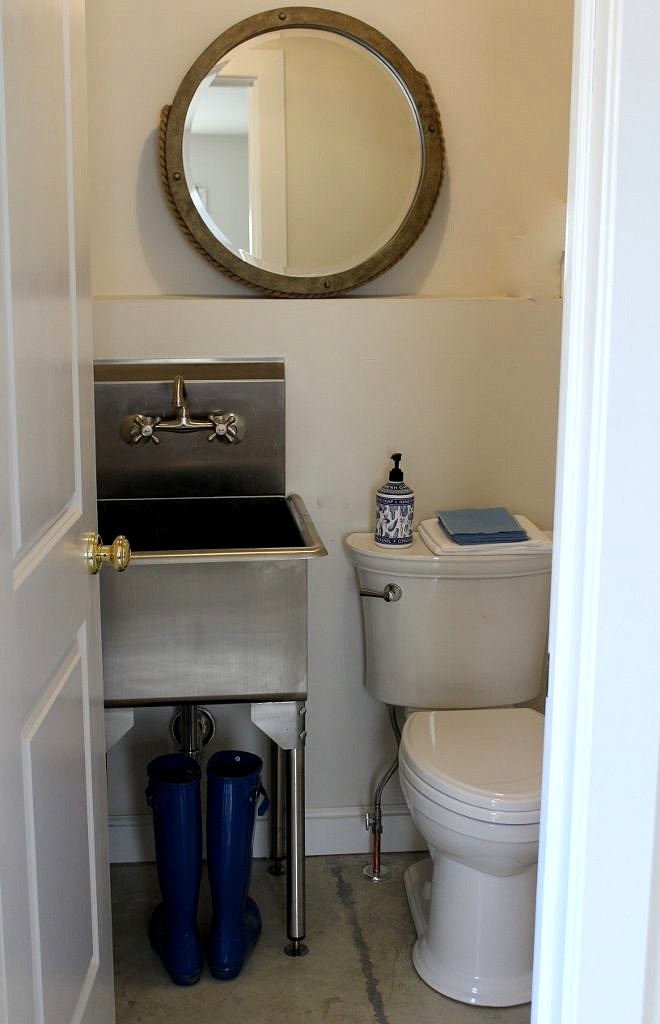
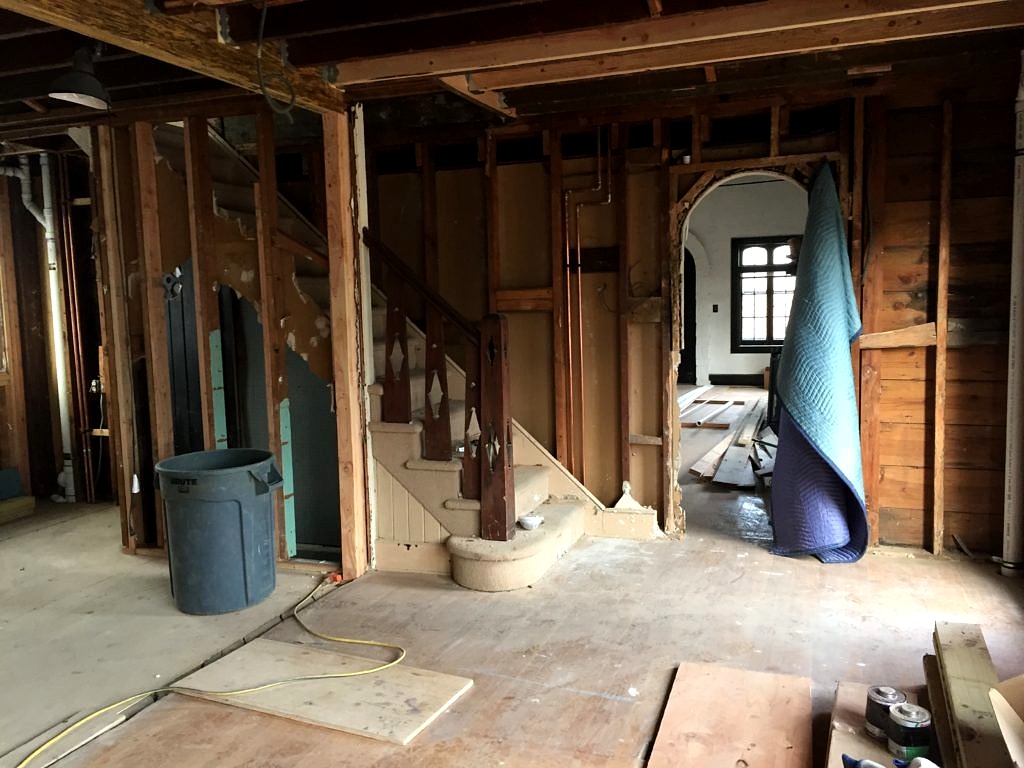
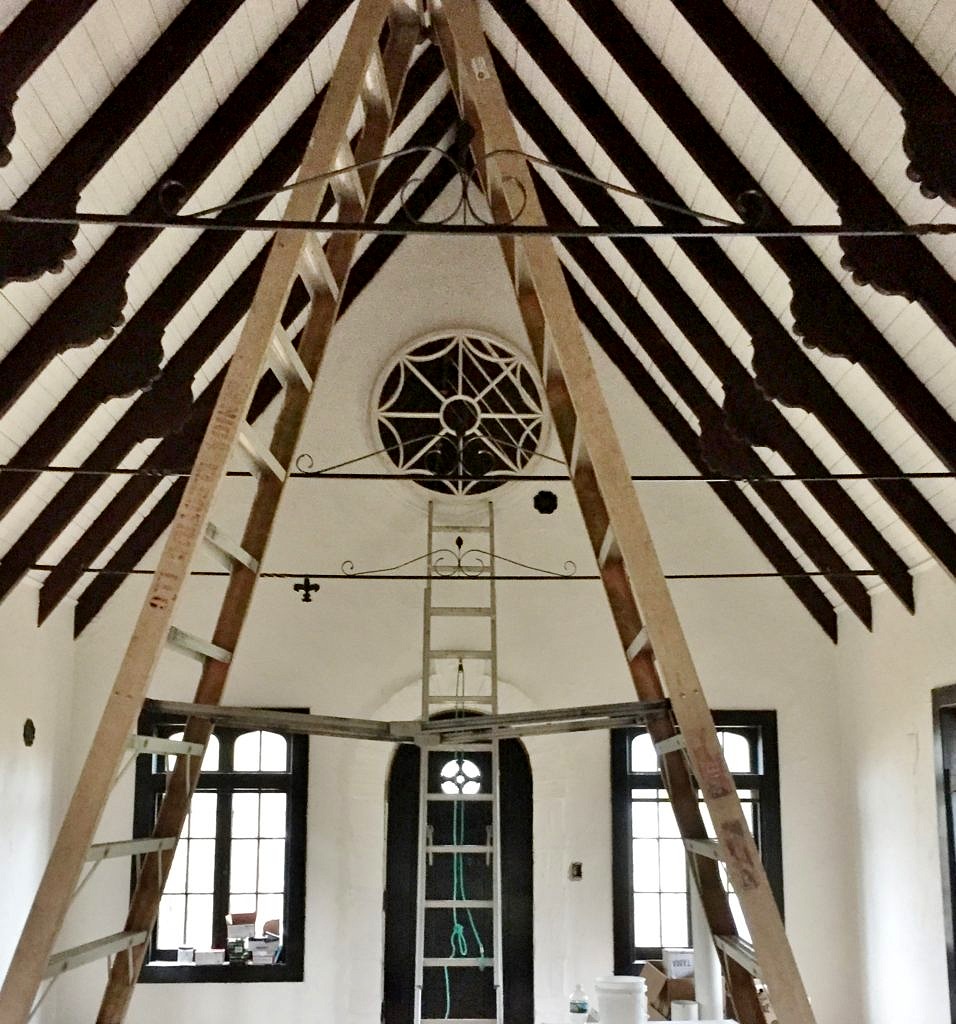
So that wraps up our  Fair Haven Fixer Upper saga. Would we do it again? Hell yes! Next time we will be a bit smarter about reading contracts. Who knew that the fine print really does matter? And I will try to think a bit harder about where outlets and lights should go. A lot of this is required by code but it it so frustrating to have switches and outlets not exactly where you want them. Same thing with plumbing fixtures; what seems okay in the rough may not be what you want in the end. But that is for next time; tomorrow, after all, is another day!
And right now I want to share my favorite new recipe of the summer: Maangchi’s Cheese Buldak or Fire Chicken from the NY Times Magazine;  although I have never made the recipe the way it is written. I use whole bone-in chicken thighs that I marinate in a mixture of whatever bottled barbecue sauce is languishing in the fridge, along with a ton of hot sauce, brown sugar, garlic, soy sauce and a little rice wine vinegar.                          Then I saute a chopped up onion in olive oil, add the chicken with the marinade, a splash of water and let that cook for about a half hour. Add the cheese and broil then top  with diced scallions. I’ve served this with leftover corn cut off the cob (amazing), basmati rice and stir-fry rice noodles.  Anything goes. So whether you follow the recipe or my way–try this dish if you, like most of us I expect, need a new fabulous chicken recipe.

INGREDIENTS

  • ¼ cup gochugaru (Korean red-pepper flakes)
  • 2 tablespoons gochujang (Korean red-pepper paste)
  • 3 tablespoons light brown sugar
  • 3 cloves garlic, peeled and minced (about 2 tablespoons)
  • 1 (1-inch) piece ginger, peeled and minced (about 1 tablespoon)
  • 1 tablespoon soy sauce
  • ½ teaspoon freshly ground black pepper
  • 1 pound boneless, skinless chicken thighs, cut into ¾-inch cubes
  • 2 tablespoons neutral oil, such as canola or peanut
  • 4 ounces sliced Korean rice cakes (optional)
  • 6 to 8 ounces low-moisture mozzarella, thinly sliced
  • 2 scallions, sliced, for garnish
    •  

PREPARATION

  1. Combine the gochugaru, gochujang, brown sugar, garlic, ginger, soy sauce and black pepper in a medium bowl and mix well. Add the chicken and stir until it is well coated.
  2. If you’re using the rice cakes, swirl the oil into a large, oven-safe skillet set over medium-high heat and wait for it to shimmer. Add the rice cakes and cook, turning the cakes often, until they are a little crisp, 3 to 4 minutes. Transfer the rice cakes to a small bowl and set aside. If you’re not using rice cakes, simply swirl the oil into the pan and move along to the next step.
  3. Add the chicken mixture to the pan along with ¼ cup water. Cover and cook over medium-high heat, stirring occasionally, until the chicken is cooked through, 8 to 10 minutes, stirring in the rice cakes halfway through, if using. Meanwhile, heat the broiler in your oven.
  4. Remove the chicken from the heat. Cover the pan with the sliced mozzarella, then slide the pan under the broiler. Cook until the cheese has melted and browned in spots, about 2 minutes. Remove from the oven, and sprinkle with scallions. Serve immediately, with rice.

The End

Fair Haven Fixer Upper – Chapter 8

It’s not over until they take the Porta John away

Recipe for Pastitsio

The dream….

So finally we are nearing the end of our ninth month working on our Fair Haven Fixer Upper. It all started on a whim–which led to a project that has ever since consumed most of our free time and energy–even invading our sleeping–or rather not–sleeping anymore hours. The good news is I can safely say, as we head into the final stretch, it has all been worth it. (Keith’s perspective might be a little less sanguine…)

The reality…

Often when remodeling things seem to drag on and on and then, all of a sudden, you jump into warp speed. In the last month or so we’ve gotten new front and back steps, tiled, sheetrocked, painted inside and half of out. The new flooring was installed and the old flooring repaired. Then, when that combo effect looked terrible in the wide open kitchen/dining area, we went with all new hardwood. More time, more money, but sometimes you have to bite the bullet.

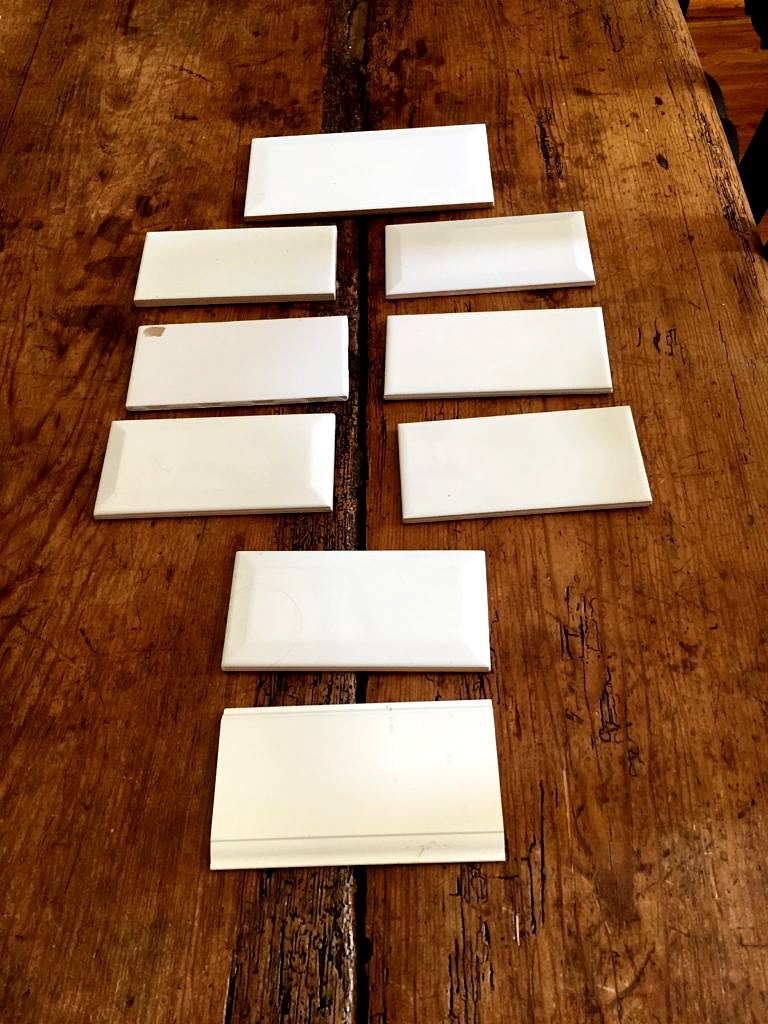
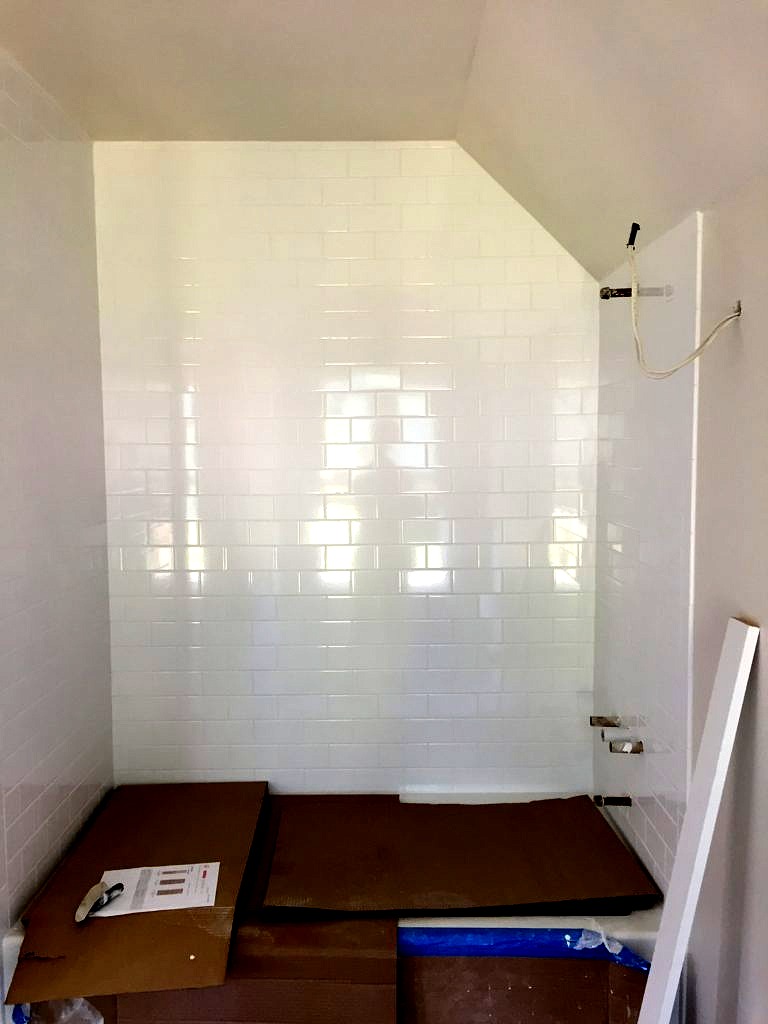
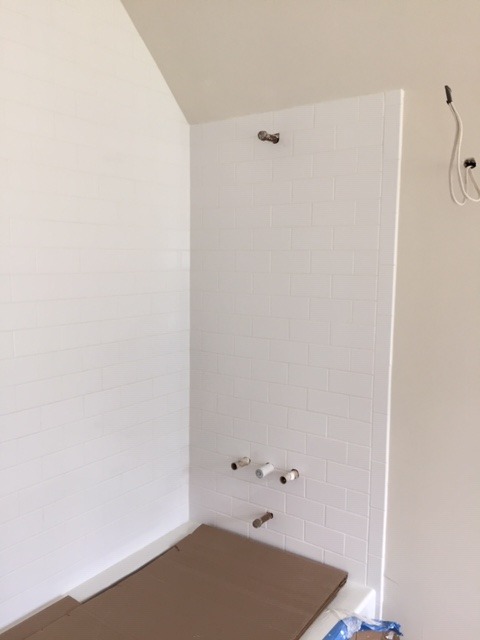
Fabulous Antonio tiled the bathrooms, all in subway tile. I pondered other options but in the end went with the super plain vanilla kind. It just made life easier not to have to think about all the millions of other options.

Alth0ugh, to be honest, I still spent a crazy amount of hours considering which of a half dozen different brands of white subway tile I liked best. I went with the one priced in the middle–which looked just like all the others. Here it is in the new master bath. (For those of you familiar with the house–this is where the door to the second floor balcony used to be).

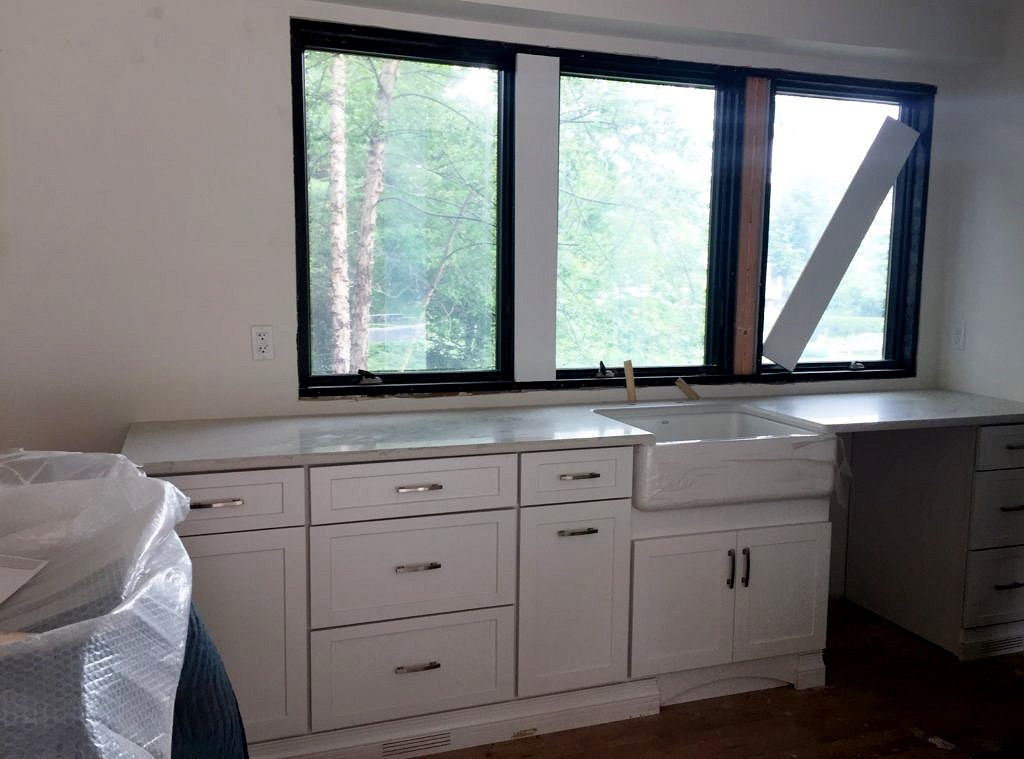
The Red Bank Cabinet Co , (who are actually down the street from the store in Tinton Falls) made and installed the kitchen cabinets. Like many of you I imagine, I fretted and pondered and poured over images from Houzz and Pinterest for hours and hours and then opted for shaker style cabinets in white…which is all I ever wanted from the beginning. When will I ever learn to stop second guessing myself? Cliche, overdone, so what, who besides me really cares? (Certainly not Keith, he is like, just pick the cabinets already). Anyway they look fresh, crisp, clean and classic. Perfect.

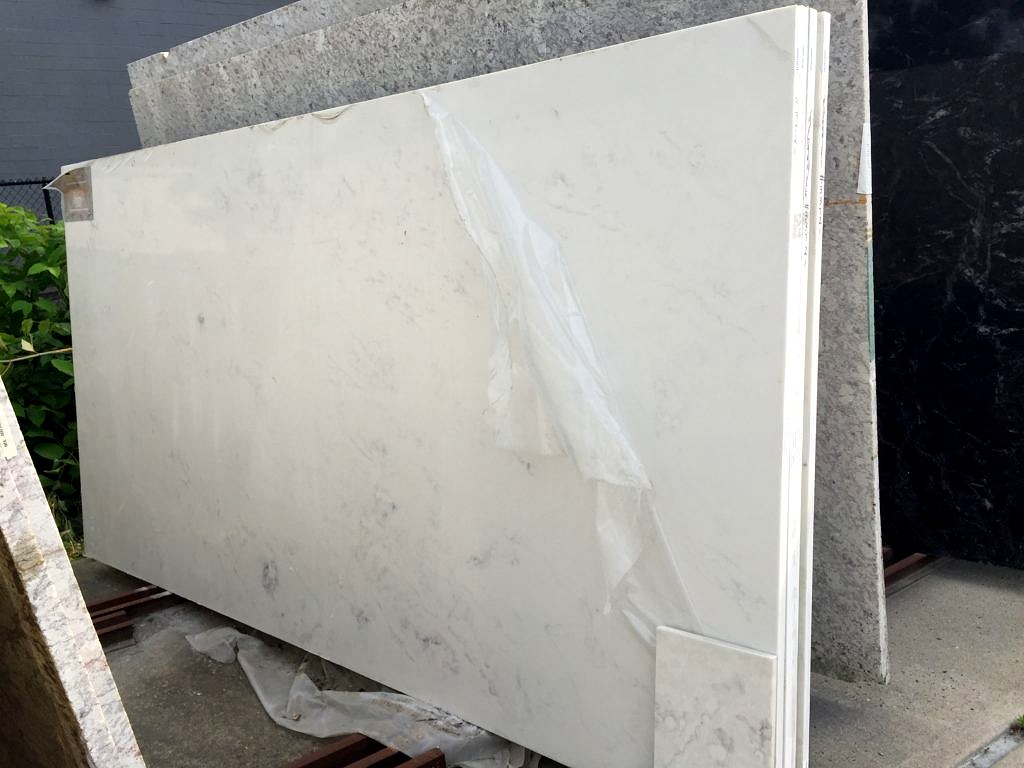
I selected quartz countertops at Bedrock Granite–also just down the street from British Cottage at 803 Shrewsbury Avenue. All my life I wanted marble countertops and now, when I finally had the chance, I choked. The fact is while I love cooking, I am not so devoted to the clean up part…How could I possibly rationalize paying more for marble when I knew I wouldn’t lift a finger to maintain it? Sometimes you just have to be honest with yourself. So quartz it is.

Meanwhile we pondered about what to do about the outside. We had hills of weeds too deep-rooted to pull, patches of poison ivy and a lumpy landscape draining every which way but out. So after calling numerous excavators, and not getting a call back, (or if we did, an estimate we could live with); Keith and I, along with our fearless mason, Mike Papa, who channeling his inner Zeitgeist as the Master of the Machine Universe, dug, crunched, dragged, scraped and basically moved tons of dirt while we raked up and discarded all the brush. It was a long day but between the three of us we managed to get the whole property graded.

Actually it was an exhausting bone-crushing day but well worth it to have a whole yard unchoked by weeds, bermless and relatively level. And then, after many truckloads from the fab folks at Rysers, gravel instead of mud in our driveway; sheer bliss.

Last week most of the interior trim and doors were installed. This week brings more trim, the kitchen countertop, overhead lighting, appliance and plumbing fixture installations. After that the floors get sanded and finished and we’re in. Let’s hope.

Meanwhile, after all this digging, raking, and wheelbarreling we were starving. No matter that salad season is upon us, all anybody wanted was a hungry man kind of dinner. This recipe from Ina, the wiz, Garten was perfect. It is enough for two meals–possibly three–and well worth the effort. (Needless to say I have tweaked this quite a bit mainly because I never have all the correct ingredients, (like heavy cream or whole milk, so I just add a bit more butter)… but clearly Ina’s way is the very best).

Pastitsio

Tomato Meat Sauce:

  • 3 tablespoons good olive oil 
  • 1 1/2 cups chopped yellow onion  (1 large)
  • 1 pound lean ground beef
  • 1 pound lean ground lamb 
  • 1/2 cup dry red wine
  • 1 tablespoon minced garlic  (3 large cloves)
  • 1 tablespoon ground cinnamon 
  • 1 teaspoon dried oregano 
  • 1 teaspoon fresh thyme leaves 
  • Pinch of cayenne pepper
  • 1 can (28 ounces) crushed toma-toes in puree  
  • Kosher salt and freshly ground 
  • black  pepper 

BECHAMEL:

  • 1 1/2 cups whole milk 
  • 1 cup heavy cream 
  • 4 tablespoons (1/2 stick) unsalt-ed butter
  • 1/4 cup all-purpose flour   
  • 1/4 teaspoon freshly grated nut-meg 
  • Salt and freshly ground black 
  • pepper 
  • 1 1/2 cups freshly grated 
  • Parmesan cheese
  • 2 extra-large eggs, beaten
  • 2/3 cup Greek-style yogurt, such as Fage Total
  • 3/4 pound small shells

Directions

1.
For the sauce, heat the olive oil over medium-high heat in a large pot.
Add the onion and saute for 5 minutes.
Add the beef and lamb, and saute over medium heat for 8 to 10 minutes, until it’s no longer pink, crumbling it with the back of a wooden spoon.
Drain off any excess liquid, add the wine, and cook for 2 more minutes.
Add the garlic, cinnamon, oregano, thyme, and cayenne, and continue cooking over medium heat for 5 minutes.
Add the tomatoes, 2 teaspoons salt, and 1 teaspoon pepper and simmer, stirring occasionally, for 40 to 45 minutes. Set aside.

2.
Preheat the oven to 350 degrees F.

3.
For the bechamel, heat the milk and cream together in a small saucepan over medium-low heat until simmering.
In a medium saucepan, melt the butter.
Add the flour and cook over medium heat, whisking constantly for 2 minutes.
Pour the warm milk and cream mixture into the butter and flour mixture, whisking constantly. Continue cooking, stirring occasionally, over medium heat for 5 to 7 minutes, until smooth and thick.
Add the nutmeg, 1 teaspoon salt, and 1 teaspoon of pepper. Stir in 3/4 cup of Parmesan cheese, 1/2 cup of the tomato and meat sauce, and allow to cool for 10 minutes. Stir in the eggs and yogurt and set aside.

4.
Meanwhile, cook the pasta in a large pot of boiling water until al dente.
Don’t over-cook because the pasta will later be baked.
Drain and set aside.

5.
Add the pasta to the meat and tomato sauce, and pour the mixture into a baking dish.
Spread the bechamel evenly to cover the pasta and sprinkle with the remaining 3/4 cup Parmesan cheese. Bake for 1 hour, until golden brown and bubbly.
Set aside for 10 minutes and serve hot.

Serve with a green salad and a nice bottle of something red and enjoy!

Fair Haven Fixer Upper – Chapter 7

April is the cruellest month, breeding
Lilacs out of the dead land, mixing
Memory and desire, stirring
Dull roots with spring rain.

Potato Tart with Mustard Greens and Lemon Thyme

T. S. Eliot may have said it but I am feeling it. April is the cruellest month. We are so close to finishing up at 28B, but the fates seem like they are conspiring to thwart us. The window that arrived broken in chapter 3, was returned a month later–still broken–so there went another three weeks. The HVAC guys who were going to finish up a month ago are at the house now hopefully finishing up this weekend. Then the estimate for the front steps came in at, make sure you are sitting down, $8000.00! The list is endless. Our house is on a private road; the owners are unhappy because we have tracked some mud on it. Really? Nonetheless we are striving to be good neighbors and basically power washed the street and then barricaded our driveway so no one can accuse us of spreading any more dirt!

Last Sunday I made Keith go to Monmouth Building Center and buy five gallons of Benjamin Moore eggshell paint in White Dove so we could paint the great room and I could feel like we were making progress somehow, somewhere. I spent a total of five minutes prior deciding on the color, not obsessing for days–as I have in the past–over which white was best and trust that sometime, in the last forty years, that I had visited this all before. China White, which I love is too grey for this house, Linen White too beige, hence White Dove it was meant to be. The trim will be a semi-gloss Decorator White for a hint of contrast and a bit of shine–where it is not already black or brown wood.

For a while I toyed with the idea of painting all the woodwork white–yes really. But I was never 100% sure that was my best idea, so we won’t. I might have painted all the wood trim you see see in the photo below.

The great room

But I am not convinced the balcony area would look so great. And I can always change my mind and paint it white in the future but right now it is going to stay the way it is.

The balcony

Anyway, we painted the great room. The week before we removed all the wooden storm windows from the ten casement windows, and were happily surprised that they are in pretty good shape. We will try to get those painted this Sunday.

Right now Keith is meant to be hanging a 48″ round mirror over the stained glass window above the back door. (I have nothing against stained glass but this is a rather dorky looking guy with a flute.) I’m hoping the mirror will add some depth to the rather vertical elements in the room and reflect the light. (Success! See photo below.) Also today they are putting in an arched door on the left that will match the door on the right in the great room. Symmetry is a good thing.

Then, assuming the HVAC gets done we can schedule inspections for next week and then, finally, get the rest of the house insulated and sheetrocked. That leaves installing the kitchen, which after much soul searching and pricing and pondering, I ordered from Red Bank Cabinet down the street from us on Shrewsbury Avenue.

This is the master bedroom and new master bath.
Guest room looking through to what will be the laundry room/master bedroom closet.

I thought I thought up the idea to combine a closet for the master bedroom with a laundry room, but then on Wednesday I went to see a delightful house down the street from us and voila–

Master bedroom closet/laundry room

Actually the owner of this house looked at ours–twice–but wisely shied away when she realized the scope of the work required…You can see how lovely her new home looks at Cinda Brown Interiors . The Austin based designer masterminded the transformation of a totally traditional suburban ranch style home into a chic transitional living space. It is really beautiful. A bit more modern in scope than we are used to but perfect for the almost art deco style sofa we purchased from Hickory White at the last High Point Furniture Market.

Speaking of High Point, we were there last week for the Spring High Point Furniture Market. It was inspiring to see so much fabulous furniture and we bought a fair amount. But that will be for future blogs. I am so hoping to wrap up our Fair Haven Fixer Upper in June and then we can get back to focusing on the myriad homes we help furnish in our unique and beautiful neck of the woods, or shore, I could say.

Although the weather in April is unpredictable, and things don’t always go my way, I can’t help but get excited that spring is finally here. And what says spring more than an incredibly delicious and mostly healthy vegetable tart? Try this recipe from Epicurious–you won’t be sorry!

Potato Tart with Mustard Greens and Lemon Thyme

  • 4 sheets whole wheat phyllo dough
  • 1 large Yukon Gold potato, sliced paper thin
  • 1/2 cup buttermilk
  • Salt and freshly ground black pepper
  • 1 tablespoon canola oil
  • 1/2 cup chopped onion
  • 2 cups chopped mustard greens
  • 2 large eggs
  • 3 large egg whites
  • 1/2 cup skim milk
  • 2 teaspoons lemon thyme leaves
  • 2 ounces soft goat cheese (about 4 tablespoons)

PREPARATION

  1. Preheat the oven to 375°F. Line a 10-inch tart pan with the whole wheat phyllo dough. Leave a 1/2-inch overhang and trim any excess. Place the tart pan on a baking sheet. In a medium mixing bowl, toss the potato slices with the buttermilk and season with salt and pepper. In a large sauté pan, heat the canola oil over medium heat and add the onions. Cook the onions for 2 minutes over medium-high heat. Add the mustard greens to the pan and cook for 5 minutes or until they are wilted. Season with salt and pepper. Shingle half the potato slices on the bottom of the phyllo-lined tart pan. Sprinkle with half of the mustard greens. Repeat the process with the remaining potatoes and mustard greens. In a medium bowl, whisk the eggs, egg whites, and skim milk for 1 minute or until combined. Add the lemon thyme and season with salt and pepper. Pour the egg mixture over the potatoes. Drop teaspoons of the goat cheese around the tart. Bake the tart for 45 to 60 minutes or until it is just set and the potatoes are cooked. Remove from the oven and let sit for 15 minutes before cutting. Cut the tart into 6 pieces and place on a serving plate.

Spring, in between showers, can also be a good time for weddings. Laird McConnell Bohn, whose grandmother once lived in our house, sent me this photo of her aunt. Now we know what the balcony was meant to be used for!

Fair Haven Fixer Upper – Chapter 6

Chapter Six

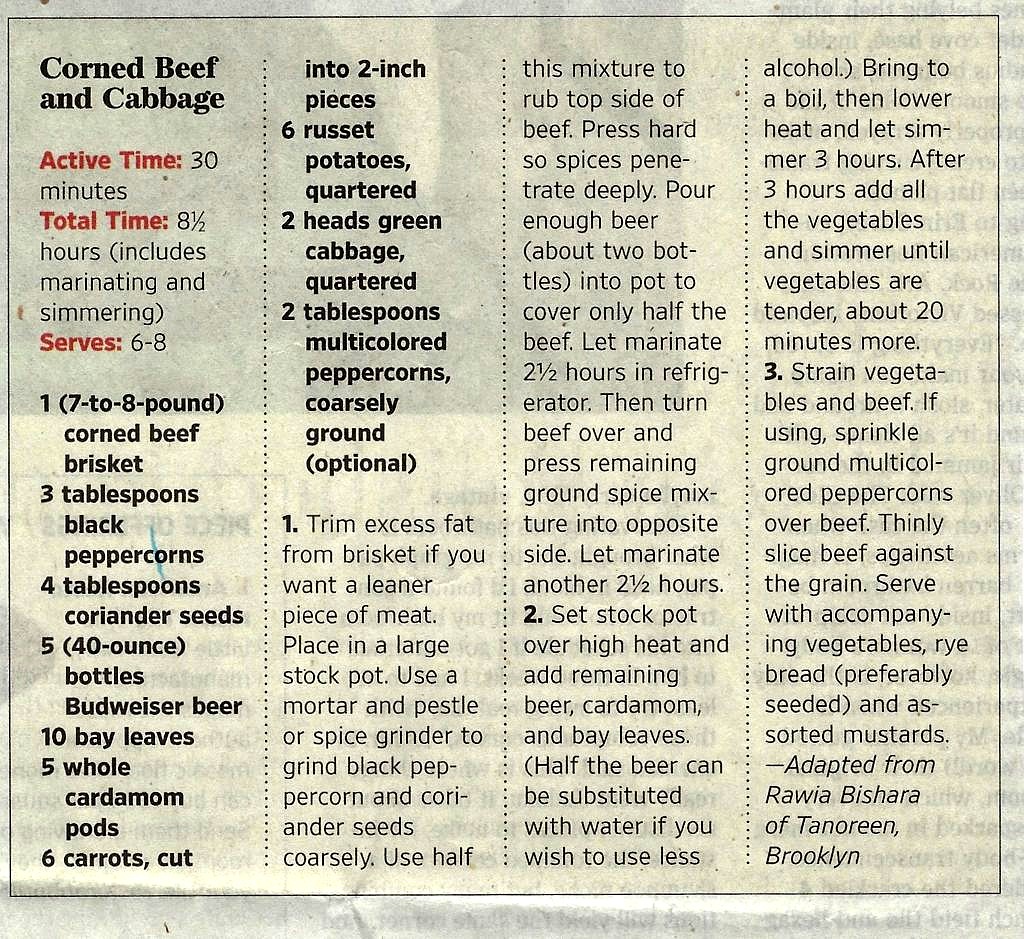
Corned Beef and Cabbage

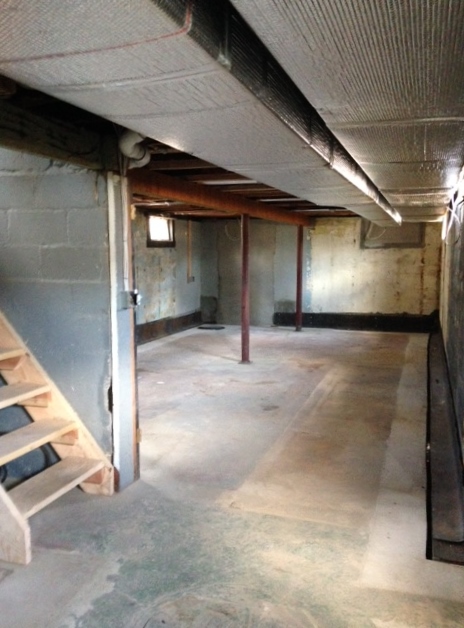
When we started this journey I imagined being finished and in the house by March 1. Needless to say that didn’t happen. However, we have made significant progress. Let’s begin with the basement:

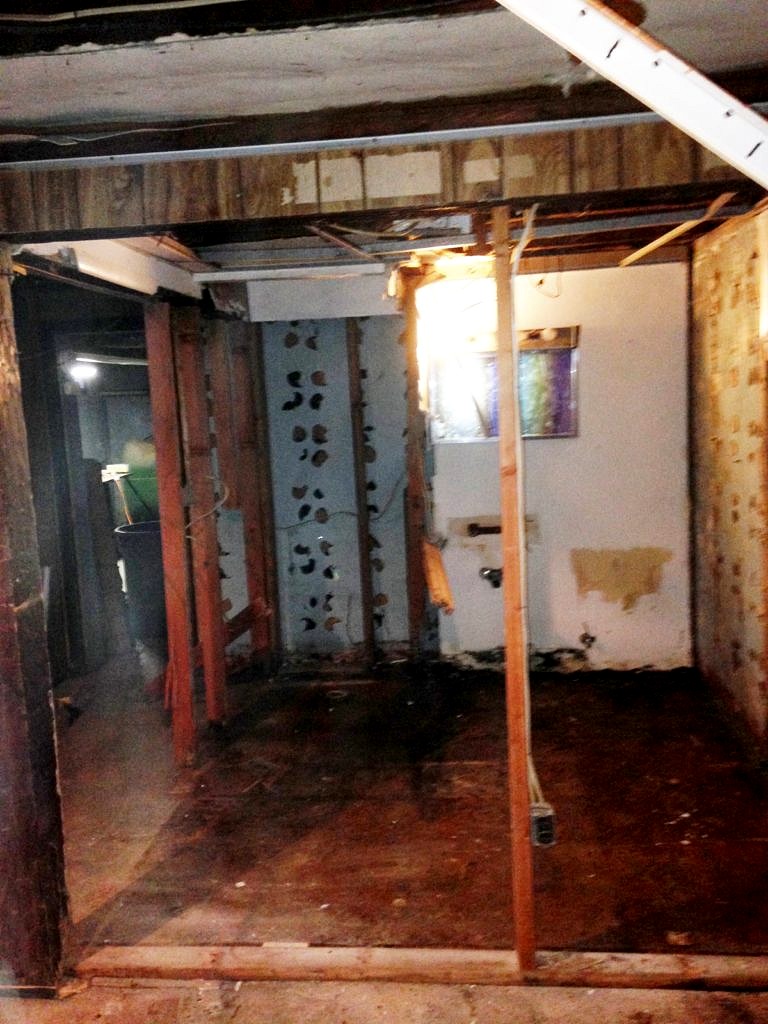
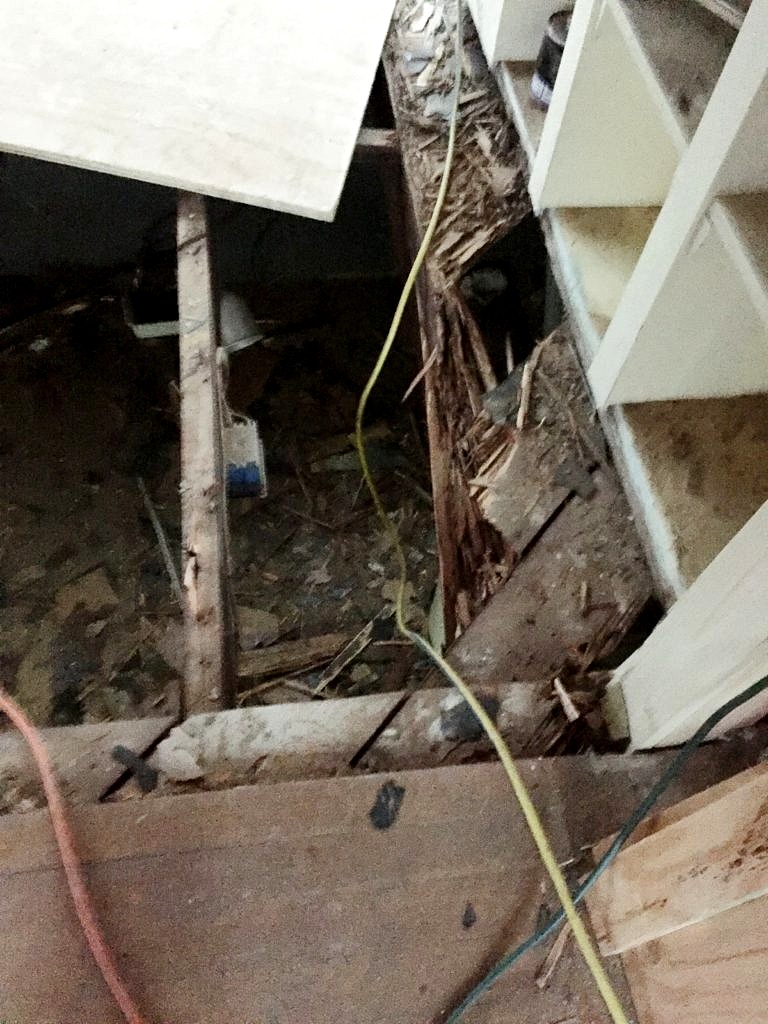
Or let’s just cut to the chase and say four and a half months later the basement is a work of art–even though it killed me to have to pay for it. We have new beams, sills, lally columns (don’t get me started), and stairs. The leaky bilco door is gone and french drains were installed thanks to Mike Papa, mason extraordinaire, and a genius when it comes to stemming the tides that afflict aged foundations. They definitely need him in Venice.

While he was poodling around in the basement The wizards at Whizzer Construction LLC were shoring up the remaining floors. Literally. The kitchen floor was completely rotten, as was the floor in the bathroom upstairs.

Meanwhile the electricians were busy rewiring the entire house! And the HVAC (Heating Ventilation & Air Conditioning) team was on the job, while our intrepid plumber and his tireless helper (Keith) installed all new plumbing throughout the entire house.

Most people would have a GC or General Contractor on the payroll to oversee the machinations of all these sub-contractors, but not me. Maybe I could with a new house, because you would know where things are going to go right from the start. But with a renovation like this it is hard to foresee what will be required on any given day. And I want to make all those decisions myself. Which means I can change the layout of the upstairs laundry–and change it back again without it being such a big deal.

Of course there is a lot of eye rolling and it has been duly noted that Keith has the patience of a saint, but I think it has generally gone well. The carpenter and the plumber did join forces and gang up against me on my plan to use a tile floor in the downstairs shower. I’ve done it in other houses. You place a waterproof mat down, then tile over it, but my plumber was convinced it would leak eventually so he found another couple of inches so we could use a manufactured shower pan.

Anyway, I’ll keep this short because unless you are in the thick of it, this part isn’t the most interesting. In the upcoming weeks we will sheetrock the walls, and then tile, install the kitchen and then the real fun begins–decorating!

Corned Beef and Cabbage

Meanwhile the hero of this renovating saga needs to be fed so in honor of our beloved St. Patrick, I will share with you a delicious new twist on that annual culinary ritual, Corned Beef and Cabbage.

Fair Haven Fixer Upper – Chapter 5

Almost homemade Pizza

The dream:
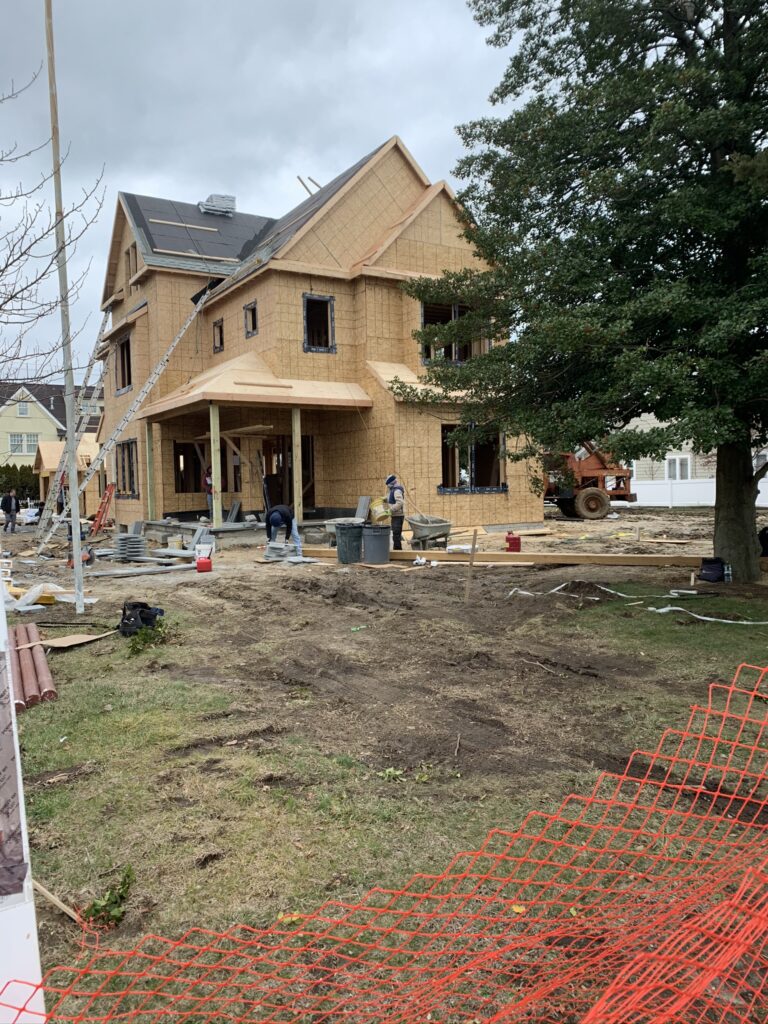
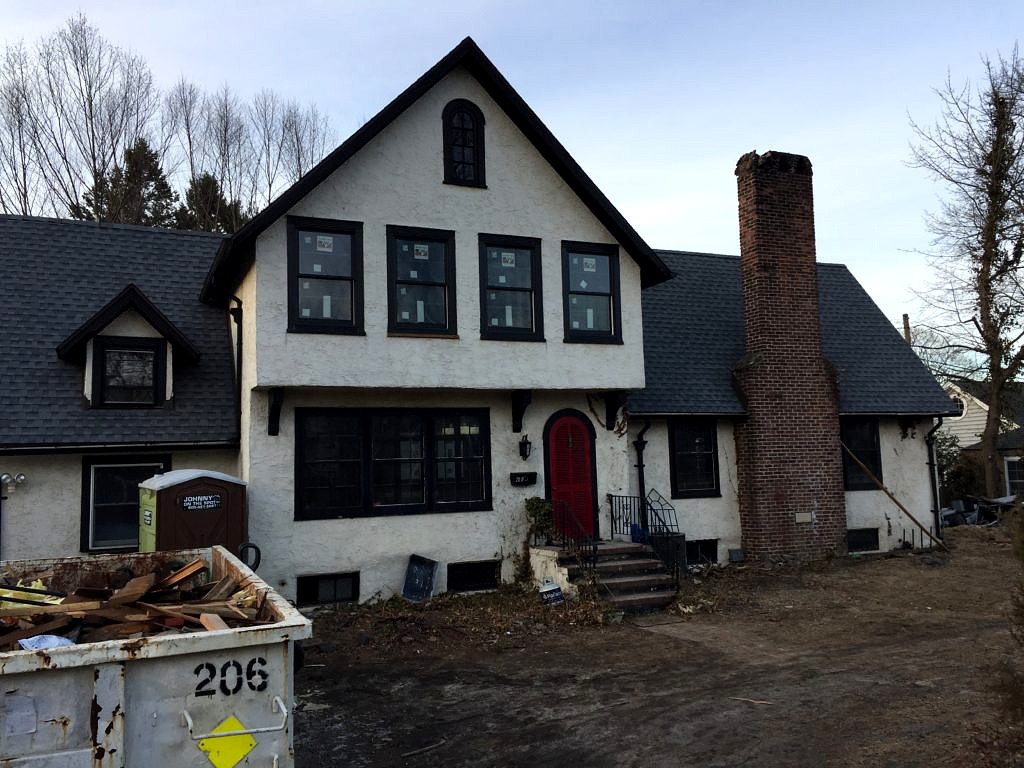
The reality:We’re about 14 weeks and four dumpsters into our project. My original plan was to be finished by March 1–not going to happen. Right now, as I type, there is a crew in the basement installing internal french drains. Who knew Fair Haven was built over a series of underground streams? And who believed their seller when he said all the wet basement issues were resolved when new drains were installed in the road a couple of years ago?
So unlike the tv Fixer Upper where whole homes are renovated in what seems minutes, we are well into our 280th hour of hard labor.  And boy have we’ve learned a lot along the way. You know how in Fixer Upper Joanna says to Chip let’s take the wall down between the kitchen and the dining room, and it happens lickety split?

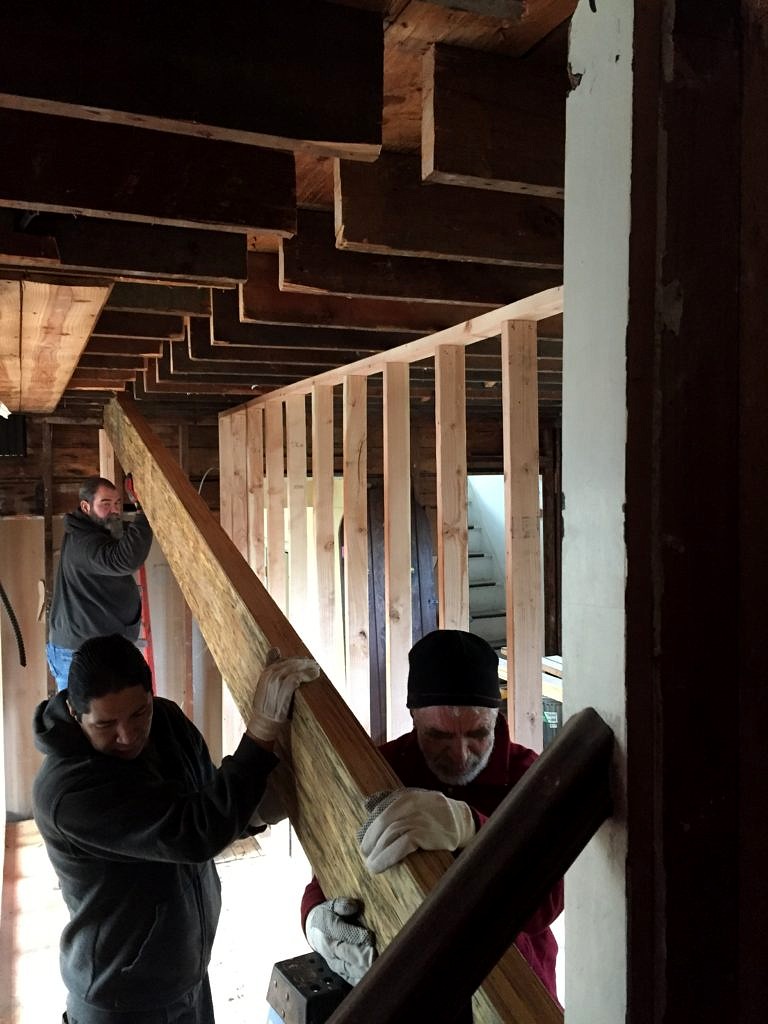
That’s so not true. Besides all the architectural drawings and building permits required, in order to take a load bearing wall down first you have to build a wall–in fact two walls–one upstairs and one downstairs in the basement to support the wall being removed! Who knew that?

And then you need to round up at least four really strong guys to wrestle the new beam–called a microllam–into place. Voila.Ironically once we got the new beam in, and replaced the rotten sub flooring in the kitchen so we could set the headers (wooden things that support walls) for the new windows just in time for their delivery date… The truck, delivering the new windows,  rear-ended someone en route to our job and one of our kitchen windows got broken–oops–too bad. So not only do we have to wait another month for the replacement window…we will have to pay our guys to come back and do the install. Oy vey already.
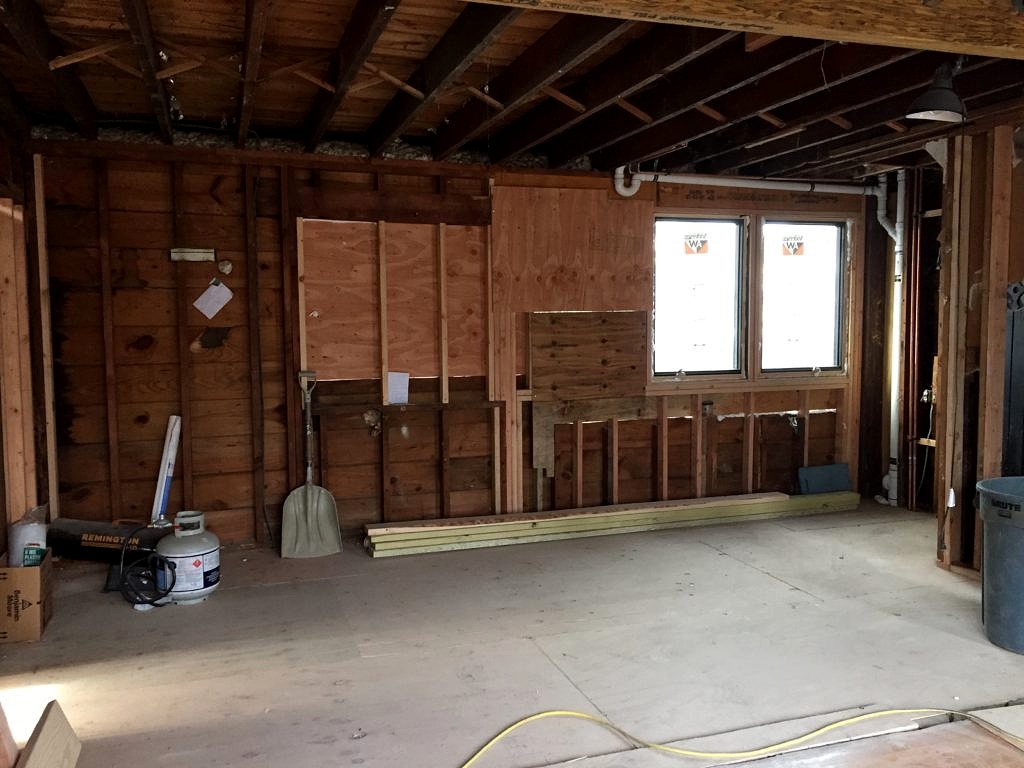
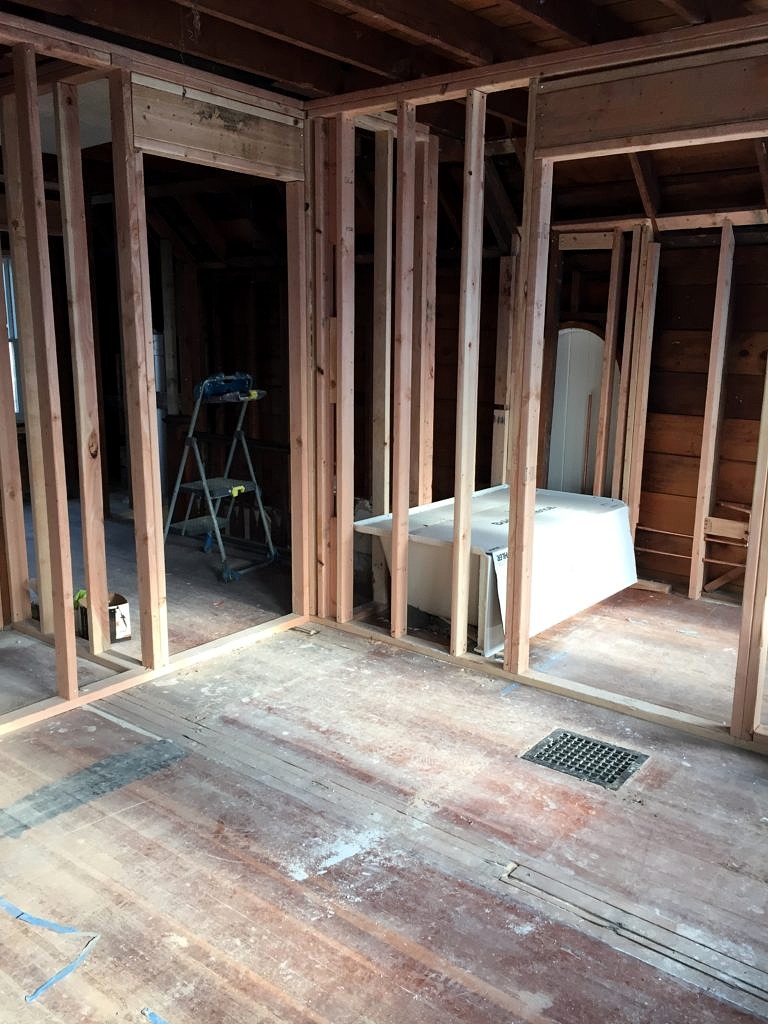
The good news is the rough plumbing is done–inspection on Thursday. The bad news is the inspector is coming between 8 and 2. No heads up phone call which means yours truly will have to sit there and freeze to death because clever Keith has scheduled deliveries for himself that day. We added a master bath; a bold move seeing as we are now losing access to the balcony overlooking the great room. But I decided, knowing my family,  someone would probably end up falling from it at a possibly alcohol fueled moment anyway, so safety and a bathtub trumped moonlight serenades.
That is part of the struggle when wrestling an 89 year old house into modernity. Some character is invariably lost along the way. Hopefully we will be able to make up for it when we get to the decor.Fortunately the great room will be a breeze to decorate and certainly something I have been looking forward to. So many decisions to ponder: tv over fireplace or on sidewall, ceiling fans or chandeliers, whether to open up the arched back door, sectional or a grouping of sofas, the list is endless.

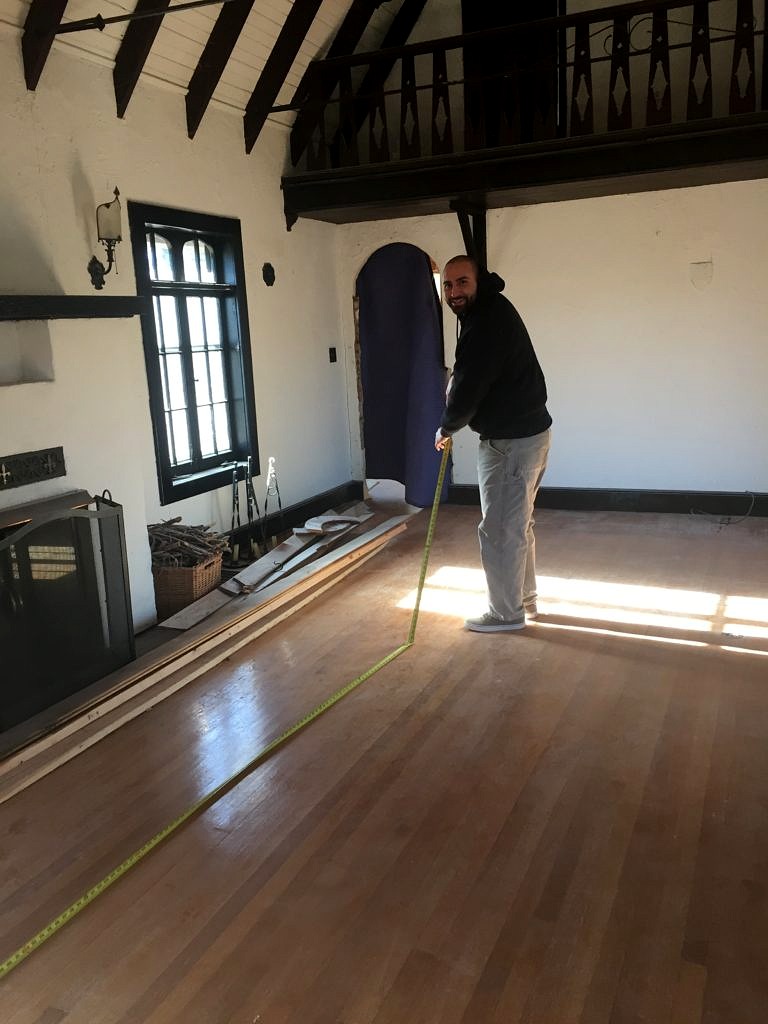
One thing we do know is we are restoring the hardwood floors throughout the house. And have hired Beaton Brothers in Lakewood to do the job… My maiden name is Beaton (I like to think I am getting the family pricing and they do nothing to disillusion me). Dave Senior was the mastermind behind the floors in our first store at 126 Shrewsbury Avenue in 1989, the 2004 renovation, the 130 Shrewsbury Avenue remake and any number of our Rumson homes. This is Dave Jr measuring up the great room.So along with progress comes an appetite. All anyone (in our case usually Keith) cares after working in a freezing cold house all day is a hot meal and a beer. And what goes better with beer then pizza?
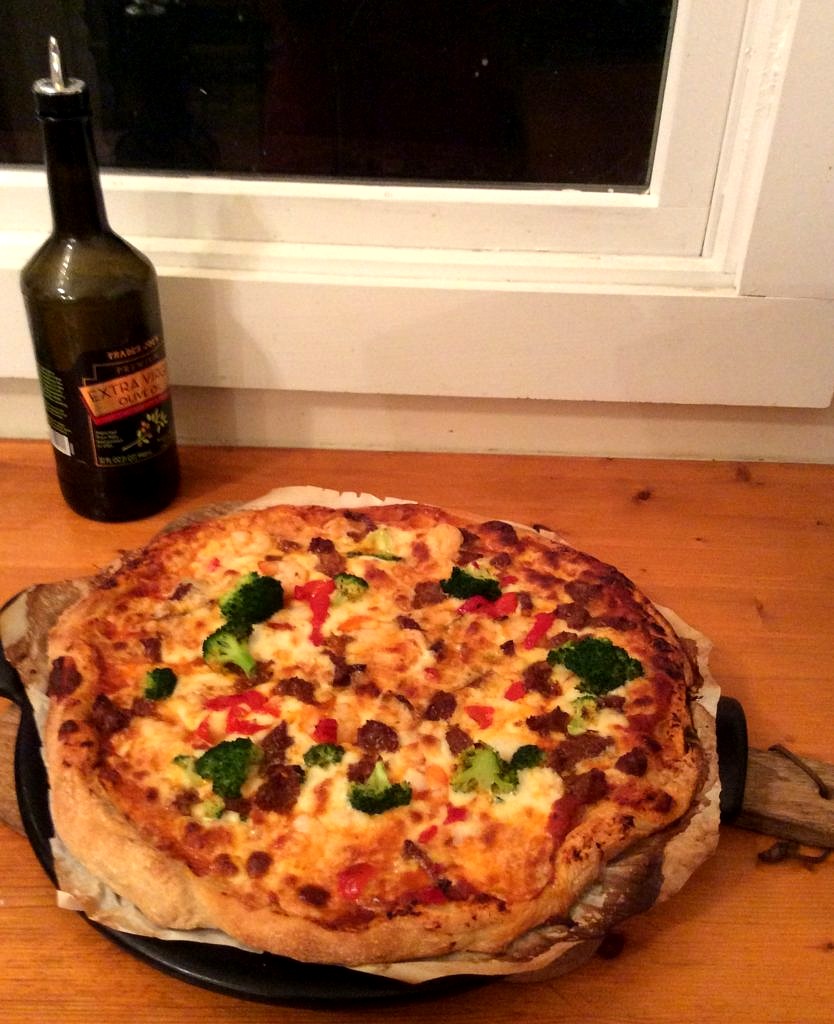
Almost homemade Pizza

In order to make great homemade pizza, you need the right equipment–not a pizza oven but a good pizza stone is key. First cut some parchment paper into the shape of your pizza stone–then put the stone into your oven and turn the heat up to to 425 degrees.
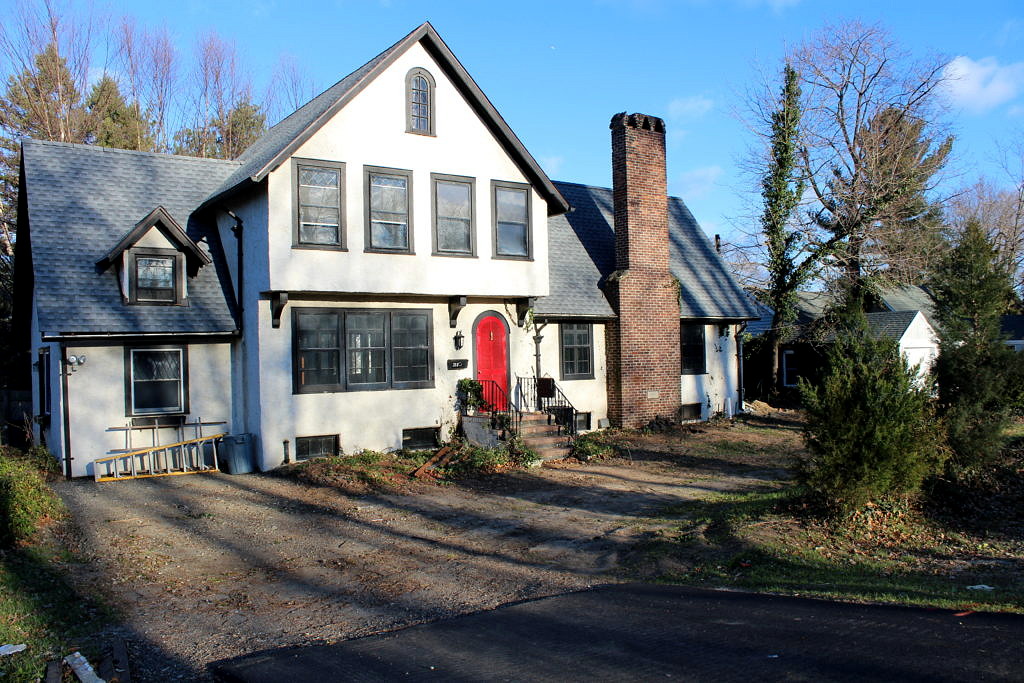
Next sprinkle the parchment paper with a dusting of cornmeal (key) then roll out your dough*, I buy it fresh from Trader Joe’s ,  (try to remember to take it out of the fridge 20 minutes or so before you are ready to roll).

You just need to schmear the dough with tomato sauce–another key thing to remember is not to over-sauce–add a ton of grated cheese, and whatever  you like in the way of toppings: crumbled hot or sweet sausage (cook this first), shrimp (toss a dish of raw shrimp in a bath of butter, garlic and hot pepper flakes in the oven while it is heating until they are slightly pink and you will thank me forever), broccoli (I put this in the microwave for about a minute first), red pepper, green pepper, onions, olives–basically whatever you have in the fridge.

Now here comes the tricky part. You have to get the pizza, on the parchment paper, onto the burning hot pizza stone. I usually let Keith handle this–then cook for about 10 to 15 minutes. That’s it. Slice it up, pour some more beer and enjoy–simple as pie.

*  There is no point debating whether truly fresh homemade dough is better–of course it is.

Fair Haven Fixer Upper – Chapter 4

All it Takes is Time–and then–More Time

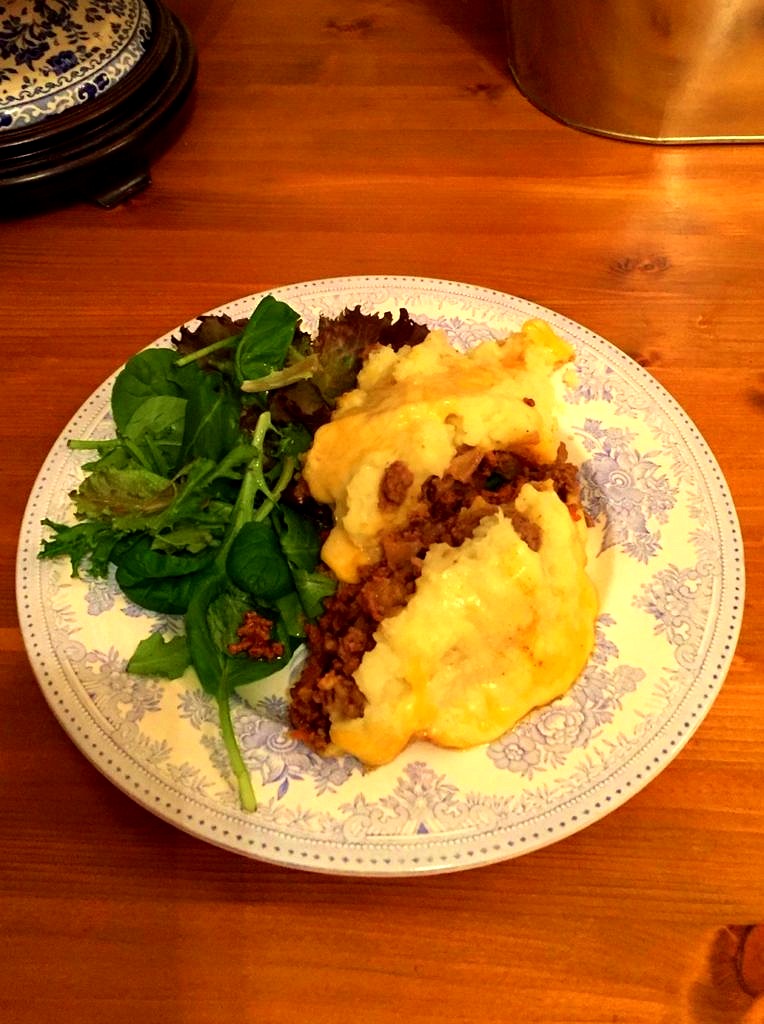
Shepherd’s Pie Recipe

After two months we have accomplished nearly all of what Chip and Joanna Gaines do in the first five minutes of their TV show Fixer Upper. What you don’t see on television but face in a real-life renovation is mountains of paperwork and red tape. Nothing happens in the town of Fair Haven New Jersey that does not require an application, an inspection, a fee–and, in all probability, another inspection.
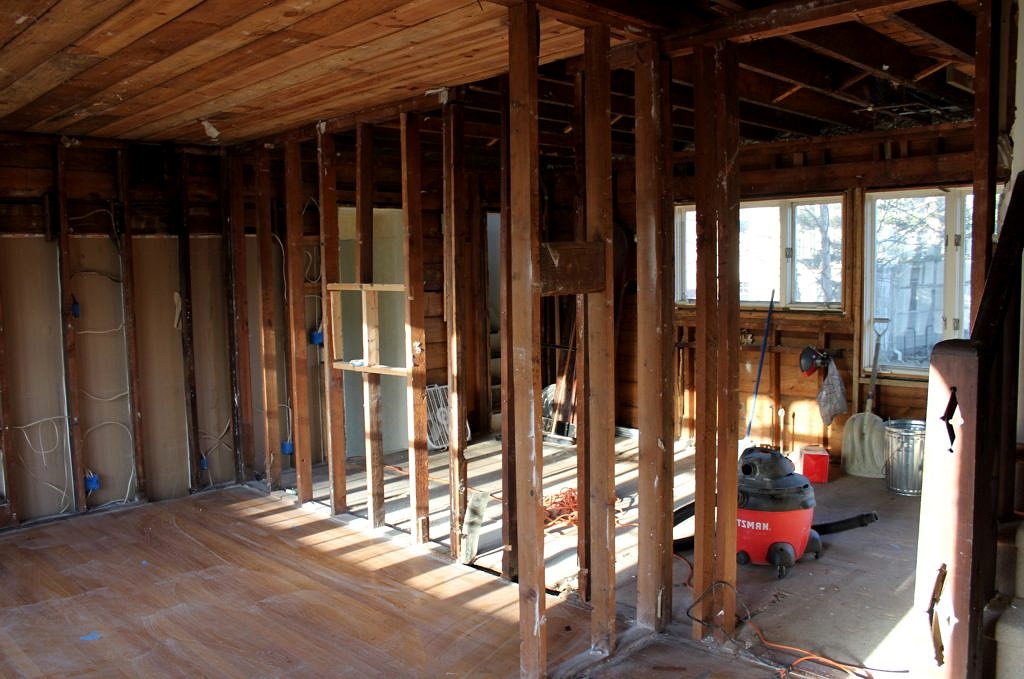
We started with the tree growing through the basement wall. In order to remove it we had to submit a request to Bill Brooks, the Town Arborist,  and once that was approved, get his okay on the required replacement. (Bill is practically a walking encyclopedia when it comes to trees and an absolute delight to talk to.) After Bill came the permit for non-structural demo–all that old sheetrock and cabinetry tossed in the dumpster had to be accounted for.

Next, because our cottage lies in Fair Haven’s designated historical district, came the application to replace the rotting windows upstairs.  That was most involved, requiring an actual in the flesh presentation to the board members of the Historic Preservation Commission so they could make sure we were not wreaking havoc upon the unique character of the neighborhood.

While you really have to admire their efforts, the selfless donation of time and energy in order to preserve what little is left of New Jersey’s unique past, it was still a wee bit frustrating to add another week–or two–to our project. The good news is our new windows passed muster and are on order–and should come in–in three to four weeks…darn.

After that came the building permit required to replace the totally missing metal support columns in the basement that were naively removed–in the days of yore–when homeowners were trusted to make and live with, their own really bad decisions.  You have to admire the way a structure stays up when logic would decree collapse was imminent. How did this not all come tumbling down? 

Right now we are waiting for a permit to do further structural work–remove the wall between the kitchen and dining room. (Sadly the little hobbit hallway had to go.)  Then we need to frame in a second bathroom in the master bedroom and rework the windows in the kitchen area.

And let’s not forget the permits for all the new plumbing, electrical and HVAC work.  We inherited a potentially lethal combination of systems dating back to 1930 that include lead piping and a heating ventilation system for the upstairs bath that was duct taped into place.

The most amazing thing is that the house did not burn down years ago: there were live wires in the walls, the ceiling, even outside the back door! So the good news is we will be able to sleep soundly when we finally move in. The bad news is that all these updates take time, more time, and of course,  more money. 

Fortunately, Keith is crazy about Shepherd’s Pie because it’s hamburger for dinner chez Nelson these days!

Shepherd’s Pie

First peel five or six good-sized potatoes, quarter and bring to a boil, then simmer for 15 or 20 minutes until fork tender.

Meanwhile, saute a chopped up onion in a splash of olive oil for a few minutes in an oven-ready pot.  Add the beef; use at least a pound and a half because this is a dish that is even better the next night. (You can go pretty lean with your hamburger because there is a lot of added seasoning.)

Toss in a clove or two of minced garlic and, although I am not a huge fan of cooked carrots, Keith is, so I grate a couple of raw carrots into the mixture so they essentially dissolve–and I might add some diced mushrooms if there are any moldering away in the fridge.

Then stir in a couple of teaspoons of tomato paste, a healthy dash of Worcestershire, and if you like some rosemary, thyme, salt, and pepper–how much is up to you really. Err on the side of flavor.

Cook on low heat until your potatoes are ready to mash. Spoon mashed potatoes over top and then a couple of cups of grated cheddar cheese–the more the better. Bake 20-25 minutes in a 400-degree oven until bubbly.

Ignore all those people who say you need to add peas or corn to this dish. Totally unnecessary because if you are British that means you are having peas as a side dish anyway.  (Nobody else likes peas). And there is no justification for having corn–with potatoes–no matter how good it tastes.

Let cool because the potatoes are really, really hot when they come out of the oven. Serve with a green veg or a tossed salad–and a pint of course.

Fair Haven Fixer Upper – Chapter 3

Rack of Lamb Recipe

As we approach the holidays our neighbors’ homes in the Fair Haven historic district really shine. Meanwhile, at Chez Nelson, the lights are barely on. Just past our first month’s anniversary at 28B Gillespie, an optimist would say wow, we’re nearly there. A pessimist might not.

It took us at least four weeks just to round up Kevin Slavin, the very busy owner of Frontier Tree, who, along with his mighty crew, skillfully removed the gargantuan maple tree that was growing through our roof–and–into the basement. 

But now, with the tree gone* a lot of other tasks are falling into place. We can finally access the basement through our Bilco door (that slanty thing on the back of old houses).  We’re planning on replacing the oil tank and furnace currently residing down there with a natural gas-powered heating and air conditioning system. It gets a little complicated because we have to install all new ductwork and that can be challenging in an older home (I really want to say it isn’t easy getting all our ducts in a row).

Anyway, once we switch out the heating system we won’t need an outside entrance so that wall gets closed up and the dreaded Bilco door removed. Right now it’s sitting outside the great room just where the veranda should, and eventually, will be. After that all we’ll need to do is upgrade the electric and a bit of plumbing, add some insulation and sheetrock.

Meanwhile, I have been doing the rounds of kitchen cabinet vendors; big box stores, local building centers, and custom cabinet shops have all been on my itinerary. My plan is simple: the core of the kitchen will be on one wall. Eventually, we’ll have a custom island and hutch built at the factory that makes all of our furniture in Hungary. Here’s my inspiration kitchen courtesy of Joanna Gaines.Kitchen by Joanna GainesThis is the core plan.

And this is the reality.Sigh.

Dinner tonight:

Rack of Lamb with Mashed Potatoes–and Brussels Sprouts

Meanwhile, I need to keep Keith’s spirits up–I may be the plotter and planner but he is the guy on the spot: filling the dumpster, peeling old insulation and sheetrock off the ceiling and walls and removing the ten thousand nails used to secure same. Luckily for us, the way to this man’s heart is through his stomach. He needs to be fed and fed well.

I always pick up a rack or two of lamb every time I go to Costco and toss them into the freezer for when I need to up my dinner game.

Pull off most of the fatty bits but don’t worry too much about the gristle. Pour a few glugs of soy sauce and a largish splash of maple syrup into a shallow bowl and toss in the lamb. You can do this a few hours in advance, or a half hour depending on how organized you are. Turn at least once.

Cook in a preheated 425-degree oven for 20 minutes and then test to see if the lamb is done. The only way I know how to do this is to actually make a small incision. Although I suppose, if I could ever locate the meat thermometer, that would be a less invasive way to test for doneness.  Pink is okay, raw is not. So either take the rack out of the oven and let it rest for a few minutes before serving or put it back in the oven for a bit. Keep an eye on it though because you can get to well done very quickly.

Serve with buttery, piping hot mashed potatoes and some freshly simmered Brussel sprouts. (Keith’s absolute, most favorite vegetable). Just spritz with lemon, add a bit of butter and salt and pepper and forget all about the bacon and cheese that make these hearty little gems injurious to one’s health–and a real pain in the neck to cook.**

Then open a lovely bottle of Cote du Rhone and enjoy.


Image result for rack of lamb photos

Photo courtesy of HealthyRecipesBlogs.com

*In Fair Haven trees don’t just don’t go away. Removal requires a permit application, site visit by the town arborist, a fee, and a commitment to plant replacements for the trees that were removed.

**Note I did not mention mint or mint sauce once.

   RESOURCES

Arborist: Kevin Slavin    http://frontiertree.com/